by lukesmith | Aug 24, 2026 | Blog
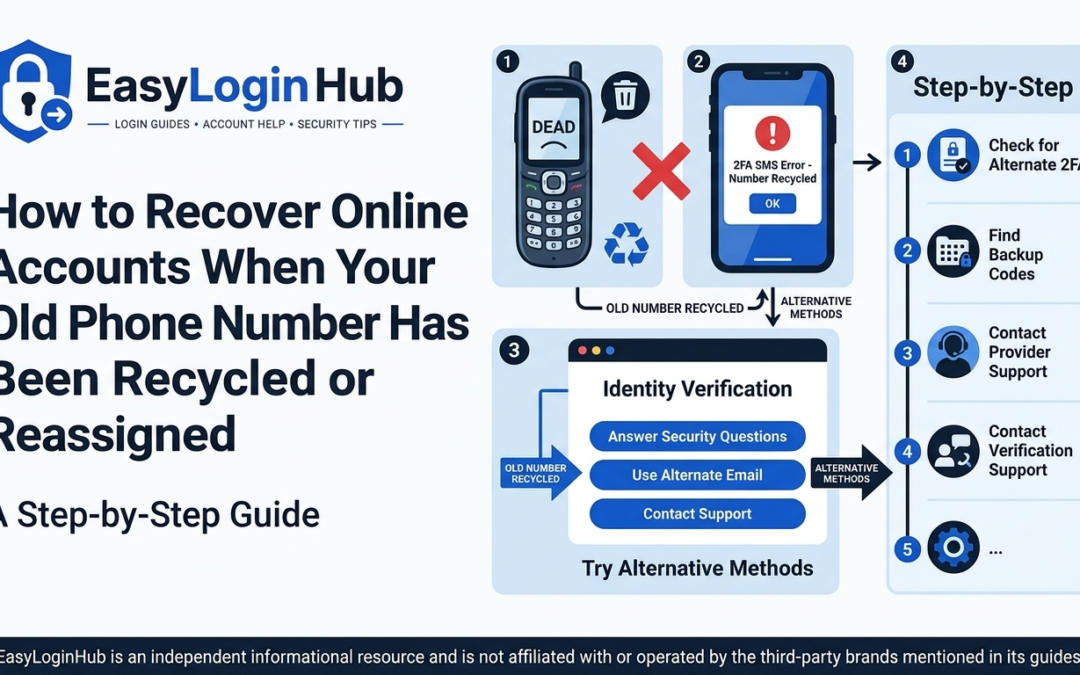
Mobile carriers frequently deactivate unused or cancelled phone numbers and assign them to new subscribers after a cooling-off period. While this helps telecom companies manage number inventory, it creates a serious problem for consumers who forget to update their contact details on online platforms. If your old phone number has been reassigned or recycled, you may find yourself locked out of critical services due to SMS-based two-factor authentication (2FA) or password reset requirements.
At Easy Login Hub, our goal is to help users navigate complex authentication challenges. Whether you need step-by-step login guides or practical account recovery assistance, understanding how account verification works when phone numbers change is essential for maintaining digital security.
Disclaimer: EasyLoginHub is an independent educational platform. We are not affiliated with, endorsed by, or operated by any third-party service providers, mobile carriers, or online platforms mentioned in our informational articles.
Why Recycled Phone Numbers Cause Account Lockouts
SMS verification relies on the assumption that your phone number remains uniquely yours. However, when a contract ends or a prepaid SIM expires, carriers eventually return that number to the active pool. Once reassigned, the new owner of that phone number receives any SMS security codes, verification prompts, or automated login alerts intended for your accounts.
This situation creates two main security risks:
- Access Loss: You can no longer receive verification passcodes needed to log in or reset your password.
- Account Exposure: The person who inherited your old number might accidentally or intentionally trigger a password reset on accounts still linked to that number.
Step-by-Step Recovery Process When Your Phone Number Is Reassigned
If you have lost access to an online account because your former phone number was recycled, follow these standard recovery steps.
Step 1: Check for Alternative Authentication Options
Most major online platforms offer multiple paths to verify your identity. During the login or password recovery prompt, avoid clicking the default “Send SMS” option immediately.
- Look for options labeled “Try another way,” “I don’t have access to this phone,” or “Use an alternative verification method.”
- Recovery Email: Check if the service allows you to send a security link or code to your linked email address instead.
- Authenticator Apps: If you previously configured an authenticator app (such as Google Authenticator, Authy, or Microsoft Authenticator), select code-based login rather than SMS.
- Backup Security Codes: Retrieve the 8-to-10-digit backup/recovery codes generated when you first enabled two-factor authentication on the platform.
Step 2: Utilize Official Account Recovery Tools
If alternative login methods fail or were not set up in advance, use the service provider’s official account recovery workflow. While procedures vary across platforms, most recovery forms follow a standard process:
- Navigate to the official sign-in page and click “Forgot Password” or “Need help signing in?”
- When prompted for SMS verification, choose the account recovery link or request identity verification.
- Answer account-related security questions or provide details associated with the account (such as previous passwords, date of creation, or recent account activity).
- Provide a new, accessible email address where the support team can contact you.
Step 3: Submit Identity Verification Proof
For high-security services like banking apps, financial institutions, primary email providers, and major social networks, you may need to submit official documentation to verify ownership. This process protects users from fraudulent account takeover attempts.
Common proof requirements include:
- A government-issued photo ID (driver’s license, passport, or national identity card).
- A photo or selfie taken while holding your ID or a handwritten code provided by the support team.
- Billing details or proof of a recent purchase linked to the account.
Ensure you submit these documents only through official platform websites or secure support tickets. Never email sensitive identification documents to unverified email addresses.
What NOT to Do When Your Phone Number Is Recycled
When trying to regain access, taking the wrong steps can compromise your privacy or lead to permanent account suspension:
- Do not text your old phone number asking for codes: Calling or messaging the new owner of your former number to ask for verification codes is dangerous. Sharing 2FA codes with strangers exposes your personal data and violates platform safety protocols.
- Do not use unauthorized account recovery services: Avoid third-party individuals on social media claiming they can “hack” or unlock your account for a fee. Official platform mechanisms are the only safe way to restore access.
- Do not attempt repeated automated password resets: Rapidly triggering password resets to an unaccessible number can cause security algorithms to lock your account entirely.
How to Update Your Account Settings Once Access Is Restored
Once you regain entry to your profile, update your contact and security configurations immediately to prevent future lockouts:
- Remove the Old Phone Number: Navigate to your security settings and remove the recycled mobile number.
- Add Your Current Number: Input your active phone number and verify it right away.
- Switch to App-Based 2FA: Replace SMS-based two-factor authentication with an authenticator app. Authenticator apps rely on time-based algorithms tied to your device rather than your cellular phone number.
- Generate and Store Backup Codes: Download or write down new recovery codes and store them safely offline (such as in a secure document safe or an encrypted password manager).
- Review Active Sessions: Check the account’s active login sessions or device history and sign out of any unrecognized devices.
Proactive Strategies to Prevent Number-Related Lockouts
To keep your accounts accessible even if you change phone numbers, carriers, or country codes, maintain proper account hygiene:
- Audit Contact Information Regularly: Set a calendar reminder every six months to verify that your email address, phone number, and backup options across all essential accounts are up to date.
- Update Details Before Changing Numbers: If you plan to cancel a phone plan or switch carriers, update your 2FA settings *before* terminating your phone service.
- Use a Password Manager: Store account recovery keys, security answers, and registered phone details in a secure password manager.
- Consult Educational Resources: Follow a comprehensive Login Guide or visit reference platforms like EasyLoginHub to learn how to troubleshoot common login problems effectively across major platforms.
Frequently Asked Questions
Can I call my old carrier to get my recycled phone number back?
In most cases, carriers cannot reassign a specific recycled number once it has been activated by another subscriber. If the number has not yet been reassigned, some carriers may allow you to select it as a custom number, but this depends on regional carrier policies.
What should I do if I also lost access to my recovery email?
If both your recovery phone number and recovery email are inaccessible, you will need to go through the platform’s manual identity verification process. This typically involves proving ownership using government-issued identification, historical account data, or security questions.
Is SMS two-factor authentication safe to use?
While SMS 2FA is better than using only a password, it is less secure than app-based authenticators or hardware security keys. SMS codes are vulnerable to SIM-swapping attacks, carrier number recycling, and network interception.
Final Thoughts
Losing access to an account due to a recycled phone number can be frustrating, but standard recovery protocols can help you regain control safely. By relying on alternative authentication methods, utilizing official support forms, and moving away from SMS-based verification toward app-based security, you can protect your digital identity against phone number reassignments.
by lukesmith | Aug 24, 2026 | Blog
Disclaimer: EasyLoginHub is an independent informational resource. We are not affiliated, associated, authorized, endorsed by, or in any way officially connected with Apple Inc. or any third-party brands or services mentioned in this article. All product names, logos, and brands are property of their respective owners.
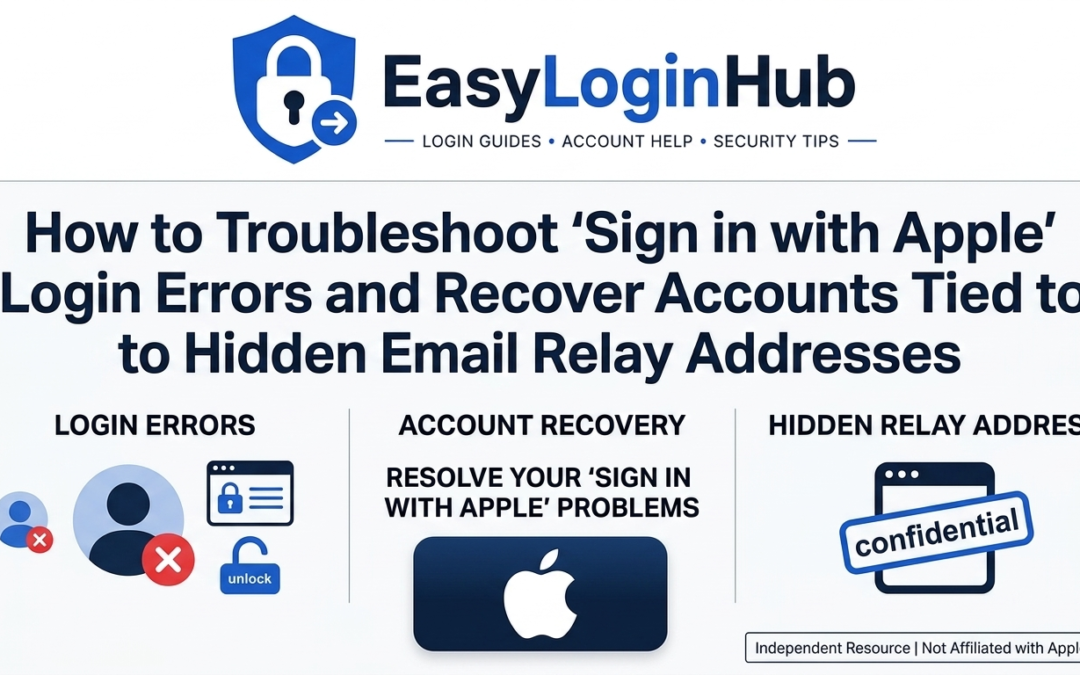
Features like “Sign in with Apple” have simplified online authentication by allowing users to create accounts on apps and websites with a single tap. To enhance user privacy, Apple offers the option to “Hide My Email.” When enabled, Apple generates a randomized, unique email address ending in @privaterelay.appleid.com that forwards communications directly to your real email inbox.
While this system offers excellent privacy protection, it can occasionally introduce complications. Users often encounter Sign in with Apple login errors, missed password reset messages, or difficulty logging into accounts from non-Apple devices. At Easy Login Hub, we provide comprehensive login guides to help you troubleshoot common login problems and navigate account access seamlessly.
In this guide, we will break down why these authentication errors occur, how to locate your hidden relay address, and the exact steps to recover accounts tied to private relay emails.
Understanding How Apple’s Hidden Email Relay Works
When you select “Sign in with Apple” while signing up for a new service, Apple gives you two choices:
- Share My Email: Shares your actual Apple ID email address with the app or website.
- Hide My Email: Generates a unique, private relay address (e.g.,
k8x9z2p4mn@privaterelay.appleid.com).
If you choose to hide your email, the app vendor only sees that generated private relay address. Any emails sent to that handle—such as verification codes, order confirmations, or password reset links—are processed through Apple’s secure server and forwarded to the primary email address linked to your Apple ID.
Problems arise when email forwarding gets toggled off, access to the Apple ID changes, or when you attempt to log into the third-party app on a platform where “Sign in with Apple” isn’t natively supported (such as a Windows PC or an Android phone).
Common ‘Sign in with Apple’ Login Errors and Causes
Before jumping into solutions, it is helpful to identify the exact issue you are facing. Common login problems related to Sign in with Apple include:
- Infinite Loading or Pop-Up Blocker Errors: Clicking the “Sign in with Apple” button produces a blank screen or times out.
- Disabled Email Forwarding: Password reset requests or log-in verification codes never arrive in your primary inbox.
- Unrecognized Credentials on Non-Apple Devices: You try typing your standard Apple ID email into a third-party app on Android or Windows, but the app says no account exists.
- Revoked App Permissions: You accidentally removed the app from your Apple ID list of managed apps, breaking the single-sign-on connection.
How to Find Your Hidden Private Relay Email Address
To fix login issues or request support from an app developer, you must first know the exact private relay address associated with your account.
On an iPhone or iPad
- Open the Settings app.
- Tap your Name / Apple ID banner at the top.
- Select Sign-In & Security (or Password & Security on older iOS versions).
- Tap Apps Using Apple ID (or Sign in with Apple).
- Select the specific app or website from the list.
- Under This App Received, you will see the unique email address ending in
@privaterelay.appleid.com.
On a Mac
- Click the Apple Menu in the top-left corner and choose System Settings.
- Click your Name / Apple ID.
- Select Sign-In & Security.
- Click on Sign in with Apple to view and select the specific app.
Via a Web Browser
- Navigate to appleid.apple.com and sign in.
- Go to the Sign-in and Security section.
- Click on Sign in with Apple.
- Choose the app to review your assigned private relay email.
Step-by-Step Troubleshooting for Sign in with Apple Errors
1. Check Email Forwarding Status
If you aren’t receiving account activation codes or password reset links from a third-party app, email forwarding might be disabled.
- Navigate to your Apple ID settings using the steps outlined above.
- Select the application giving you trouble.
- Locate the Forward To setting.
- Ensure the toggle switch is turned ON and pointed to your correct primary email address.
2. Resolve Browser and Session Conflicts
If the Sign in with Apple prompt fails on a web browser:
- Disable Pop-up Blockers: Apple’s authentication requires a pop-up window or redirect. Ensure your browser isn’t blocking pop-ups from the website.
- Clear Browser Cache and Cookies: Outdated session cookies can corrupt authentication tokens. Clear your browser data or attempt the login using an Incognito / Private Window.
- Check Two-Factor Authentication (2FA): Sign in with Apple requires active two-factor authentication on your Apple ID. Ensure your trusted Apple device is nearby to receive the 6-digit verification code.
3. Fix Accidental Revocation of App Access
If you deleted the app from your Apple ID “Apps Using Apple ID” menu, the third-party app may no longer accept your login attempt.
- Open the app or website where you are attempting to log in.
- Select Sign in with Apple again.
- When prompted, grant permission to authorize the service using your existing Apple ID. In many cases, Apple will reconnect you to the existing account matching that internal user ID.
How to Recover Accounts Tied to Hidden Email Relay Addresses
If you are trying to log into a service on a non-Apple platform (like Windows, Linux, or Android) or need to contact the developer for account recovery assistance, follow these strategies.
Method 1: Log in Using the Relay Email Address Directly
Many users do not realize that the @privaterelay.appleid.com address acts as your actual username for that specific platform. If you are on an Android device or PC where the “Sign in with Apple” button is missing:
- Locate your unique relay address via your Apple ID settings.
- Enter that full address (e.g.,
xyz123@privaterelay.appleid.com) into the standard Email field on the third-party app.
- Click Forgot Password?.
- Check your actual email inbox for the password reset message forwarded by Apple’s relay system.
- Create a unique standalone password for that app. You can now log in using the relay email address and your new password on any device.
Method 2: Contact App Support with Your Relay Identifier
If you cannot receive emails or if the third-party app does not allow password resets for private relay users, you will need to reach out to the app’s support team directly.
When submitting a support ticket, provide them with:
- Your full
@privaterelay.appleid.com email address.
- Your full name (or the name assigned to the app during initial sign-up).
- Proof of past transactions, receipts, or account activity to prove ownership.
- A request to manually update your registered account email to your real, permanent email address.
Best Practices for Managing Apple Relay Accounts
To avoid losing access to important accounts in the future, consider implementing these account management practices:
- Document Your Relay Addresses: Keep a record or use a secure password manager to note which private relay address corresponds to each app or website.
- Update Account Details Promptly: If you plan to stop using an Apple ID or Apple device entirely, migrate your third-party accounts to standard email addresses before closing the Apple account.
- Keep Apple ID Security Information Current: Always ensure your recovery phone number and primary email address on your Apple ID are kept up to date.
For more step-by-step instructions, account setup guides, and system troubleshooting, explore our collection of expert Login Guide resources on Easy Login Hub.
Frequently Asked Questions (FAQ)
What happens if I turn off email forwarding for an app?
If you turn off email forwarding in your Apple ID settings, any emails sent by that app (including security codes, password reset requests, and notifications) will bounce and will not reach your inbox. You can turn forwarding back on at any time through your Apple ID settings.
Can I change my ‘Hide My Email’ address for an existing account?
No, Apple assigns a specific private relay address per app upon account creation. Once generated, that specific address is tied to that third-party service. To change it, you must update your contact email directly inside the third-party app’s profile settings.
What should I do if I permanently stop using my Apple ID?
Before closing or deleting an Apple ID, log into every third-party account created with “Sign in with Apple.” Change your registered email address on those services to a personal, non-relay email address and establish separate passwords. Otherwise, you risk permanently losing access to those accounts.
by lukesmith | Aug 24, 2026 | Blog
Disclaimer: EasyLoginHub is an independent informational platform that provides educational resources, step-by-step guides, and general troubleshooting instructions. EasyLoginHub is not affiliated with, endorsed by, or operated by any third-party software provider, cloud service, or corporation mentioned in this article.
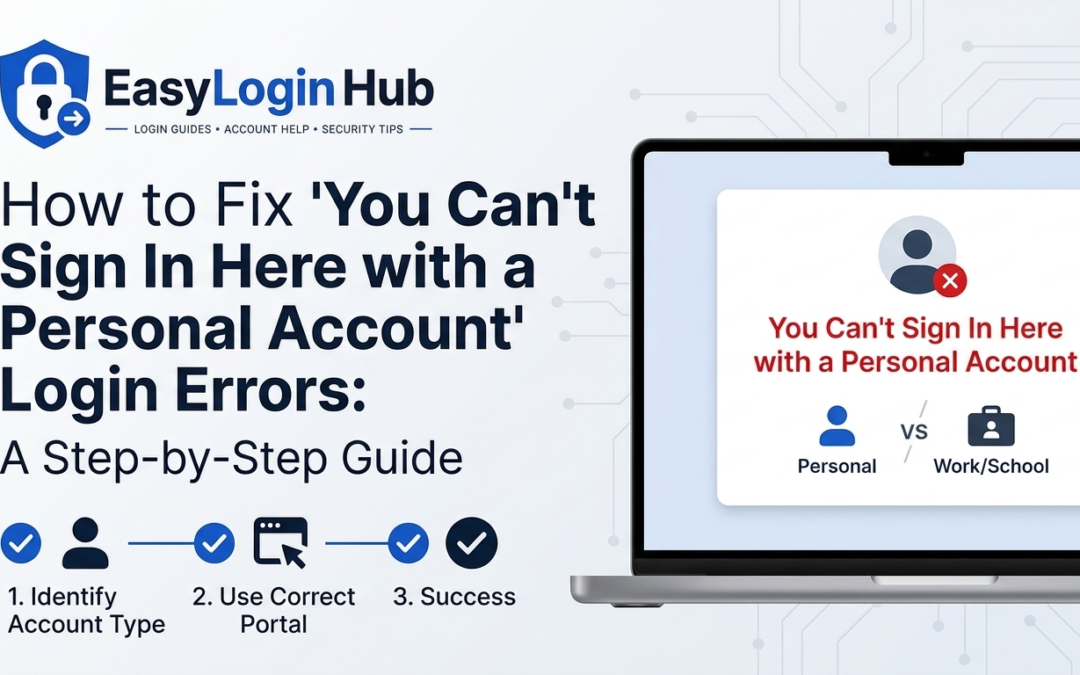
Running into an unexpected error message when trying to access your cloud services or web applications can stall your workflow immediately. One of the most common and confusing messages users encounter is: “You can’t sign in here with a personal account. Use your work or school account instead.”
This message often appears suddenly—even if you believe you are using the correct credentials. Whether you are trying to open a shared document, access a corporate portal, or log into a collaboration tool, encountering this wall can be frustrating. Fortunately, at Easy Login Hub, our mission is to provide clear, actionable login guides to help you troubleshoot common login problems and regain control of your digital identity.
In this guide, we will break down why this error occurs, explore the differences between personal and organizational accounts, and walk you through step-by-step solutions to resolve the issue quickly.
Understanding the Root Cause of the Error
To fix the “personal account” login error, it helps to understand why authentication systems trigger it in the first place. Modern identity platforms distinguish between two fundamental types of user accounts:
- Personal Accounts: Created independently by individuals for personal use (e.g., standard consumer email addresses, personal cloud storage, or individual subscriptions).
- Work or School Accounts (Organizational Accounts): Managed by an enterprise, educational institution, or IT department. These accounts are tied to an organization’s directory and security policies.
The error message occurs when an enterprise sign-in portal receives credentials from a personal identity system rather than an organizational directory. The portal is configured to enforce security standards that only corporate credentials can satisfy. When a personal account attempts entry, the security system blocks access to protect institutional data.
Common Triggers for This Error
Several underlying situations usually trigger this conflict:
- Navigating to the Wrong Sign-In Page: Entering your personal email address into a portal designated exclusively for enterprise accounts.
- Overlapping Email Addresses: Using the exact same email address for both a personal profile and an enterprise directory account (a legacy configuration issue).
- Cached Web Sessions: Your browser automatically submitting stored personal credentials to an enterprise service landing page.
- External Access Restrictions: Trying to open a shared link from an external organization that requires an authorized corporate identity rather than a guest account.
Step-by-Step Solutions to Fix the Sign-In Error
Follow these structured steps to resolve the issue and successfully log into your intended service.
1. Verify the Access Point and URL
The simplest explanation is often the correct one: you may be accessing a page configured solely for organizational users. Check the web address (URL) in your browser bar.
- If you are trying to access a personal web service or cloud storage, ensure you are on the consumer landing page rather than a business management portal.
- If you are attempting to log into a workplace portal, confirm with your IT administrator that you are using the precise sign-in URL provided for staff or contractors.
2. Open a Private or Incognito Browser Window
Web browsers store cookies and active session data to keep you logged in across various websites. If you previously signed into a personal account, your browser may automatically try to authenticate you using those cached credentials.
Testing your sign-in inside a private window bypasses saved cache and cookies:
- Open your preferred web browser.
- Launch a new Private or Incognito window (typically accessible via the browser menu or using keyboard shortcuts like
Ctrl + Shift + N or Cmd + Shift + N).
- Navigate directly to the service URL and try signing in again.
If this resolves the issue, clear your standard browser cache to prevent the conflict from returning during regular browsing sessions.
3. Clear Your Browser’s Cookies and Cache
If private browsing fixes the problem, you should clear your standard browser data to permanently remove conflicting session tokens.
- Navigate to your browser’s settings or history menu.
- Select the option to clear browsing data.
- Choose a time range of at least “All time” or “Everything.”
- Ensure Cookies and other site data and Cached images and files are checked.
- Confirm the action, restart your browser, and try signing in again.
4. Select the Correct Account Prompt
When entering an email address associated with both personal and workplace systems, authentication screens often present a prompt asking: “Which account do you want to use?”
- Work or school account: Select this if you are trying to access company tools, corporate emails, or institutional portals.
- Personal account: Select this only if accessing individual consumer services.
If you mistakenly choose “Personal account” when visiting a company portal, the system immediately returns the “You can’t sign in here with a personal account” message. Always select Work or school account when accessing enterprise resources.
5. Resolve Duplicate Email Aliases
If your personal account shares the exact same email address as your organizational account, identity platforms can easily get confused. You can resolve this conflict by creating a primary alias for your personal profile:
- Log into your personal account dashboard directly via the primary consumer portal.
- Navigate to your account info or sign-in preferences section.
- Add a new email alias (such as an alternate personal address).
- Set the new alias as your primary sign-in handle for your personal profile.
By separating the sign-in identifiers, systems can immediately distinguish your personal credentials from your enterprise account, eliminating automated authentication loops.
Preventing Account Conflicts in the Future
Managing multiple digital identities across personal and professional environments requires good browser habits. Here are proven strategies to avoid future sign-in errors:
Use Dedicated Browser Profiles
Modern web browsers allow you to create distinct user profiles. Setting up one profile for personal browsing and another for work or school keeps session cookies, saved passwords, and browser histories completely isolated.
- Work Profile: Log into your enterprise accounts, company tools, and work emails here.
- Personal Profile: Reserve this space exclusively for personal shopping, personal email, and leisure accounts.
Utilize Multiple Web Browsers
If you prefer not to manage multiple profiles within a single browser, use separate applications altogether (for example, using Microsoft Edge for work tasks and Google Chrome for personal activities). This guarantees zero credential overlap.
When to Contact Your IT Administrator
If you have followed all the steps above and still face authentication barriers, the issue may stem from administrative access permissions. You should reach out to your organization’s IT department or service administrator if:
- You are a new employee or contractor whose work account has not yet been fully provisioned in the directory.
- An external organization shared a file or directory with you, but your email address was not correctly added to their guest user list.
- Your security permissions or multi-factor authentication (MFA) settings need to be reset by an administrator.
For broader platform guidance and general account recovery assistance, consult our master Login Guide resources at EasyLoginHub.
Frequently Asked Questions (FAQs)
Why does the system say I need a work or school account when I don’t have one?
This occurs when the webpage or link you clicked is hosted on an enterprise network that restricts access exclusively to corporate directories. If you were invited to view a document or portal but do not have an organizational account, the sender must either issue a guest invite to your personal email or adjust their document sharing permissions.
Can I convert my existing personal account into a work account?
No, personal accounts and organizational accounts exist on entirely separate infrastructure platforms. A personal account cannot be converted directly into a enterprise directory account. Instead, an organization’s IT administrator must provision a dedicated work account for you within their management portal.
Why does my browser keep signing me in automatically with the wrong account?
This is caused by persistent login cookies and single sign-on (SSO) tokens saved in your browser history. Clearing your browser cache or separating your work and personal activities into different browser profiles will stop automated logins from picking the incorrect credentials.
Summary
The “You can’t sign in here with a personal account” error is simply a security gateway preventing personal credentials from accessing enterprise directories. By verifying your login URL, utilizing incognito windows, clearing cached data, selecting the proper account type, or setting up isolated browser profiles, you can eliminate this error and maintain smooth access across all your digital accounts.
by lukesmith | Aug 24, 2026 | Blog
Few digital experiences are as frustrating as being locked out of an account, requesting a password reset email, and immediately seeing an error message that reads “Token Expired,” “Invalid Link,” or “Reset Link No Longer Valid.” You requested the email just seconds ago, yet the system rejects your attempt to regain access.
This issue is surprisingly common across banking portals, social media platforms, productivity suites, and online shopping accounts. At Easy Login Hub, we regularly help users understand account security and troubleshoot common login problems. In this guide, we will break down why security tokens fail, what triggers these errors, and the exact step-by-step methods you can use to successfully reset your password.
What Is a Password Reset Token?
To understand why reset links fail, it helps to understand how password security works behind the scenes. When you click “Forgot Password,” the service generates a unique, temporary cryptographic string known as a security token. This token is attached to the URL sent to your registered email address.
The system uses this token to verify two essential conditions:
- Identity Verification: It proves that the person clicking the link has direct access to the email account associated with the profile.
- Time-Limited Authorization: It creates a temporary window during which a password change is permitted, preventing unauthorized actors from using old, intercepted links later on.
Because these tokens are strictly time-sensitive and usually configured for single-use access, even minor discrepancies in timing, browser settings, or email security software can render the link invalid.
Common Reasons for ‘Token Expired’ and ‘Invalid Link’ Errors
When a password reset link fails immediately or shortly after arrival, one of several hidden factors is typically responsible:
1. Multiple Reset Requests (Token Overwriting)
If you click “Forgot Password” multiple times in rapid succession, the server generates a brand-new token with every request. In most systems, issuing a new token automatically invalidates all previously generated tokens. If you accidentally click the link from an earlier email rather than the most recent one, you will receive an “Invalid Link” or “Token Expired” error.
2. Anti-Spam and Email Security Pre-Fetching
Modern enterprise email security systems (such as Microsoft Defender for Office 365, Proofpoint, or corporate firewalls) use automated security scanners to protect users from phishing. These tools often “pre-fetch” or automatically open links within incoming emails to verify their safety before delivering the message to your inbox. Because reset links are designed to be single-use, the automated scanner consumes the token before you ever physically click it.
3. Short Expiration Windows
To comply with modern cybersecurity standards, many platforms set aggressive expiration windows on sensitive links—sometimes as short as 5 to 15 minutes. If your email provider experiences minor delivery delays, the token may expire before the message even arrives in your inbox.
4. Email Formatting and Line Breaks
Some plain-text email clients or mobile mail applications automatically format long URLs by breaking them into multiple lines. If a long security token gets cut off when you click it, your browser only opens a partial web address, resulting in an “Invalid Token” response from the server.
5. Browser Cache, Cookies, and Existing Sessions
Your web browser stores temporary cache files and cookies to speed up website loading. If your browser holds active session data or cached redirect pages from a previous failed login attempt, it may interfere with the fresh reset link you are trying to open.
6. Incorrect System Time or Timezone Mismatch
Password reset tokens rely on UTC timestamps. If your device’s internal clock is set manually and deviates by even a few minutes from standard server time, the website may calculate that the token was generated in the future or past, triggering an automated rejection.
Step-by-Step Troubleshooting Guide
If you are stuck in a loop of expired links, follow these structured troubleshooting steps to successfully complete your password reset.
Step 1: Clean Up Your Inbox
Before requesting a new link, open your email client and delete every previous password reset email sent by that service. This prevents you from accidentally clicking an outdated link when the new notification arrives.
Step 2: Clear Browser Cache or Use Incognito Mode
To ensure active cookies or cached session errors do not corrupt the reset process:
- Open a private or Incognito window in your preferred web browser (Chrome, Firefox, Edge, or Safari).
- Alternatively, navigate to your browser settings and clear your browsing history, cached images, and cookies for that specific site.
Step 3: Check Your Device System Time
Ensure your computer or smartphone is configured to set its date and time automatically:
- Windows: Go to Settings > Time & Language > Date & time and toggle on Set time automatically.
- macOS: Go to System Settings > General > Date & Time and enable automatic synchronization.
- iOS/Android: Navigate to Date & Time settings and ensure Set Automatically is enabled.
Step 4: Request a Single Fresh Reset Link
Return to the platform’s official login page, initiate the password recovery process once, and submit the request. Do not click the button multiple times.
Step 5: Copy and Paste the Complete Link
When the new email arrives:
- Right-click the link (or tap and hold on mobile) and select Copy Link Address.
- Inspect the copied URL in a plain text editor or directly in your browser’s address bar to ensure the full token string is intact.
- Paste the complete address into your private/incognito browser window and press Enter.
Step 6: Temporarily Adjust Security Scanner Settings (For Corporate Accounts)
If you are trying to reset a password for a work or school account using an enterprise email address, security scanners might be pre-clicking your links. Try these workarounds:
- Request the reset link while connected to an external network or mobile hotspot if your company allows it.
- Contact your IT administrator to temporarily whitelist the domain or adjust automated link-inspection rules.
Proactive Strategies for Seamless Account Access
Resolving link expiration issues solves the immediate problem, but adopting better digital habits can prevent similar login hurdles in the future. Following a comprehensive Login Guide or standard account maintenance checklist can help protect your profile:
- Use a Reliable Password Manager: Password managers securely store complex passwords and autofill them accurately, significantly reducing the need to trigger password resets in the first place.
- Keep Recovery Details Updated: Ensure your secondary email address and phone number are up to date so you have multiple avenues for account recovery assistance.
- Enable Two-Factor Authentication (2FA): Adding an authenticator app or hardware security key provides a secure backup method for verifying your identity when recovering an account.
For additional step-by-step walkthroughs and platform-specific troubleshooting tips, explore our dedicated login guides available across the site.
Frequently Asked Questions (FAQ)
How long do password reset links usually remain valid?
Expiration windows vary by platform. Standard web services typically set reset link lifetimes between 15 minutes and 24 hours. High-security platforms like financial institutions or enterprise services often enforce shorter limits, expiring links within 5 to 10 minutes.
Why does a reset link say “Invalid Link” even when I click it immediately?
This usually happens if your email provider uses automated security software that scans and pre-opens links before they reach your inbox, or if you received multiple reset emails and clicked a link from an earlier message.
Can I fix an expired token error on a mobile phone?
Yes. If you encounter the error on a mobile device, copy the full URL directly from your email app, open your mobile browser in Private/Incognito mode, and paste the link into the address bar.
What should I do if none of these troubleshooting steps work?
If you continue to experience token errors after following this guide, contact the customer support team for that specific service. They can issue a manual reset link or assist with secondary identity verification.
Disclaimer: EasyLoginHub is an independent online informational resource. We provide educational guides, security tips, and general troubleshooting assistance. EasyLoginHub is not affiliated with, endorsed by, or operated by any third-party brands, websites, or services mentioned in this guide. All trademarks belong to their respective owners.
by lukesmith | Aug 24, 2026 | Blog
Few digital frustrations match the experience of trying to log into an online banking app, social media platform, or workplace account, only to sit waiting indefinitely for a text message that never arrives. One-Time Passwords (OTPs) sent via SMS are among the most common security mechanisms used for two-factor authentication (2FA) and identity verification. However, when an SMS OTP fails to deliver, your entire login workflow comes to a screeching halt.
At Easy Login Hub, we understand how critical seamless access is for your daily routine. Whether you are attempting to access a personal account or completing an urgent transaction, this comprehensive guide explains why SMS verification codes get delayed or blocked and provides actionable steps to troubleshoot common login problems effectively.
Disclaimer: EasyLoginHub is an independent informational platform. We provide educational tutorials, troubleshooting advice, and step-by-step account access guides. EasyLoginHub is not affiliated with, endorsed by, or operated by any third-party brand, cellular network provider, or online service mentioned in this article.
Why SMS OTP Verification Codes Fail to Deliver
Before jumping into solutions, it helps to understand the underlying infrastructure behind SMS OTP transmission. Unlike standard peer-to-peer text messages sent between friends, business OTPs are typically sent via Application-to-Person (A2P) messaging networks through specialized gateway providers.
A failure anywhere along this path can prevent the code from reaching your phone screen. Common causes include:
- Network Congestion or Poor Signal: Temporary cellular tower overload or weak signal strength can stall incoming SMS traffic.
- Shortcode Blocking: Verification codes are usually sent from short 5- or 6-digit numbers known as shortcodes. Certain mobile plans or spam filters automatically block messages from shortcode sources.
- Incorrect Phone Number Formatting: Missing country codes or minor typographical errors during account setup or login attempts prevent proper delivery.
- Spam and Content Filters: On-device security software or native messaging filters may misidentify verification texts as unsolicited spam.
- Carrier Routing and Gateway Delays: Server overloads on the service provider’s end or intermediary routing hiccups across international telecommunication carriers can cause severe delivery delays.
- Roaming Restrictions: Traveling abroad without an active international roaming plan often prevents A2P shortcodes from reaching mobile devices.
Step-by-Step SMS OTP Troubleshooting Checklist
If you are currently waiting for a verification code, work through these proven troubleshooting steps sequentially to resolve the delivery issue.
1. Check Signal and Toggle Airplane Mode
A weak or disrupted cellular connection is the most frequent culprit behind missing text messages. Inspect your phone’s status bar to verify cellular network connectivity.
- Turn on Airplane Mode (Flight Mode) on your mobile device.
- Wait approximately 10 to 15 seconds.
- Turn Airplane Mode back off to force your device to reconnect to the nearest mobile tower.
2. Verify Phone Number Details and Country Codes
If you are prompted to input your phone number prior to receiving a code, ensure the formatting matches global telecommunication standards. Always double-check:
- That you selected the correct international country code (e.g., +1 for the USA/Canada, +44 for the UK).
- That you did not accidentally include an unnecessary leading zero if required by your region’s international formatting rules.
- That there are no typos in the digits entered.
3. Search Your Spam and Blocked Folders
Modern Android devices (via Messages by Google) and iOS devices (via Apple iMessage settings) feature automated spam protection that occasionally misfilters legitimate authentication texts.
- On Android: Open your default Messaging app, tap your profile icon or three-dot menu, and navigate to Spam & blocked.
- On iOS: Open Settings > Messages, scroll down to Message Filtering, and check if Filter Unknown Senders or junk folders contain your code.
4. Check Shortcode Blocking and Carrier Services
Some mobile network operators disable premium SMS or shortcode reception by default on prepaid accounts or budget plans. Furthermore, if you previously replied “STOP” to a marketing text from a service, you may have inadvertently unsubscribed from all operational messages sent from that gateway.
- Contact your cellular carrier’s customer support to verify whether shortcode or A2P text messaging is enabled on your line.
- Ensure your mobile account does not have an active billing pause or service block.
5. Restart Your Smartphone
A simple system reboot clears temporary cache files, refreshes background messaging services, and resets local network radio interfaces. Turn your phone off completely, wait 30 seconds, power it back on, and request a fresh OTP code.
6. Clear Messaging App Cache (Android Devices)
On Android platforms, temporary data corruption in the messaging app can prevent incoming SMS notifications from popping up correctly.
- Open device Settings > Apps.
- Select your default Messages app.
- Tap Storage & Cache and choose Clear Cache.
Alternative Verification and Login Solutions
When SMS delivery remains unresponsive despite basic troubleshooting, utilizing alternative authentication options can help you regain account access without further delay.
If you regularly consult a Login Guide on our platform, you will notice that most major web portals provide multiple verification pathways. Consider trying the following alternatives:
- Voice Call Verification: Many platforms offer a “Call Me Instead” option. Selecting this option triggers an automated phone call that reads the verification code aloud. Voice calls frequently bypass shortcode SMS routing obstacles.
- Email Verification: Check if the service allows sending a backup OTP to your registered email address instead of your phone number.
- Authenticator Applications: Moving away from SMS authentication in favor of Time-based One-Time Password (TOTP) applications—such as Google Authenticator, Microsoft Authenticator, or Authy—eliminates mobile network dependency entirely. These apps generate secure codes locally on your device every 30 seconds without requiring a cellular signal.
- Backup Emergency Codes: When enabling two-factor authentication initially, most services issue a list of one-time recovery codes. Entering one of these backup keys allows immediate access if your mobile phone is unavailable.
What to Do If You Are Still Locked Out
If none of the immediate fixes resolve your issue and alternative login routes are unavailable, you may need formal account recovery assistance. Follow these practical recommendations:
- Avoid Repeated Spam Requests: Do not click “Resend Code” dozens of times rapidly. Sending excessive requests often triggers temporary automated rate limits, locking your account for 24 hours due to anti-abuse policies.
- Wait Out Cooldown Periods: Allow 15 to 30 minutes between attempt requests to let queued system messages clear.
- Initiate Account Recovery Procedures: Visit the official support center of the service provider you are trying to reach. Most major platforms feature official recovery forms allowing you to verify identity via alternate email addresses, government ID submission, or trusted contacts.
Long-Term Strategies for Reliable Mobile Login Security
While SMS remains a popular multi-factor authentication standard due to its ubiquity, technical industry standards increasingly favor more resilient alternatives. To minimize future login interruptions, consider implementing these best practices:
- Upgrade to TOTP Apps or Hardware Keys: Switch your accounts from SMS-based 2FA to authenticator apps or FIDO2 hardware security keys (like YubiKeys).
- Keep Recovery Information Updated: Ensure secondary emails and mobile numbers are always current in your account settings before changing network providers or traveling.
- Store Backup Codes Securely: Keep printed or encrypted digital copies of initial recovery codes generated during 2FA setup.
Explore More Login Guides at Easy Login Hub
Navigating digital account access shouldn’t be stressful. Browse our vast collection of login guides on Easy Login Hub to find step-by-step walkthroughs, portal access instructions, and effective solutions for managing your online profiles securely.
by lukesmith | Aug 23, 2026 | Blog
You sit down at a coffee shop, airport terminal, or hotel lobby, connect your laptop or smartphone to the local network, and wait for the Wi-Fi splash page to appear. Your device shows full Wi-Fi bars, but the browser displays a blank screen, a connection timeout error, or simply refuses to open the network’s landing page. Without agreeing to the terms or entering access credentials on that screen, you remain stuck online without actual internet connectivity.
This redirected landing screen is known as a captive portal. When it fails to trigger automatically, accessing the internet becomes impossible. At Easy Login Hub, we regularly help users troubleshoot common login problems across various networks and services. In this comprehensive guide, you will learn why captive portal login pages freeze or fail to pop up, alongside step-by-step instructions to force the page to load on Windows, macOS, iOS, and Android devices.
What Is a Wi-Fi Captive Portal and Why Does It Fail to Load?
A captive portal is a Web page that users are forced to view and interact with before granted broader access to a public Wi-Fi network. Businesses use these portals to authenticate guests, present terms of service, collect user details, or request payment for connection time.
When your device connects to a network with a captive portal, operating systems typically send a background request to an unencrypted HTTP URL (such as a device check domain). If the router intercepts this request, it redirects your browser to the local login portal. However, several configuration issues can break this redirect cycle:
- HTTPS and HSTS Enforcement: Modern web browsers prioritize encrypted connections (HTTPS). If your browser default home page or saved tab enforces strict HTTPS or HSTS (HTTP Strict Transport Security), the browser will block the unencrypted redirect attempt from the router for security reasons.
- Custom DNS Configurations: Using third-party DNS services like Google Public DNS (8.8.8.8) or Cloudflare DNS (1.1.1.1) prevents your device from recognizing the local network router’s internal server address.
- Active Virtual Private Networks (VPNs): VPNs encrypt and re-route your traffic immediately, bypassing local router interception scripts required to display captive portals.
- Browser Caching and Cookies: Stored session data or corrupt network caches can confuse the browser when redirecting to a new local network address.
- Ad Blockers and Extension Conflicts: Content blockers and strict privacy extensions may flag portal redirect scripts as malicious pop-ups or tracker scripts.
Step-by-Step Solutions to Fix Captive Portal Login Pages
If you are stuck on a public Wi-Fi network that shows a connected status without internet access, follow these actionable troubleshooting steps in order.
1. Force an Unencrypted HTTP Connection
Because modern browsers automatically upgrade web addresses to secure HTTPS connections, the public router may fail to inject its login page. Forcing an unencrypted (HTTP) connection triggers the router’s redirect mechanism.
- Open your preferred web browser.
- Type an unencrypted domain into the address bar, such as
http://neverssl.com, http://example.com, or http://http.badssl.com.
- Alternatively, type a raw non-secure IP address directly into the address bar, such as
http://8.8.8.8 or http://1.1.1.1.
- Press Enter. The network router should intercept the HTTP request and redirect you directly to the captive portal login page.
2. Turn Off Active VPNs and Custom Proxies
A Virtual Private Network creates a secure tunnel that hides traffic from local network managers. However, this stops public Wi-Fi routers from recognizing your authorization status.
- Disconnect any active VPN applications on your device before attempting to join the public network.
- Disable browser-based proxy extensions or system-wide proxy settings.
- Once you successfully load the captive portal page, accept the network terms, and establish a working internet connection, you can reactivate your VPN for encryption and security.
3. Reset DNS Settings to Automatic (DHCP)
If you have manually configured custom DNS servers (such as Google DNS, Quad9, or Cloudflare) on your computer or phone, your device will attempt to resolve domain names globally rather than through the local router server. To resolve this issue, restore your settings to retrieve DNS details automatically from the local network.
On Windows:
- Open Settings > Network & internet > Wi-Fi.
- Click on Hardware properties or your connected network name.
- Under DNS server assignment, click Edit.
- Change the setting from Manual to Automatic (DHCP) and save changes.
On macOS:
- Open System Settings > Network > Wi-Fi.
- Click Details next to your current Wi-Fi network.
- Select the DNS tab on the left sidebar.
- Select any manual DNS server entries listed in bold and click the minus (–) button to remove them, allowing the default local router DNS to populate. Click OK.
On Android and iOS:
- iOS: Go to Settings > Wi-Fi, tap the i icon next to the network, tap Configure DNS, and select Automatic.
- Android: Go to Settings > Network & Internet > Private DNS and set it temporarily to Off or Automatic.
4. Clear the Operating System DNS Cache
A corrupted or outdated local DNS cache can prevent your browser from locating the captive portal server address even after changing settings.
- Windows: Open Command Prompt or Terminal, type
ipconfig /flushdns, and press Enter.
- macOS: Open Terminal, enter
sudo dscacheutil -flushcache; sudo killall -HUP mDNSResponder, press Enter, and supply your administrator password.
- Chrome Browser Short Cut: Type
chrome://net-internals/#dns into Chrome’s address bar and click Clear host cache.
5. Forget the Wi-Fi Network and Reconnect
Network details previously cached by your device can create IP address leasing conflicts. Clearing stored credentials forces a complete handshake attempt with the local access point.
- Navigate to your device’s Wi-Fi network list.
- Select the network name (SSID) and click Forget Network or Remove.
- Turn off your device’s Wi-Fi radio, wait 10 seconds, and turn it back on.
- Select the network again from the list to initiate a clean connection request.
6. Access the Default Gateway Address Directly
If automatic browser redirection fails entirely, you can manually type the router address into your browser address bar to reach the login page directly.
- Find your current default gateway IP address via your device network status screen (commonly
192.168.1.1, 192.168.0.1, 10.0.0.1, or 1.1.1.1).
- Open a browser tab, type
http:// followed by that gateway address (e.g., http://192.168.1.1), and press Enter.
Summary Troubleshooting Table
| Issue Symptom |
Primary Cause |
Recommended Fix |
| Browser shows SSL / Certificate Error |
HTTPS forced on captive portal redirect |
Visit http://neverssl.com in your browser. |
| Wi-Fi connected, no internet pop-up appears |
Active VPN or custom DNS blocking local router |
Turn off VPN; set DNS server assignment to Automatic (DHCP). |
| Redirect loop or stuck loading wheel |
Corrupted browser cookies or old network session |
Clear browser cache or open an Incognito / Private tab. |
Security Considerations When Using Public Wi-Fi Portals
While public wireless networks offer convenience, they carry inherent security risks since network traffic can be intercepted by unauthenticated actors sharing the same spectrum.
- Verify Network Names: Ensure you are connecting to the legitimate network provided by the venue, avoiding similarly named unauthorized networks (“evil twins”).
- Enable Your VPN After Login: As soon as you clear the captive portal and secure basic network access, immediately turn your VPN back on to encrypt outgoing communications.
- Avoid Sensitive Transactions: Postpone handling confidential online banking or critical account adjustments over public connections without active end-to-end encryption.
For detailed step-by-step instructions on securing personal accounts and managing online credentials across various digital platforms, refer to the extensive library of login guides available on EasyLoginHub. If an underlying network glitch locks you out of an online account entirely during travel, exploring specialized account recovery assistance strategies can help restore access smoothly.
Disclaimer: Easy Login Hub is an independent informational resource providing technical access information, standard network troubleshooting steps, and educational guides. EasyLoginHub is not affiliated with, endorsed by, or partnered with any third-party software developers, hardware vendors, or public internet providers mentioned in this Login Guide.
Frequently Asked Questions (FAQ)
Why does my smartphone say “Connected without Internet” on public Wi-Fi?
This message indicates that your phone successfully connected to the wireless router, but the router has not yet granted external internet access. This usually happens because you have not yet completed the captive portal splash page requirements or because custom DNS settings on your phone are blocking the local router gateway interface.
Is it safe to visit an unencrypted HTTP page like neverssl.com?
Yes. Web pages like neverssl.com are designed specifically to force network redirects without collecting sensitive information. Because no personal data or passwords are requested on that site, unencrypted HTTP transmission poses no privacy risk during that specific step.
What should I do if the captive portal loads as a blank white page?
If the captive portal loads blank, your browser’s ad blocker or JavaScript blocker may be stopping required interactive elements from rendering. Temporarily disable content blockers, switch to a clean private browsing window, or try opening the page in an alternative browser engine like Safari, Edge, or Chrome.
by lukesmith | Aug 22, 2026 | Blog
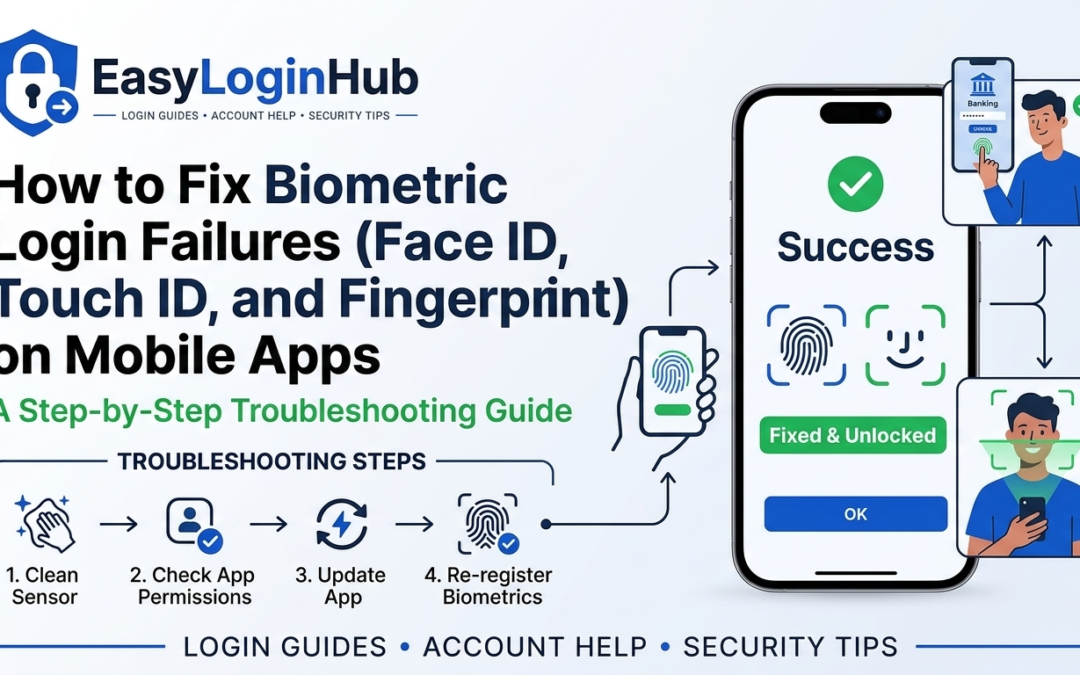
Biometric authentication has revolutionized how we access mobile devices and sensitive applications. With a simple glance or a quick tap of a finger, you can unlock your phone, authenticate banking transactions, and log into password managers in a fraction of a second. However, when Face ID, Touch ID, or fingerprint scanners suddenly stop working, access to critical accounts can be immediately disrupted.
Whether an app continuously prompts you for a manual password, throws a generic error message, or fails to launch the biometric prompt entirely, resolving the issue usually requires a systematic approach. At Easy Login Hub, we provide practical login guides to help you navigate device technicalities and maintain secure account access. This comprehensive guide walks you through the root causes of biometric login failures and actionable steps to get your mobile apps working seamlessly again.
Understanding Why Biometric Logins Fail
To effectively troubleshoot common login problems related to biometrics, it helps to understand how mobile operating systems handle facial recognition and fingerprint scanning. Mobile apps do not store your actual biometric image or facial map; instead, they communicate with your operating system’s secure enclave (such as Apple’s Secure Enclave or Android’s Hardware-backed Keystore) via system application programming interfaces (APIs).
A failure can occur at several different stages in this chain:
- Physical/Hardware Obstructions: Dirt, oil, moisture, damaged screen protectors, or smudged camera lenses preventing accurate sensor reading.
- System-Level Permissions: The individual app having its permission to access biometric hardware toggled off within system settings.
- Corrupted App Cache or Session Tokens: Outdated security tokens that break the connection between the app and the device’s secure vault.
- Operating System Updates: Recent software updates altering security protocols or requiring re-authentication.
- Changed Biometric Credentials: Adding or removing a new fingerprint or facial profile at the OS level, which automatically invalidates biometric login sessions for high-security apps (like banking apps) for safety.
Step 1: Perform Physical and Hardware Maintenance
Before modifying settings or resetting apps, start with basic physical maintenance. Biometric sensors rely on precise optical, capacitive, or ultrasonic measurements, making them sensitive to physical interference.
Clean Sensors and Lenses
- Fingerprint Readers: Microscopic amounts of grease, sweat, or moisture can prevent capacitive and optical fingerprint sensors from reading ridges properly. Wipe the sensor with a dry, lint-free microfiber cloth. Ensure your hands are clean and completely dry before scanning.
- Facial Recognition Cameras: Face ID and Android facial scanners utilize the front-facing camera assembly and infrared sensors (TrueDepth camera system on iOS). Carefully clean the top notch or hole-punch display area to remove smudges, fingerprints, or dust.
Check Accessories and Screen Protectors
Thick tempered glass screen protectors or misaligned cases can obscure front-facing sensors or create an gap over under-display fingerprint scanners. If biometric failures started immediately after applying a new screen protector, test the functionality without it or recalibrate your fingerprint with the protector installed.
Step 2: Check System-Level Biometric Permissions
Even if biometric authentication works to unlock your smartphone, an individual application may lack permission to use biometric hardware. This frequently occurs after app updates or when transferring settings to a new phone.
On iOS (iPhone & iPad):
- Open the Settings app.
- Scroll down to find and select the specific app experiencing issues.
- Ensure the toggle next to Face ID or Touch ID is turned ON (green).
- Alternatively, navigate to Settings > Face ID & Passcode, enter your passcode, and verify which apps are authorized under Other Apps.
On Android:
- Open Settings and select Apps or Application Manager.
- Select the target application from the list.
- Tap Permissions and confirm that hardware permissions related to biometrics or security are allowed.
- Open the specific app’s internal settings menu to verify that options like “Enable Fingerprint Login” or “Use Biometrics” are toggled active.
Step 3: Toggle App Settings and Re-authenticate
When an app’s internal authorization token becomes unsynchronized with the device’s secure enclave, manually resetting the feature within the app often resolves the conflict.
- Log into the affected app using your standard username and fallback password (or PIN).
- Navigate to the app’s internal Settings, Security, or Account menu.
- Locate the toggle for Biometric / Face ID / Touch ID login.
- Turn the setting OFF.
- Sign out of the application completely.
- Sign back in using your regular password, return to the Security settings, and toggle Biometric login back ON.
Step 4: Reset Device Biometric Data
If biometric login fails across multiple apps or device unlocking itself is inconsistent, the enrolled biometric data stored on your device may be corrupted or outdated.
Re-enrolling your facial data or fingerprints creates a fresh cryptographic key in the secure enclave:
Resetting Fingerprints:
- Go to Settings > Security / Biometrics.
- Delete existing enrolled fingerprints.
- Restart your mobile device.
- Return to settings and select Add Fingerprint. Ensure you capture the full surface and edges of your finger during registration.
Resetting Facial Recognition:
- For iOS: Go to Settings > Face ID & Passcode and tap Reset Face ID. Set up Face ID again, ensuring proper lighting. Consider setting up an Alternative Appearance if you frequently wear glasses or headwear.
- For Android: Go to Settings > Security & Privacy > Biometrics > Face recognition, remove current face data, and re-scan.
Conditions
Step 5: Clear App Cache or Reinstall the Application
Software conflicts can prevent an app from successfully calling the operating system’s biometric prompt. Clearing temporary system files or refreshing the application binary helps eliminate software bugs.
- Clear App Cache (Android): Go to Settings > Apps > [App Name] > Storage and tap Clear Cache. Restart the app and attempt biometric login again.
- Reinstall App (iOS & Android): Delete the application entirely from your device. Re-download the latest version from the Apple App Store or Google Play Store, log in manually once, and re-enable biometric access when prompted.
- Update Device OS: Outdated operating systems can lead to compatibility issues with app security frameworks. Ensure your phone is running the latest stable system software.
What to Do If You Are Locked Out
Biometric authentication is designed as a convenient layer on top of primary account credentials, not a complete replacement. If biometric options fail completely and you do not recall your traditional password, you will need to initiate standard recovery procedures.
When you require account recovery assistance, follow these universal security best practices:
- Use the official “Forgot Password” link on the app’s login screen to request a reset link via verified email or SMS.
- Have access to your multi-factor authentication (MFA) device or backup security codes.
- Refer to a complete Login Guide specific to your service for platform-dependent recovery protocols.
Disclaimer: EasyLoginHub is an independent educational platform providing technical guidance, security concepts, and step-by-step account access information. EasyLoginHub is not affiliated with, endorsed by, or operating on behalf of Apple, Google, Android, or any third-party app developer or financial institution mentioned.
Frequently Asked Questions (FAQs)
Why does Face ID or Touch ID work for unlocking my phone but fail on banking apps?
Banking and financial applications enforce stricter security thresholds than general system unlocking. If you recently added a new fingerprint or enrolled an alternative face in your device settings, financial apps automatically disable biometric login for safety, requiring you to re-enable the feature inside the app’s security settings using your primary password.
Will clearing an app’s cache delete my saved biometric data?
No. Clearing an app’s cache or data deletes local configuration files and session cookies, but your actual biometric data remains securely stored inside your phone’s isolated hardware enclave (Secure Enclave on iOS or Knox/Keystore on Android).
Why does my fingerprint scanner fail when my phone is charging?
Unofficial or faulty third-party chargers can introduce electrical noise (ground loop issues) through the touch panel or screen, interfering with capacitive or optical fingerprint sensors while plugged in. Try unplugging the charging cable to see if sensor accuracy returns to normal.
by lukesmith | Aug 22, 2026 | Blog
Hardware security keys and WebAuthn (Web Authentication) technology offer some of the strongest account security available today. By replacing or supplementing traditional passwords with physical tokens—such as YubiKeys, Titan Security Keys, or device-based passkeys—users can protect their online accounts from phishing, credential stuffing, and unauthorized access.
However, when a hardware key or WebAuthn prompt fails, it can instantly block you from accessing critical accounts. Whether your browser displays a generic authentication error, your device fails to recognize the security key, or the request simply times out, authentication failures can be frustrating. At Easy Login Hub, we provide clear, reliable login guides and technical security information to help you resolve login issues quickly and safely.
Disclaimer: EasyLoginHub is an independent informational platform providing general educational content and account security guidance. EasyLoginHub is not affiliated with, authorized by, or endorsed by any hardware key manufacturer, web browser vendor, or third-party web service provider mentioned in this guide.
Understanding WebAuthn and Hardware Security Key Technology
To effectively fix authentication errors, it helps to understand how WebAuthn operates under the hood. WebAuthn is an API standard created by the World Wide Web Consortium (W3C) and the FIDO Alliance. It allows web applications to create asymmetric public-key credentials backed by hardware tokens, secure elements, or local biometric authenticators (like Windows Hello, Touch ID, or Face ID).
When you attempt to sign in using a security key:
- Challenge: The server sends a cryptographic challenge along with the verified domain name (origin) to your web browser.
- Verification: The browser passes this request to your hardware key or local authenticator. You interact with the device by touching a sensor, typing a PIN, or scanning a fingerprint.
- Response: The key signs the challenge using a unique private key stored securely inside its chip and sends the signature back to the server.
Because this process depends on a chain of hardware, browser APIs, operating system services, and server configurations, a breakdown at any single point can cause a login error.
Common WebAuthn and Security Key Error Messages
When WebAuthn authentication fails, browsers and websites usually report one of several common error types:
- “Device Not Recognized” or “No Compatible Key Found”: The operating system or browser cannot detect an attached security key or local hardware authenticator.
- “Operation Timed Out”: The authentication request expired before user interaction (touch or PIN entry) was detected.
- “User Verification Failed”: The required PIN, fingerprint, or facial recognition was entered incorrectly or cancelled.
- “Domain / Origin Mismatch”: The web domain attempting authentication does not match the origin stored on the key during initial registration.
- “NotAllowedError” or “Security Error”: The browser, operating system, or security settings blocked access to the WebAuthn API or hardware key.
Step-by-Step Troubleshooting Guide for WebAuthn Errors
If you encounter security key failure, follow this step-by-step Login Guide to systematically identify and fix the issue.
Step 1: Check Physical Connections and Hardware Integrity
Physical communication failure is a frequent culprit for USB and NFC security keys.
- USB Port Issues: Disconnect the key and reinsert it directly into a primary USB port on your computer. Avoid unpowered USB hubs or faulty adapters, which may fail to deliver sufficient power or data throughput.
- Clean the Contacts: Dust or oxidation on the metal contacts of USB keys can prevent steady communication. Gently wipe the contacts with a dry micro-fiber cloth or isopropyl alcohol swab.
- NFC Alignment: If using Near Field Communication on a mobile device, make sure NFC is enabled in your phone settings. Hold the key firmly against the NFC reader zone on the back of your smartphone (usually near the top or middle camera housing) until the device vibrates or confirms detection.
- Bluetooth Keys: Verify that Bluetooth is enabled on your host device and that the security key’s battery is charged.
Step 2: Verify Browser Compatibility and Permissions
WebAuthn relies heavily on modern browser APIs. Outdated or restricted browsers often block security key interactions.
- Update Your Browser: Ensure your browser (Google Chrome, Mozilla Firefox, Microsoft Edge, or Apple Safari) is updated to its latest stable release.
- Check Private / Incognito Mode: Certain browser privacy modes or strict third-party cookie restrictions can interfere with WebAuthn API requests. Test signing in through a standard browser window.
- Disable Conflicting Extensions: Content blockers, aggressive script blockers, or misconfigured security extensions can prevent WebAuthn scripts from executing properly. Temporarily disable extensions and retry.
- Clear Cache and Site Data: Stale web cache or corrupted session cookies can cause origin mismatch errors. Clear temporary data for the specific site you are attempting to access.
Step 3: Review Operating System and Authenticator Settings
Your operating system manages low-level access to USB devices and biometric hardware.
- Windows Security / Windows Hello: On Windows OS, security key operations are routed through Windows Hello. Ensure Windows services are functioning properly. If your key requires a PIN, verify that you are entering the correct security key PIN, which is separate from your Windows account login PIN.
- macOS Settings: Ensure system permissions allow browser access to local authenticators (Touch ID) or external security devices.
- Restart System Services: Restarting your computer or smartphone clears temporary driver hangs and resets local security subsystem communication.
Step 4: Manage Security Key PIN and Biometrics
FIDO2 security keys allow users to configure a physical Security Key PIN for multi-factor or passwordless logins.
- Incorrect PIN Lockout: Entering an incorrect security key PIN multiple times consecutively will temporarily or permanently lock the token to protect your data. If locked, you may need to reset the security key using key management software provided by your hardware vendor (note: resetting a key erases all credentials stored on it).
- Re-register Biometrics: If using a key with a built-in fingerprint sensor, ensure your finger is clean and dry. If failures persist, re-register your fingerprint through your security key’s official configuration software.
Step 5: Verify HTTPS and Origin Requirements
WebAuthn strict security rules require a secure HTTPS connection. The API will automatically fail over unencrypted HTTP protocols (except on local development environments like localhost).
- Verify that the website URL starts with
https:// and that the SSL certificate is valid.
- Check that you are accessing the exact web address where you originally registered the key. Security keys prevent phishing by refusing to authenticate on lookalike or alternate domains.
What to Do If You Are Completely Locked Out
If your hardware key is lost, damaged, or persistently failing despite troubleshooting, you will need to utilize alternate authentication routes to gain access.
- Use a Backup Security Key: Security experts strongly recommend registering at least two hardware keys when enabling WebAuthn protection—one primary key and one backup key kept in a secure location.
- Use One-Time Recovery Codes: Most online services generate backup recovery codes when you set up two-factor authentication. Input one of these one-time codes at the login screen to bypass the hardware key prompt.
- Select Alternative 2FA Methods: Check if the service offers secondary authentication methods, such as an authenticator app (TOTP) or SMS/email verification codes.
- Seek Account Recovery Assistance: If all secondary options fail, you must go through the service’s formal account recovery process. Visit our dedicated resources at EasyLoginHub for step-by-step account recovery assistance tailored to popular online platforms.
Best Practices for a Seamless WebAuthn Experience
To avoid future authentication errors and prevent accidental lockouts, adopt these security key best practices:
- Register Multiple Authenticators: Always register a secondary key, phone passkey, or biometric authenticator during initial setup.
- Store Backup Codes Off-Device: Print or securely save recovery codes in an encrypted password manager or physical safe.
- Keep Device Firmware Updated: Use official device manager apps from your key manufacturer to check for and apply firmware updates when available.
- Rely on Trusted Resources: When you need to troubleshoot common login problems, consult trustworthy, updated guides to prevent misconfiguration or security risks.
Conclusion
WebAuthn and hardware security keys represent the modern standard for online account defense. While login errors can occur due to physical connection failures, browser restrictions, or PIN misconfigurations, following a systematic process usually restores full function. Keep your devices updated, maintain backup authentication options, and rely on Easy Login Hub whenever you need reliable support navigating digital security and account access.
by lukesmith | Aug 22, 2026 | Blog
Disclaimer: EasyLoginHub is an independent informational platform providing educational guides and account management tips. It is not affiliated with, sponsored by, or associated with any third-party online service, financial institution, or software provider mentioned in this guide.
Introduction: Understanding Location-Based Login Blocks
Few technical hiccups are more frustrating than encountering an “Access Denied” or “HTTP 403 Forbidden” error screen when attempting to sign in to your email, online banking, social media, or streaming accounts. Whether you are traveling internationally for vacation or business, or simply attempting to protect your online privacy by using a Virtual Private Network (VPN), automated security systems can frequently flag your connection as suspicious.
Modern online platforms rely on sophisticated automated threat detection mechanisms. When these security systems detect an unfamiliar IP address, an unexpected country of origin, or routing patterns associated with commercial data centers, they may block your connection to prevent unauthorized access. If you find yourself locked out, practical steps are available to resolve location-based restrictions and safely regain access to your account.
At Easy Login Hub, our goal is to help users navigate technical barriers with comprehensive login guides and security insights. In this troubleshooting guide, we examine why location-based login errors occur and detail step-by-step methods to fix them.
Why Do “Access Denied” and Location Blocks Happen?
Security engines analyze multiple contextual signals before granting access to an account. When any of these signals mismatch your established access history, security protocols trigger defensive blocks.
- IP Address Reputation and Blacklisting: VPN services route internet traffic through shared data center IP addresses. Security filters monitor these server IPs; if bad actors misuse a shared server IP for spam or automated attacks, platforms may flag or ban the entire IP block.
- Impossible Travel Velocity: Security systems compute the geographical distance and time elapsed between your logins. If you sign in from New York at 10:00 AM and attempt to sign in from Tokyo at 10:30 AM via a VPN, the system flags the activity as physically impossible, suspecting account takeover.
- Regional Geo-Fencing & Regulatory Compliance: Certain streaming platforms, financial portals, and corporate portals restrict access to explicit geographical regions due to content licensing restrictions, local regulatory compliance (such as GDPR or financial controls), or regional security policies.
- Cached Session Mismatches: Web browsers store local data, cookies, and location tokens. If your stored cookies reflect one region while your IP address reflects another, web application firewalls (WAFs) may generate an “Access Denied” response.
How to Fix “Access Denied” Errors When Using a VPN
If you encounter access blocks while connected to a VPN, work through these proven technical adjustments to restore access.
1. Switch to a Different VPN Server Location
Commercial VPN providers maintain thousands of individual IP addresses across hundreds of servers. If the specific IP address assigned to you has been flagged by a web service, switching servers will provide a fresh IP address.
- Disconnect your active VPN session.
- Select a server located in your home city or country.
- Reconnect and refresh the website or app login page.
2. Clear Browser Cache, Cookies, and Location Storage
Web services frequently store geographical tokens inside your browser. Clearing these cached files removes conflicting data that might be triggering modern anti-bot controls.
- Open your browser settings and navigate to Privacy and Security.
- Select Clear Browsing Data.
- Choose a time range of at least 7 days (or “All time”) and clear cached images, files, and cookies.
- Alternatively, open a private or Incognito window and attempt to log in again.
3. Disable WebRTC Leaks and Verify DNS Settings
Even with an active VPN, browsers can accidentally expose your real IP address via WebRTC (Web Real-Time Communication) or local DNS requests. If a site detects a discrepancy between your VPN IP and your real IP, access is denied.
- Use an online IP and DNS leak checker to verify whether your true location is exposed.
- Enable DNS leak protection within your VPN client’s settings menu.
- Disable WebRTC in your browser settings or use a reputable privacy extension to block WebRTC requests.
4. Enable Obfuscated Servers or “Stealth Mode”
Advanced security systems use Deep Packet Inspection (DPI) to identify standard VPN traffic signatures. If a portal actively blocks known VPN connections, switch to your VPN’s obfuscated servers (sometimes labeled as Stealth Mode, Cloaking, or Scramble). This technology disguises VPN traffic so it resembles standard HTTPS web traffic.
5. Use a Dedicated or Static IP Address
Because shared VPN IPs are used by thousands of subscribers simultaneously, automated security systems easily flag them. A dedicated IP address assigned exclusively to your account provides the privacy of an encrypted connection without triggering suspicious multi-user activity alerts.
How to Fix Login Blocks When Traveling Internationally
Traversing national borders frequently changes your device’s cellular network, local Wi-Fi provider, and time zone. Below are steps to troubleshoot common login problems while abroad.
1. Complete Secondary Security Verification (2FA)
When logging in from an unfamiliar country, systems will usually present an extra identity check rather than a total permanent block. Ensure you can complete identity verification through your primary multi-factor authentication (MFA) channels:
- Authenticator Apps: Time-based One-Time Password (TOTP) apps (such as Google Authenticator, Microsoft Authenticator, or Authy) generate codes locally on your phone without requiring cellular roaming or active SMS services.
- Email Verification: Ensure you maintain access to your backup email account to retrieve single-use authorization links or verification codes.
2. Set Up Travel Notifications in Advance
Financial institutions and major account providers often allow users to register travel plans. Before departing on international travel, log into your banking or online payment accounts to update your travel preferences or notify customer support of your destination dates.
3. Route Traffic Back to Your Home Country
If a regional online service strictly requires an access point from your native country, connect your VPN to a server in your home nation before opening the application or service website. This ensures your origin IP matches the region expected by local security rules.
4. Utilize Emergency Recovery Protocols
If an account becomes temporarily locked due to repeated location warnings, look for options labeled “Verify Identity,” “Unlock Account,” or “Help Logging In.” Following standard platform verification steps—such as answering security questions or uploading identification—can clear security holds. For structured support instructions, you can consult a detailed Login Guide or seek account recovery assistance.
Best Practices for Maintaining Seamless Account Access
Taking preventative steps before traveling or activating security tools can minimize future access interruptions.
| Preventative Strategy |
Action Required |
Primary Benefit |
| Generate Backup Codes |
Download and print multi-factor emergency recovery codes before traveling. |
Allows full account access if SMS cellular coverage is unavailable abroad. |
| Use Hardware Keys or TOTP |
Transition away from SMS-based 2FA to authenticator apps or security keys. |
Works completely offline without requiring roaming carrier coverage. |
| Keep Recovery Contact Info Updated |
Regularly review secondary phone numbers and email addresses on file. |
Ensures access recovery links reach accessible, active inboxes. |
| Utilize a Password Manager |
Store credentials and secure notes in an encrypted password manager. |
Prevents mistaken lockout caused by typos during security checks. |
Conclusion
Location-based login blocks and “Access Denied” messages are designed to protect your sensitive accounts from global cyber threats, but they can occasionally create significant friction for legitimate users traveling abroad or utilizing VPNs. By understanding how IP reputation, browser caching, and multi-factor security rules operate, you can quickly diagnose and bypass access barriers safely.
Remember to clear your browser data, switch VPN servers or enable obfuscation, and rely on authenticator apps over SMS when traveling. For more step-by-step account security articles and user guides, explore the resources available on EasyLoginHub.
by lukesmith | Aug 22, 2026 | Blog
Disclaimer: Easy Login Hub is an independent informational platform providing general educational guides and account assistance tips. EasyLoginHub is not affiliated with, endorsed by, or connected to any third-party brand, service, or verification provider mentioned in this guide.
Few online experiences are as frustrating as entering your correct username and password, only to be forced into an infinite loop of selecting crosswalks, traffic lights, or bicycles. You complete the challenge, click verify, and instead of redirecting to your dashboard, the system reloads a brand-new CAPTCHA challenge or displays a generic “Verification Failed” error message.
Security challenges like Google reCAPTCHA, hCaptcha, and Cloudflare Turnstile are designed to distinguish human users from automated bots. However, when browser settings, network configurations, or corrupt session data trigger false alarms, legitimate users end up locked out. At Easy Login Hub, our primary goal is to provide clear, actionable login guides that help users troubleshoot common login problems and regain seamless access to their online accounts.
In this comprehensive guide, we will break down why CAPTCHA loops occur and walk you through step-by-step solutions to fix verification failures on any desktop or mobile device.
Why Do CAPTCHA Loops and Verification Failures Happen?
To fix an endless verification loop, it helps to understand what causes security engines to flag your session. Modern anti-bot algorithms evaluate dozens of browser and network signals in real time. If a combination of these signals appears suspicious, the system repeatedly demands verification.
- Corrupted Cookies or Stale Browser Cache: Expired session tokens can conflict with new login requests, causing authentication servers to reject your attempts continuously.
- Virtual Private Networks (VPNs) and Proxies: Sharing an IP address with thousands of other users on a VPN server often triggers anti-bot systems, as automated scripts frequently originate from public server IPs.
- Overly Aggressive Browser Extensions: Script blockers, ad blockers, and strict privacy extensions can block essential JavaScript files that CAPTCHA systems need to evaluate your browser.
- Disabled JavaScript or Browser Tracking Protection: Most CAPTCHA services rely on JavaScript execution to analyze user behavior (like mouse movements or focus events). Blocking these scripts prevents the verification from finishing.
- Incorrect System Date and Time: Security certificates rely on precise timestamps. If your device clock is out of sync, cryptographic checks fail during login.
- Network-Level Blocking: Public Wi-Fi networks or restricted firewalls may filter background requests essential for completed verification.
Step-by-Step Guide to Fix Endless CAPTCHA Loops
Follow these proven troubleshooting steps in order to break the infinite loop and log into your service successfully.
Step 1: Open an Incognito or Private Browsing Window
The fastest way to test whether your main browser environment is causing the failure is to open an Incognito (Chrome), Private (Firefox/Safari), or InPrivate (Edge) window.
- Private windows temporarily disable most browser extensions and operate with a clean cache and cookie state.
- Navigate to the login page within the private window and attempt your sign-in again.
- If the login succeeds, the root cause is likely a corrupted cookie, cached file, or active browser extension in your main browser profile.
Step 2: Clear Your Browser Cache and Cookies
If private browsing works, cleaning out stored web data in your primary browser is the next logical fix.
- Open your browser settings menu.
- Locate the Privacy & Security section and select Clear Browsing Data.
- Set the time range to All time (or at least 24 hours if the issue started recently).
- Ensure Cookies and other site data and Cached images and files are selected.
- Click Clear Data, restart your browser, and attempt to log in again.
Step 3: Temporarily Disable VPNs and Proxies
Security services often flag incoming traffic from commercial VPN endpoints due to heavy automated traffic sharing those same IPs.
- Disconnect from your VPN software or proxy extension.
- Refresh the login page and re-attempt the verification process.
- If you must use a VPN, try changing the server location or switching to a dedicated IP address provided by your VPN vendor.
Step 4: Disable Problematic Extensions or Try Safe Mode
Extensions designed to block ads, scripts, or tracking cookies can interfere with security widgets like reCAPTCHA.
- Temporarily toggle off ad blockers (such as uBlock Origin or AdGuard) and privacy-focused add-ons.
- Alternatively, open your browser’s extension manager and disable all third-party extensions temporarily.
- Reload the page and check if the CAPTCHA now completes with a single click.
Step 5: Verify JavaScript and Cookie Settings
Modern interactive prompts require JavaScript to process user clicks and generate validation tokens.
- In your browser’s content settings, confirm that JavaScript is set to Allowed for all sites or specifically whitelisted for the website you are trying to access.
- Check that third-party cookies or cross-site tracking protections are not blocking essential cross-domain verification endpoints (such as Google or hCaptcha domains).
Step 6: Sync Your Device’s System Time
An inaccurate system clock breaks modern SSL/TLS security protocols, preventing CAPTCHA validation tokens from matching server timestamps.
- Windows: Go to Settings > Time & Language > Date & Time, then click Sync now under Additional settings.
- macOS: Open System Settings > General > Date & Time, and ensure Set time and date automatically is turned on.
Step 7: Switch Networks or Change DNS Configuration
If your local network IP has been flagged due to high traffic volume (common on corporate, school, or public Wi-Fi networks), switching your connection can resolve the block immediately.
- If you are on desktop, switch to a mobile hotspot to obtain a fresh IP address from your cellular carrier.
- If you are on a mobile device, turn off Wi-Fi and attempt the login using cellular data.
- Consider flushing your DNS cache or configuring a public DNS provider (such as Cloudflare 1.1.1.1 or Google Public DNS 8.8.8.8) if domain lookup issues persist.
Troubleshooting CAPTCHA Loops on Mobile Devices
Verification loops are equally common on smartphones and tablets, whether using mobile web browsers or native mobile applications.
For Mobile Browsers (Safari / Chrome)
- Safari (iOS): Go to Settings > Safari > Clear History and Website Data. You can also temporarily disable “Prevent Cross-Site Tracking” under Privacy & Security if verification prompts repeatedly drop your session.
- Chrome (Android): Open Chrome, tap the three dots > Settings > Privacy and Security > Clear browsing data.
For Native Mobile Apps
- If an in-app verification prompt loops continuously, force close the app completely.
- On Android, go to Settings > Apps > [App Name] > Storage > Clear Cache.
- Check your device’s App Store or Google Play Store to ensure the application is updated to the latest official release.
What to Do If You Are Completely Locked Out
If you have followed every technical fix and the system still refuses to validate your request, the issue may extend beyond browser configurations. Repeated verification attempts within a short timeframe can cause automated rate-limiting, temporary IP bans, or account locks.
In these situations, it is best to pause further attempts for 15 to 30 minutes to allow any automated security cooldown period to expire. If you suspect your account has been temporarily flagged or suspended during the process, seeking structured account recovery assistance can help you locate official resolution channels for the platform in question.
Frequently Asked Questions (FAQs)
Why does CAPTCHA keep asking me to solve multiple images?
When anti-bot algorithms assign a low trust score to your IP address or browser footprint, they present additional image challenges to confirm human intent. This often happens if you are using a VPN, a private browser, or an IP address recently associated with automated traffic.
Can an ad blocker cause a CAPTCHA verification failure?
Yes. Many ad blockers and content filtering extensions block third-party scripts that verification platforms require to process your challenge response. Temporarily pausing your ad blocker on the login page often resolves the problem.
Will switching browsers help break an endless loop?
Yes. Trying an alternative browser (such as switching from Chrome to Firefox or Edge) provides a completely fresh browser profile, isolated extension environment, and default security configuration, which frequently bypasses local rendering glitches.
Where can I find more specific login help?
For more detailed technical walkthroughs, account recovery advice, and step-by-step sign-in instructions across popular web services, explore the free library available at EasyLoginHub. Our dedicated Login Guide resources help users navigate authentication issues efficiently and securely.
by lukesmith | Aug 22, 2026 | Blog
Disclaimer: EasyLoginHub is an independent informational platform providing practical guides and security awareness content. EasyLoginHub is not affiliated with, endorsed by, or connected to any third-party brands, app developers, or authentication service providers mentioned in this guide.
Upgrading to a new smartphone is an exciting milestone, but it often brings an unexpected hurdle: migrating your two-factor authentication (2FA) apps. While transferring photos, contacts, and mobile applications to a new device has become almost effortless, moving time-based one-time password (TOTP) authenticators requires extra caution. Making a mistake during this transition can result in locked accounts, tedious recovery processes, or permanent loss of access to critical online services.
Whether you rely on authenticator apps for banking, social media, work portals, or email accounts, careful planning is essential. At Easy Login Hub, our step-by-step login guides are designed to help you navigate digital access safely. Below is a comprehensive guide on how to securely transfer your 2FA authenticator apps to a new phone without getting locked out of your accounts.
The Golden Rule: Keep Your Old Phone Active
The single most important rule when upgrading smartphones is: Do not erase, factory reset, or trade in your old phone until you have verified every single 2FA account on your new device.
Most authenticator applications store security tokens locally on your physical device for safety. If you wipe your old phone before confirming that your 2FA tokens are active on your new device, you will destroy the unique cryptographic keys needed to generate your verification codes. Always complete the entire migration process while both phones are powered on and accessible.
Step 1: Check Your Authenticator App Type
How you transfer your 2FA codes depends largely on which authenticator app you use and how it handles encryption and account synchronization. Authenticator apps generally fall into two categories:
1. Cloud-Synced Authenticator Apps
Many modern authenticator apps allow you to back up your 2FA tokens to an encrypted cloud account associated with your Apple ID, Google Account, or vendor account. Examples include Microsoft Authenticator, Twilio Authy, and updated versions of Google Authenticator with cloud synchronization enabled.
- How it works: Your seed keys are encrypted and backed up to the cloud. When you install the app on your new device and sign in with the same master account, your 2FA entries restore automatically or via an account recovery passphrase.
- Security precaution: Ensure cloud backup features are toggled ON inside the app settings on your old device prior to starting the setup on your new phone.
2. Local / Device-Bound Authenticator Apps
Some users deliberately disable cloud sync for maximum privacy, while certain secure apps store token keys strictly within your device’s local enclave (unless exported manually).
- How it works: Accounts must be transferred manually using a batch export feature (typically generating a temporary export QR code on your old screen) or re-scanned individually for each service.
- Security precaution: Never screenshot or publish your export QR codes. They contain the raw setup keys for all your connected accounts.
Step 2: Pre-Transfer Checklist Before Switching Devices
To avoid security snags, run through this pre-migration checklist before opening your new phone:
- Locate Your Emergency Backup Codes: When you first set up 2FA on services like Google, GitHub, or financial institutions, you were likely given 8- to 10-digit backup codes. Retrieve these codes from your secure storage in case an app transfer fails.
- Verify Alternative Verification Methods: Check if your accounts have secondary backup options enabled, such as verified SMS phone numbers, backup email addresses, or hardware security keys.
- Update Connected Phone Numbers: If your new phone comes with a new phone number, update your profile settings across your accounts before relinquishing access to your old number.
Step 3: Transferring Popular Authenticator Apps
While exact menu layouts change over time, the general migration path for major authenticator tools follows these procedures:
Google Authenticator
Google Authenticator offers both cloud synchronization via a Google Account and a direct device-to-device export option.
- Cloud Sync Method: Ensure you are signed into your Google Account inside the app on your old phone. Download Google Authenticator on your new phone and sign into the identical Google Account. Your 2FA codes should populate automatically.
- Manual QR Transfer Method: If cloud sync is disabled, open the app menu on your old phone and look for the option to transfer or export accounts. Select the accounts you wish to move to generate an export QR code. On your new phone, install the app, choose the option to import existing accounts, and scan the QR code displayed on your old phone screen.
Microsoft Authenticator
Microsoft Authenticator relies on account-level cloud backups to move 2FA entries safely.
- On your old phone, open the settings menu within Microsoft Authenticator and verify that Cloud Backup (or iCloud/Android Backup) is enabled and linked to your personal Microsoft account.
- Download Microsoft Authenticator on your new phone.
- Upon opening the app on your new device, choose the option to Restore from backup rather than adding a new account immediately. Sign in with the master Microsoft account used for the backup.
- Note: Some personal or corporate accounts may require you to re-verify credentials for security reasons after a backup restore.
Twilio Authy
Authy supports multi-device synchronization linked to your mobile phone number and account password.
- On your old phone, navigate to settings and ensure Multi-Device access is turned ON. Also, verify that you know your Backup Password.
- Install Authy on your new phone and enter the phone number associated with your account.
- Approve the new device installation using a prompt sent to your old phone or an SMS/call verification.
- Enter your account Backup Password to decrypt and unlock your 2FA tokens on the new phone.
Step 4: Verify Every Account Before Wiping the Old Phone
Once you believe all 2FA tokens have migrated to your new device, perform a thorough verification test:
- Pick 3 to 5 critical accounts (e.g., primary email, financial accounts, social media).
- Open a private browsing window on a computer or secondary device and initiate a sign-in attempt.
- When prompted for a 2FA code, enter the digits generated by the authenticator app on your new phone.
- Confirm that the login succeeds.
- Only after successfully verifying all critical platforms should you erase or factory reset your old smartphone.
What to Do If You Get Locked Out
If you discover that an account did not transfer correctly and you no longer have access to your old device, don’t panic. You can still troubleshoot common login problems using established recovery procedures:
- Use One-Time Emergency Recovery Codes: Enter one of the offline backup codes generated during initial 2FA setup to gain access and register your new authenticator app.
- Fallback Verification: Look for options such as “Try another way” or “Use alternative verification” on the login screen to receive a code via email or SMS.
- Request Account Recovery: If no backup options work, seek formal account recovery assistance directly through the service provider’s official support channel. Be prepared to verify your identity using official government IDs, registered email confirmation, or account history details.
Long-Term Best Practices for 2FA Management
To ensure smooth device upgrades in the future, adopt these proactive security habits:
- Store Backup Codes Off-Device: Store printed or handwritten physical copies of recovery codes in a secure location, or place them inside an encrypted password manager.
- Consider Hardware Security Keys: Physical security keys (such as FIDO2/WebAuthn USB keys) can serve as an uncopyable secondary authentication method that operates independently of mobile apps.
- Audit Your Accounts Annually: Periodically review which services require 2FA and clean up inactive logins to streamline future device upgrades.
By following these systematic steps, transferring your authenticator apps to a new smartphone can be entirely stress-free. For more step-by-step account recovery assistance, security insights, and detailed Login Guide resources, explore the extensive library available at Easy Login Hub.
by lukesmith | Aug 21, 2026 | Blog
Disclaimer: EasyLoginHub is an independent informational platform providing educational guides, password assistance, and login troubleshooting. EasyLoginHub is not affiliated with, sponsored by, or officially connected with Google LLC or any of the third-party platforms mentioned in this guide. All brand names belong to their respective trademark holders.
Single Sign-On (SSO) through Google is one of the most convenient web technologies available today. With a single click on “Sign In with Google,” users can access hundreds of third-party apps, productivity portals, and SaaS tools without remembering separate usernames and passwords. However, when the authentication handshake fails, users often find themselves trapped in an infinite login loop or facing obscure SSO error messages.
A login loop occurs when you click the Google authentication button, complete the prompt (or watch it automatically process), only to be redirected right back to the original login page without being authenticated. In other cases, you might encounter browser errors such as 400 bad_request, redirect_uri_mismatch, or a blank popup window that never finishes loading.
At Easy Login Hub, we help users navigate digital identity hurdles every day. In this detailed guide, we break down why Google SSO authentication breaks and provide step-by-step solutions to troubleshoot common login problems so you can regain access to your critical accounts quickly.
Understanding How ‘Sign In with Google’ Works
To understand why login loops happen, it helps to understand the underlying technology: OAuth 2.0 and OpenID Connect (OIDC). When you click “Sign In with Google”:
- The Request: The target website sends an authorization request to Google’s identity servers.
- Authentication: Google verifies your identity using session cookies saved in your web browser or asks you to enter your credentials.
- Authorization Token: Once verified, Google generates a secure authorization token or authorization code and sends it back to the target website via a callback URL.
- Session Creation: The target website validates the token with Google and creates a local login session for you via a session cookie.
If any single step in this multi-party communication breaks—due to corrupted browser cache, overly restrictive privacy settings, token expiration, or network security rules—the handoff fails, and the application resets the authentication flow, leading directly into a login loop.
Primary Causes of Google SSO Login Failures
Before jumping into troubleshooting, identify the most common triggers behind Google authentication loops:
- Corrupted Cookies or Stale Tokens: Outdated session cookies on your computer can conflict with new authentication tokens.
- Blocked Third-Party Cookies: Google SSO relies on cross-site communication. Modern privacy settings often block third-party cookies required to pass authentication tokens across domains.
- Browser Extension Interference: Ad blockers, privacy-enhancing extensions, and script blockers frequently disrupt identity provider redirects.
- Multiple Signed-In Google Accounts: If you are signed into multiple Google Accounts (e.g., personal and work) in the same browser session, the authorization handoff can pick the wrong profile or fail entirely.
- Incorrect System Clock Settings: OAuth tokens rely on exact UTC timestamps. If your device clock is off by even a few minutes, security tokens are rejected as expired or invalid.
Step-by-Step Guide to Fixing Google SSO Login Loops
Step 1: Test Access in Incognito or Private Browsing Mode
The fastest way to isolate the cause of a login loop is to open a new Incognito or Private window in your web browser and attempt to sign in again.
- If Google SSO works in Incognito mode, the issue is directly linked to stored browser cache, stale cookies, or an active browser extension in your normal window.
- If Google SSO still fails in Incognito mode, the problem is likely related to account permissions, network security policies, or backend configuration errors on the target platform.
Step 2: Clear Browser Cookies and Cache for Google and Target Sites
Corrupted authorization tokens stored in your browser cache are the leading cause of infinite redirect loops. Clearing cache and cookies forces your browser to negotiate a fresh session key.
To perform a targeted cookie cleanup without clearing your entire browser history:
- Open your browser settings (e.g., Chrome Settings > Privacy and Security > Third-party cookies).
- Navigate to See all site data and permissions.
- Search for
google.com and delete the associated data.
- Search for the domain name of the website you are trying to access (e.g.,
app.example.com) and delete its data as well.
- Restart your browser and attempt to log in again.
Step 3: Enable Cross-Site Tracking and Adjust Third-Party Cookie Settings
Strict browser privacy settings—such as Apple Safari’s Intelligent Tracking Prevention (ITP) or Chrome’s Enhanced Protection—frequently block the cross-domain authorization cookies that OAuth requires.
If you encounter SSO failures on specific browsers:
- In Google Chrome: Go to Settings > Privacy and security > Third-party cookies. Ensure that third-party cookies are allowed for the specific site, or add the website domain to the exception list under “Allowed to use third-party cookies.”
- In Apple Safari: Open Settings > Privacy and temporarily uncheck Prevent cross-site tracking and Block all cookies to check if this resolves the authentication loop.
- In Mozilla Firefox: Click the shield icon in the address bar to check if Enhanced Tracking Protection is blocking the Google login popup, and temporarily set protection to Standard for that site.
Step 4: Disable Conflicting Browser Extensions
Privacy extensions (like uBlock Origin, Privacy Badger, or Ghostery) or script blockers can stop OAuth popup windows from passing security tokens back to the parent page.
- Disable your extensions one by one or pause them globally for the site experiencing issues.
- Pay special attention to content blockers, password managers with auto-fill scripts, and VPN extensions.
- Refresh the login page and attempt the Google Sign-In sequence again.
Step 5: Resolve Multiple Google Account Conflicts
When you are logged into several Google accounts simultaneously within one browser profile, Google assigns index numbers to your accounts (e.g., /u/0/, /u/1/). Certain third-party services fail to handle these multi-account pathways correctly, resulting in login loops.
- Sign out of all Google accounts in that browser window, then sign back in only with the primary Google account associated with the service.
- Alternatively, set up separate browser profiles (e.g., Chrome Profiles) for Work and Personal Google accounts to keep authentication cookies completely isolated.
Step 6: Revoke and Re-Grant Third-Party App Permissions
If a previously working Google SSO connection suddenly starts failing, the app’s authorization token in your Google Account settings may have been revoked or invalidated.
- Go to your official Google Account Management dashboard (
myaccount.google.com).
- Navigate to the Security section and scroll down to Your connections to third-party apps & services.
- Locate the application that is failing to log in.
- Select the application and click Delete all connections or Remove Access.
- Return to the target application’s site and click “Sign In with Google” again to grant fresh OAuth permissions.
Step 7: Verify System Time and Network Settings
OAuth 2.0 security relies on short-lived time-stamped tokens. If your computer or mobile device’s system clock is out of sync with international atomic time servers, Google will automatically reject authentication requests.
- On Windows or macOS, open System Settings, locate Time & Date settings, and ensure Set time automatically is turned on.
- If you are using a Virtual Private Network (VPN) or enterprise proxy firewall, temporarily disable it. Some network-level security appliances strip authentication headers or block outbound connections to Google authentication endpoints.
When SSO Problems Require Administrative Intervention
Sometimes, login loops are caused by administrative policy configurations rather than user-side issues. If you are using a work, school, or organizational Google Workspace account, contact your organization’s IT department or consult additional login guides for enterprise environments:
- Admin Controls: Google Workspace administrators can restrict users from authorizing unapproved third-party apps via the Google Admin Console.
- Redirect URI Mismatches: If you see an explicit error screen stating
redirect_uri_mismatch, the web developer of the third-party application has configured their OAuth credentials incorrectly. Only the application developer can resolve this issue on their backend.
Getting Additional Help for Persistent Account Issues
If you have cleared your browser environment, verified your clock, and re-granted permissions, yet still cannot access your service, you may be facing a broader profile lockout or credential synchronization failure. For step-by-step walk-throughs on recovering locked profiles or resetting access protocols, visit our dedicated account recovery assistance tutorials at EasyLoginHub.
Frequently Asked Questions (FAQs)
Why does ‘Sign In with Google’ keep refreshing without logging me in?
This usually happens because your web browser is blocking the third-party session cookie that the external site needs to establish your authenticated session after Google verifies who you are. Clearing site cache or lowering cross-site cookie restrictions generally resolves the loop.
Is it safer to use Google SSO or a traditional password?
Using Google Single Sign-On is generally more secure than creating traditional site-specific passwords, provided your Google Account is secured with Multi-Factor Authentication (MFA). It reduces password reuse and prevents your credentials from being leaked if the individual third-party service suffers a database breach.
Will clearing cookies log me out of all my other accounts?
If you clear all cookies globally across your browser, yes, you will be logged out of active sessions on other sites. However, if you follow our targeted cleanup steps to delete cookies exclusively for Google and the affected target site, your active sessions on other websites will remain intact.
Final Thoughts
While Google SSO failures can disrupt your workflow, most login loops stem from simple browser caching issues, multi-account confusion, or overly strict privacy settings. By systematically following these troubleshooting steps, you can break the loop and regain access to your favorite applications safely. For more in-depth guides on troubleshooting digital access and managing online security effectively, turn to EasyLoginHub.
by lukesmith | Aug 21, 2026 | Blog
Few error messages are as frustrating as seeing “Too Many Failed Login Attempts” or “Your Account Has Been Temporarily Locked” right when you need to access an important online service. Whether you are trying to check your banking details, log into a social media account, or access a workplace portal, sudden access restrictions can disrupt your day.
While these security measures are designed to protect your sensitive data from unauthorized access, automated safeguards can sometimes trigger accidentally due to simple user errors, outdated browser settings, or background apps. At Easy Login Hub, we specialize in providing practical login guides and direct account recovery assistance to help you regain access quickly and securely.
In this comprehensive troubleshooting guide, we explain why platforms enforce login limits, outline actionable steps to fix account lockouts, and share essential tips to prevent the problem from happening again.
Why Do Platforms Block Logins After Multiple Failed Attempts?
To understand how to resolve a lockout, it helps to understand why platforms enforce these rules in the first place. Automated lockouts are primarily a defensive mechanism against cyber threats.
1. Brute-Force and Credential Stuffing Attack Protection
Cybercriminals often use automated scripts or bots to test thousands of password combinations per minute against user accounts—a tactic known as a brute-force attack. Alternatively, they may try leaked username-and-password pairs across multiple websites (credential stuffing). Rate-limiting systems monitor login requests and lock an account or IP address after a specified number of wrong attempts to neutralize these attacks.
2. Account Hijacking Prevention
If someone else is actively trying to guess your credentials, locking the account ensures that the unauthorized party cannot keep guessing until they hit the right combination, giving the legitimate account owner time to secure their credentials.
3. False Positives Caused by Background Services
Lockouts are not always triggered by human error or external hackers. Sometimes, automated processes running on your own device—such as an outdated password manager, a background app attempting to sync data, or an automated script using old credentials—trigger the security filter by repeatedly submitting incorrect login details without your knowledge.
Common Causes of Login Lockout Errors
Before jumping straight into account recovery, identifying the root cause can save you time and prevent repeated lockouts:
- Caps Lock or Keyboard Layout Changes: Passwords are case-sensitive. Having Caps Lock turned on or using a different system language layout can result in multiple unintended failed attempts.
- Outdated Auto-Fill Credentials: Web browsers and password managers occasionally save outdated passwords and attempt auto-fill silently in the background.
- Network or IP Address Restrictions: Connecting through a public Wi-Fi network, shared corporate network, or Virtual Private Network (VPN) can cause systems to flag your connection if another user on the same IP address triggered security alarms.
- Corrupted Cookies or Web Cache: Stored session data in your browser can become corrupted, leading the platform server to repeatedly reject incoming authentication tokens.
Step-by-Step Troubleshooting: How to Resolve ‘Too Many Failed Login Attempts’
If you find yourself locked out, follow these systematic steps to clear the restriction and regain entry to your account.
Step 1: Wait Out the Security Cool-Off Period
Most online services enforce a temporary restriction rather than a permanent ban. These cool-off periods usually range from 15 minutes to 24 hours depending on the platform’s security policy.
- Temporary Locks (15–60 minutes): Common for standard consumer accounts. The best response is often simply pausing login attempts for at least an hour.
- Extended Locks (12–24 hours): Triggered when multiple lockout cycles occur consecutively.
Important Note: Repeatedly attempting to log in while a cool-off period is active will usually reset the timer, extending your lockout duration further.
Step 2: Clear Browser Cache, Cookies, or Try Incognito Mode
Corrupted cookies or outdated cache files can cause authentication errors even when you type the correct credentials.
- Open a new Incognito or Private Browsing window. This bypasses cached files and browser extensions.
- Attempt to log in through the private window.
- If this succeeds, return to your normal browser settings, navigate to history/privacy settings, and clear your cache and cookies for that specific website.
Step 3: Disconnect VPNs and Proxy Networks
If your account lockout is tied to your network IP address rather than your specific username, switching networks can help isolate the issue:
- Disable active VPN services or proxy servers temporarily.
- If you are on a public or shared Wi-Fi network, switch to a mobile data connection or trusted home network.
- Restart your Internet router to request a fresh dynamic IP address from your provider, if applicable.
Step 4: Initiate an Official Password Reset Process
In many cases, initiating an official password reset bypasses temporary rate limits because it proves ownership via an out-of-band communication channel (such as your verified email address or mobile phone via SMS).
- Click the platform’s official “Forgot Password?” or “Reset Password” link.
- Enter your verified email address or phone number.
- Follow the link or code sent to your inbox or phone to set a new password.
- Log in using your newly updated password.
If you need specialized steps for specific services, exploring a dedicated Login Guide on EasyLoginHub can walk you through service-specific recovery options.
Step 5: Review and Update Password Managers
After successfully updating or confirming your password, immediately update the stored credentials in your browser, password manager app, or mobile auto-fill settings. This prevents background apps from sending old credentials and triggering another lockout cycle.
Step 6: Contact Official Customer Support
If self-service options do not restore access, or if the account lock is permanent, reaching out to official customer support is necessary. When contacting support:
- Use the official support channels listed on the provider’s verified website.
- Be prepared to verify your identity using photo ID, security questions, or confirmation codes sent to registered contact points.
- Never share account passwords or sensitive verification PINs with anyone.
Best Practices to Prevent Future Account Lockouts
Taking a few proactive security steps can drastically reduce the chances of encountering login errors in the future:
- Use a Reliable Password Manager: Password managers securely store and fill exact credentials, eliminating typos and case-sensitivity mistakes.
- Enable Two-Factor Authentication (2FA): Enabling 2FA adds an extra layer of security. Accounts protected by multi-factor authentication are often less vulnerable to automated brute-force lockouts because authorization requires explicit confirmation on your trusted device.
- Keep Recovery Information Updated: Ensure your recovery phone number and backup email address remain current so you can receive password reset codes instantly when needed.
- Save Offline Recovery Codes: When setting up 2FA or account security features, save backup or recovery codes in a secure location for emergency access.
Frequently Asked Questions (FAQs)
How long does a ‘too many failed login attempts’ restriction usually last?
Most automated login restrictions expire within 15 to 60 minutes. However, depending on the platform’s security policies, severe or consecutive lockouts may last anywhere from 12 to 24 hours.
Will changing my IP address remove the lockout?
If the system blocked your IP address due to network-level rate limits, changing networks (such as switching from Wi-Fi to cellular data) may allow you to access the login page. However, if the lockout is tied directly to your user account, you must wait out the timer or reset your password.
Why did I receive a lockout error on my very first attempt today?
This can occur if an automated background service, browser extension, or password manager tried logging in repeatedly using old credentials without your realization. Alternatively, someone else may have attempted to access your account, or another user on your shared IP network triggered system-wide rate limits.
Can third-party websites unlock my account directly?
No. Only the official service provider operating the account can unlock or reset credentials. Independent resources like Easy Login Hub provide step-by-step guidance to help you troubleshoot common login problems safely, but official recovery must always be completed directly on the service provider’s verified platform.
Conclusion
Encountering a temporary account lockout can be inconvenient, but understanding how rate limiting works makes it far easier to resolve. By waiting out cool-off periods, clearing browser cookies, disconnecting VPNs, or utilizing official password reset links, you can regain control of your accounts securely.
For more detailed walkthroughs, password reset tutorials, and account management safety tips, explore the educational guides available at EasyLoginHub.
Disclaimer: EasyLoginHub is an independent informational platform providing general educational guides, troubleshooting advice, and account recovery information. EasyLoginHub is not affiliated with, authorized, endorsed, or operated by any third-party brands, services, or companies referenced in its content. All trademarks and brand names belong to their respective owners.
by lukesmith | Aug 21, 2026 | Blog
Losing access to your primary email address is one of the most frustrating security hurdles internet users encounter. Because most online services rely on an email inbox as the primary anchor for account management, password resets, and multi-factor authentication (MFA) codes, losing that single point of access can make you feel locked out of your digital life completely.
Whether your old email account was deactivated due to inactivity, compromised by unauthorized parties, or tied to an expired work or student domain, recovering linked third-party accounts is still often possible. At Easy Login Hub, we provide comprehensive login guides and actionable account recovery assistance to help you navigate complex access scenarios step-by-step.
Disclaimer: EasyLoginHub is an independent educational platform providing general information and troubleshooting guidance. It is not affiliated with, endorsed by, or connected to any third-party online platforms or services mentioned in this guide.
Why Primary Email Access Matters for Account Recovery
Online platforms design their authentication systems around verified communication channels. Your primary email address serves three central functions:
- Identity Verification: Proving you are the rightful owner through temporary magic links or One-Time Passwords (OTPs).
- Security Alerts: Sending notifications regarding unexpected logins, password changes, or device authorizations.
- Account Rebinds: Allowing you to authorize security setting adjustments and update personal profile details.
When you no longer control the inbox, standard recovery links bounce into a digital void. Consequently, you must leverage alternate authentication mechanisms established during initial setup or undergo manual identity verification with platform administrators.
Immediate Actionable Steps Before Contacting Support
Before launching a lengthier manual recovery process, try these initial troubleshooting measures to see if you can regain entry locally or bypass the missing email check.
1. Check Existing Signed-In Devices
Audit all smart devices, browsers, and mobile applications where you might still be actively logged into the service. If an active session exists on a tablet, secondary laptop, or mobile phone, you can often navigate directly to the account settings menu and update your contact email address immediately—without needing to verify a code sent to the old inbox.
2. Try Recovering the Primary Email Account First
In many instances, solving the root issue is easier than recovering dozens of connected accounts individually. Attempt to regain control of your original email address by:
- Utilizing security questions or secondary phone verification provided by your email host.
- Requesting domain reactivation if the email was part of an expired personal domain.
- Submitting a formal account restoration claim through your email provider’s recovery center.
Alternative Verification Pathways
If recovering the primary inbox is impossible, standard platforms generally support alternative recovery pathways. Knowing how to leverage these methods can help you troubleshoot common login problems quickly.
SMS and Mobile Phone Verification
If you linked a mobile phone number to your account for two-step verification, look for an option on the login screen such as “Try another way” or “Use phone number instead.” Platforms frequently allow identity verification via SMS text messages or automated voice calls when email communication fails.
Backup Security Codes
Many online services prompt users to download or print emergency recovery codes when enabling Two-Factor Authentication (2FA). These single-use multi-digit passcodes act as emergency bypass keys when standard authentication steps fail. Search your local files, printouts, or secure cloud drives for these codes.
Authenticator Apps and Hardware Security Keys
If your account relies on time-based one-time password (TOTP) apps (like Google Authenticator or Authy) or physical FIDO2/U2F security keys, you may still be able to prove your identity even without email access. Entering your valid credentials alongside an active authenticator token can grant access, after which you can update your profile details.
Manual Account Recovery & Identity Verification
When automated backup options fail, your remaining recourse is submitting an account recovery ticket to the service’s support desk. Modern platforms maintain automated tools or manual support queues to process identity claims.
Information to Prepare for Support Verification
To prevent fraud and protect user privacy, platform administrators will require strong evidence proving you are the genuine account owner. Gather as much of the following information as possible before submitting a request:
- Account History Details: Approximate month and year the account was created, recent profile updates, or historical passwords previously used.
- Transaction & Billing Evidence: Invoices, invoice reference numbers, order histories, or partial payment card details (such as the last four digits) associated with paid subscriptions.
- Known Connected Devices & IP Addresses: Brand names, operating system versions, and typical geographic locations or IP addresses used to log into the service.
- Government Identity Documents: A valid photo ID (driver’s license, passport, or national ID card) if requested by specialized verification portals.
Best Practices to Prevent Getting Locked Out in the Future
Once you successfully regain control of your online account, take proactive steps to strengthen your security setup and eliminate single points of failure.
1. Maintain Updated Secondary Contact Info
Always register at least one backup email address alongside a verified mobile phone number. Review your contact parameters whenever you change mobile carriers or transition away from work and school email accounts.
2. Generate and Store Offline Recovery Keys
Whenever you configure multi-factor authentication, generate offline backup codes immediately. Store them in a physical document safe or inside an encrypted password manager vault.
3. Use Password Managers with Secure Notes
Password managers allow you to attach security notes directly to stored logins. Record security question answers, creation dates, and account details in these notes so you have immediate access to them if verification is ever required again.
How Easy Login Hub Simplifies Account Management
Navigating different platform interfaces and security policies can feel overwhelming. Every major platform enforces distinct procedures for updating user details, navigating password resets, and contacting customer support desks.
At Easy Login Hub, we simplify these processes by publishing step-by-step guides for everyday web platforms, streaming tools, financial platforms, and social utilities. Whether you need an intuitive Login Guide, guidance on security best practices, or help resolving login hurdles, our independent resources are designed to help you maintain control of your online presence.
Frequently Asked Questions
Can customer support change my email address over the phone?
Most modern platforms do not permit account email changes over phone support due to caller ID spoofing and social engineering risks. Instead, support representatives will direct you to a secure, web-based identity verification workflow.
What if I forgot both my account password and my primary email?
If you lack both your password and primary email access, your recovery options depend heavily on whether you configured alternative verification channels (phone, backup codes) or can prove ownership using billing records and official identity verification forms.
How long does manual identity verification take?
Manual review timelines vary widely across organizations. Standard platforms usually process requests within 24 to 72 hours, though complex claims requiring document review can take up to several business days.
Final Thoughts
Losing access to your primary email address presents a real obstacle, but it does not mean your connected online accounts are permanently lost. By checking active sessions, leveraging alternative multi-factor channels, and providing thorough verification evidence to support teams, you can systematically recover your accounts. For more helpful technical walkthroughs and account management advice, explore the latest guides on Easy Login Hub.
by lukesmith | Aug 21, 2026 | Blog
Password autofill is one of the most convenient features built into modern web browsers. Instead of memorizing dozens of complex login credentials, your browser automatically fills in your username and password as soon as you land on a sign-in screen. However, when autofill suddenly stops working, gaining access to your everyday accounts can become frustrating.
Whether you are using Google Chrome, Mozilla Firefox, Microsoft Edge, or Apple Safari, autofill glitches are a common issue. At Easy Login Hub, we provide comprehensive login guides and practical advice to help you maintain seamless access to your favorite online services. In this detailed guide, we will explore why password autofill fails and walk you through step-by-step solutions to troubleshoot common login problems.
Disclaimer
EasyLoginHub is an independent informational platform providing user guides and troubleshooting tips. EasyLoginHub is not affiliated with, endorsed by, or operated by Google, Mozilla, Microsoft, Apple, or any third-party websites or services mentioned in this guide.
Common Reasons Why Browser Password Autofill Stops Working
Before jumping into solutions, it helps to understand why password autofill might fail on login screens. The issue usually stems from one of the following factors:
- Disabled Autofill Settings: A browser update or policy change may have turned off the setting that prompts saved passwords.
- Corrupted Browser Cache or Cookies: Cached data can conflict with updated web forms, preventing autofill scripts from detecting input fields.
- Extension Interference: Third-party security tools, ad blockers, or separate password managers can block built-in browser autofill capabilities.
- Website Code Rules: Some web developers insert specific code attributes (such as
autocomplete="off") on sensitive login forms for security reasons.
- Outdated Web Browsers: Running an outdated version of a browser can cause unexpected bugs on modern login pages.
- Mismatched Stored Credentials: If the site updated its domain structure or login URL, your saved credentials may no longer auto-associate with the new page.
Step-by-Step Solutions to Fix Password Autofill
If your saved credentials are not popping up, try these standard troubleshooting steps in order.
1. Check and Re-Enable Password Autofill Settings
The most straightforward reason autofill fails is that the feature was turned off in your browser preferences.
- Google Chrome: Navigate to Settings > Autofill and passwords > Google Password Manager > Settings. Ensure that “Offer to save passwords” and “Auto sign-in” are toggled on.
- Mozilla Firefox: Go to Settings > Privacy & Security > Logins and Passwords. Check the boxes for “Ask to save logins and passwords for websites” and “Autofill logins and passwords.”
- Microsoft Edge: Go to Settings > Profiles > Passwords. Ensure that “Offer to save passwords” and “Autofill passwords and passkeys” are enabled.
- Apple Safari: Open Preferences / Settings > AutoFill. Verify that the checkbox for “Usernames and passwords” is active.
2. Clear Cache and Browsing Data
Outdated or corrupted web cache can obscure form fields from your browser’s detection scripts. Clearing temporary internet files often resolves subtle form glitches.
- Open your browser settings menu.
- Locate the Clear Browsing Data or Privacy section.
- Select a time range (such as “All time” or “Past 7 days”).
- Select Cached images and files and Cookies and other site data.
- Confirm the action, restart your browser, and revisit the sign-in page.
3. Disable Conflicting Browser Extensions
Browser add-ons—especially content blockers, privacy protection extensions, or standalone password management apps—can interfere with your browser’s native autofill functionality.
- Open your browser’s Extensions or Add-ons management menu.
- Temporarily disable all active extensions.
- Reload the login page to test if autofill returns.
- If autofill works, re-enable your extensions one by one to identify the specific tool causing the conflict.
4. Delete and Re-Save Saved Credentials
Sometimes the stored entry for a specific website becomes corrupted or linked to an outdated URL path. Refreshing the saved record can resolve the issue.
- Access your browser’s saved passwords list.
- Search for the domain name of the affected site.
- Delete the stored entry for that platform.
- Navigate to the official login page and sign in manually.
- When prompted by your browser, save the password anew.
If you have lost access to your primary login credentials during this process, consult a dedicated Login Guide or seek account recovery assistance to restore your credentials safely before attempting to resave them.
5. Update Your Web Browser
Browser developers frequently release updates to fix rendering bugs, patch security vulnerabilities, and improve compatibility with modern web standards. Ensure your browser is running its latest version by navigating to its About section in the settings menu, which typically triggers an automatic check for updates.
6. Inspect Website Specific Restrictions
In rare instances, certain financial institutions, enterprise portals, or heightened-security platforms deliberately prevent automatic form filling to mitigate unauthorized script attacks. When a web form disables autofill:
- You may need to manually type your credentials.
- You can use a copy-and-paste method directly from your password management interface.
- Consider using browser feature overrides only if supported natively by your chosen browser developer.
Best Practices for Managing Saved Passwords Safely
While fixing password autofill restores convenience, keeping your accounts protected remains the top priority. Follow these essential tips from EasyLoginHub for secure login management:
- Protect Your Device: Always secure your computer or smartphone with a PIN, biometrics, or a strong device password to prevent unauthorized access to autofilled accounts.
- Use Unique Passwords: Avoid reusing passwords across multiple services. If one account is compromised, unique passwords ensure your other logins remain safe.
- Enable Two-Factor Authentication (2FA): Even when autofill works seamlessly, 2FA adds an critical extra layer of defense against unauthorized account access.
- Keep Emergency Details Secure: Ensure your recovery phone numbers and backup email addresses stay up to date so you can easily recover access if credentials fail.
Frequently Asked Questions (FAQ)
Why does password autofill work on some websites but not on others?
Websites are built differently. Some sites use non-standard field names, complex JavaScript login forms, or explicit security tags (like autocomplete="off") that prevent browser scripts from detecting where to enter saved credentials.
Is it safe to store passwords directly inside a web browser?
Built-in browser password managers offer convenient encryption and integration. However, to keep them safe, ensure your operating system user profile is password-protected and that device encryption (such as BitLocker or FileVault) is active.
What should I do if my browser autofills an old or incorrect password?
Go to your browser’s password manager settings, locate the entry for the specific domain, and manually edit or delete the old saved password. The next time you log in with the correct password, approve the prompt to save the updated version.
Can private browsing or incognito mode affect password autofill?
Yes. Private browsing windows often restrict access to stored cookies and auto-saved preferences depending on your browser’s privacy settings, which can cause password autofill options to disappear temporarily during that session.
Final Thoughts
Password autofill is a vital tool for seamless web navigation, but unexpected settings shifts, extension conflicts, or browser updates can temporarily disrupt it. By systematically checking your settings, clearing your cache, and managing your extension list, you can resolve most autofill glitches in just a few minutes.
For more clear tutorials, step-by-step account recovery insights, and helpful account management information, explore the latest resource guides available on Easy Login Hub.
by lukesmith | Aug 21, 2026 | Blog
Disclaimer: EasyLoginHub is an independent informational platform providing educational resources, news, and step-by-step guides. EasyLoginHub is not affiliated with, endorsed by, or connected to any third-party companies or online service providers mentioned in this article.
Realizing that your online account has been compromised is stressful. However, discovering that the intruder has logged in, changed your password, and replaced your recovery email address and phone number can feel overwhelming. When standard password reset links are directed to an attacker’s inbox or phone, traditional recovery methods no longer work.
Despite these changes, online platforms have built-in safeguards designed to handle unauthorized account takeovers. At Easy Login Hub, we specialize in providing clear, actionable security insights and login guides to help users navigate complex account access issues. This article provides a comprehensive guide on how to reclaim a compromised account even when your recovery credentials have been completely altered.
1. Act Swiftly: Search for Security Notifications in Your Original Email
When security credentials like a primary email, recovery email, or phone number are updated, most major services automatically send an alert to the original email address. These security alert emails serve as a first line of defense against account takeovers.
- Look for Security Link Overrides: Check your original email account (including Spam, Junk, and Trash folders) for recent security notifications from the service. Many platforms include a dedicated link such as “Was this not you?” or “Revert changes.”
- Time Sensitivity: These security links are often active for a limited time (frequently 24 to 72 hours). Clicking these specialized links allows you to temporarily freeze access or instantly revert the email change back to your original address.
- Check Deleted Messages: If an attacker briefly gained access to your primary email to confirm the change, they may have deleted the confirmation or notification messages. Check your deleted items folder or bin immediately.
2. Attempt Recovery from a Known Device and Network
Modern authentication engines analyze background telemetry, such as device identifiers, browser fingerprints, and IP address history, to gauge user legitimacy. When you attempt to recover an account, platform security algorithms evaluate whether the request comes from a familiar environment.
To maximize your chances of automated verification:
- Use a Previously Trusted Device: Initiate the recovery process using the specific laptop, smartphone, or tablet you regularly used to log into that account.
- Connect via a Familiar Network: Use your primary home or work Wi-Fi network rather than a public connection, VPN, or mobile data network.
- Use Your Standard Browser: Open the web browser you typically use for that service rather than an incognito or fresh browser window, as existing session cookies and cache history can help verify identity.
3. Navigate to Alternative Verification Methods
When you enter your username or original email on a login screen and click “Forgot Password?”, systems usually default to sending a verification code to the current (hacked) recovery options. When those details belong to the hacker, look for alternative prompts such as:
- “Try another way”
- “I don’t have access to these options”
- “Verify your identity”
Clicking these options opens secondary security workflows. Depending on the service provider, you may be offered specialized account recovery assistance mechanisms, such as:
A. Answering Historical Security Questions
Older accounts may fall back on security questions created during setup. Ensure you enter answers exactly as written originally, accounting for potential capitalization or spelling differences.
B. Entering Previous Passwords
Systems often ask you to provide the last password you remember using before the breach occurred. Providing an accurate, previously valid password strongly indicates legitimate account ownership.
C. Backup Codes or Hardware Security Keys
If you previously generated two-factor authentication (2FA) recovery codes or bound a physical security key (like a YubiKey) to your account, you can often bypass altered email and phone credentials entirely using these offline tools.
4. Complete Identity Verification and Account Escalation Forms
If automated methods fail because the security options were replaced, you will typically be routed to a manual or semi-automated account recovery form. To successfully complete this process, you must compile verifiable proof that you are the rightful account holder.
Prepare the following information before submitting an escalation form:
- Account History Details: The exact date or approximate month and year the account was created.
- Recent Account Activity: Folder names, labels, recent subject lines, or transaction history associated with the service.
- Billing & Payment Information: If the account is tied to paid subscriptions or services, provide the credit card holder name, billing address, last four digits of the payment card, or transaction reference IDs.
- Government Identification: Certain social media platforms and financial portals require uploading a clear image of a government-issued photo ID (passport, driver’s license) to confirm identity matches the legal name on record.
5. Secure Linked and Secondary Accounts Immediately
Account breaches rarely happen in isolation. If an attacker gains control of your email address or phone number through a SIM swap, they may attempt a cascade attack across your other digital accounts.
While working to reclaim the primary account, take these immediate protective actions:
- Update Passwords Everywhere Else: Ensure that any account sharing the same or a similar password gets updated to a strong, unique passphrase immediately.
- Check Email Forwarding Rules: If your underlying email account was breached, check its settings for unauthorized auto-forwarding rules or filter settings created by the attacker to quietly steal password reset links.
- Contact Your Mobile Carrier: If you suspect a SIM swap (e.g., your phone suddenly loses cellular network access completely), contact your mobile service provider to lock your account with a PIN.
6. What to Do After Regaining Account Access
Once you successfully reclaim your account using official workflows, you must immediately secure the account environment to prevent the attacker from regaining entry.
- Revoke Active Sessions: Access the security dashboard and choose “Log out of all other sessions” or “Sign out everywhere” to terminate any active connections held by the hacker.
- Remove Unrecognized Recovery Details: Thoroughly inspect recovery email addresses, secondary phone numbers, and backup emails, removing any unknown details added during the breach.
- Enable App-Based Two-Factor Authentication (2FA): Switch from SMS-based verification to an authenticator app (like Google Authenticator, Authy, or Microsoft Authenticator) or a hardware security key. Authenticator apps are immune to SIM swapping attacks.
- Generate and Save Backup Codes: Store offline backup codes in a secure location, such as a physical safe or an encrypted password manager.
Need Help Accessing Online Portals?
Navigating portal security updates, finding support forms, and setting up multi-factor authentication can feel complicated. EasyLoginHub delivers practical tutorials to help users manage account access and troubleshoot common login problems across various online services securely.
Frequently Asked Questions
Can I recover an account if I don’t have access to my original recovery email?
Yes, but you will need to rely on alternative identity verification options. Platforms generally provide escalation options such as answering account creation questions, verifying previous transactions, using trusted devices, or submitting government-issued identification.
How long does manual account recovery usually take?
Manual review timelines vary widely depending on the platform and current support volume. Automated checks can resolve within minutes to hours, while manual identity verification reviews typically take anywhere from 24 hours to several business days.
Why do hackers change the recovery phone number and email first?
Intruders change recovery information immediately to lock out the legitimate owner and intercept any multi-factor authentication or password reset requests, making standard automated recovery attempts fail.
What should I do if my recovery request is denied?
If your initial recovery submission is declined, gather additional evidence (such as earlier transaction receipts, accurate creation dates, or former billing information) and submit a new request from a trusted device and location.
by lukesmith | Aug 21, 2026 | Blog
Few digital issues are as frustrating as being locked out of an online account, clicking “Forgot Password,” and then waiting endlessly for a password reset email that never arrives. Whether you are attempting to access your online banking, social media, work portal, or streaming subscription, a missing reset link stops your productivity in its tracks.
At Easy Login Hub, we provide clear, reliable advice to help users navigate access barriers across various online platforms. Our practical login guides are designed to make technical troubleshooting straightforward and stress-free.
Disclaimer: Easy Login Hub is an independent informational platform and is not affiliated with, endorsed by, or operated by any third-party companies, service providers, or platforms mentioned in our guides.
1. Check Your Spam, Junk, and Promotional Folders
The most common reason for a missing password reset email is aggressive spam filtering. Email providers like Gmail, Outlook, Yahoo, and Apple Mail use automated algorithms to categorize incoming messages. Often, automated verification links get misflagged as unsolicited bulk mail or promotional material.
- Check the Spam/Junk folder: Look for messages sent within the last 15 to 30 minutes.
- Inspect Secondary Tabs: In Gmail or webmail clients with tabbed inboxes, check the Promotions, Updates, or Social tabs.
- Mark as “Not Spam”: If you find the reset message in your spam folder, select it and mark it as safe. This ensures future security alerts deliver directly to your primary inbox.
2. Verify the Email Address You Entered
It is surprisingly easy to make a small typo when filling out a recovery request form. Common mistakes include misspelling the domain name (e.g., typing gmai.com instead of gmail.com) or leaving out a dot or number in your username.
Additionally, make sure you are checking the specific email inbox associated with that platform. Many people maintain multiple email addresses for personal, work, and secondary sign-ups. If you submitted a reset request using one email address but are monitoring another, you will not see the message.
If you suspect an error, return to the platform’s sign-in page and resubmit the request carefully. To troubleshoot common login problems effectively, always verify that your username and recovery email match the credentials on file.
3. Inspect Email Storage Capacity and Limits
If your email inbox has reached its maximum storage quota, your email provider will reject new incoming messages. When an inbox is full, incoming emails—including critical security and password reset communications—are returned to the sender as “bounced mail.”
How to resolve inbox storage issues:
- Delete older emails with heavy attachments to free up space immediately.
- Empty your Trash and Spam folders, as items in these folders often still count toward your total storage limit.
- Check your cloud storage allotment if your email service shares storage space with cloud drives (such as Google One or Microsoft OneDrive).
Once storage is cleared, trigger a new password reset request from the service’s access page.
4. Review Blocked Senders and Custom Filtering Rules
Over time, users set up custom mail filters, rules, or blocked sender lists to keep their inboxes organized. You may have inadvertently blocked automated messages from the service provider’s domain.
- Check your Blocked Addresses: Look in your email settings for any addresses containing domain names associated with the service (e.g.,
no-reply@service.com or notifications@service.com).
- Review Inbox Rules: Ensure you do not have an active rule automatically routing messages with keywords like “Password,” “Reset,” or “Verification” directly to the Trash or Archive.
- Whitelist System Domains: Add official notification email addresses from the service to your email contacts to guarantee delivery.
5. Account for Mail Server Delays and Rate Limits
Password reset emails are usually generated instantly, but email deliverability is not always immediate. Network congestion, temporary server outages, or security checks on either the sender’s or recipient’s server can cause delays ranging from several minutes to hours.
Furthermore, rapidly clicking “Resend Email” multiple times can work against you. Many systems implement anti-abuse protections that apply temporary rate limits or invalidate previous reset tokens every time a new request is generated. If you click the link from an earlier email after generating a new one, the link will show as expired or invalid.
Recommended Strategy: Submit a single password reset request and wait at least 15 to 20 minutes before requesting another link.
6. Explore Alternative Account Recovery Methods
If you continue to experience issues receiving reset emails, check whether the platform offers alternative identity verification methods. For detailed step-by-step assistance, reviewing our comprehensive Login Guide tutorials can help clarify your options.
Common alternative recovery features include:
- SMS or Phone Verification: Requesting a one-time passcode (OTP) delivered via text message to your registered mobile phone.
- Authenticator Apps: Entering a time-based security code from an app like Google Authenticator or Microsoft Authenticator.
- Backup Security Codes: Utilizing single-use recovery codes generated when you originally set up two-factor authentication (2FA).
- Security Questions: Answering pre-set security questions configured during account creation.
If these options are available, they often allow you to regain access without relying on email delivery.
7. Contact Official Customer Support Safely
When self-service troubleshooting options fail, your remaining option is to reach out directly to the platform’s official support team for specialized account recovery assistance.
When seeking direct support, always adhere to basic digital safety practices:
- Always navigate directly to the company’s official website or app to access support contact forms.
- Never search for third-party support phone numbers through unverified search engine ads, as these are often targets for deceptive scams.
- Be prepared to verify your identity using account history details, billing records, or government-issued identification, depending on the platform’s verification protocol.
- Remember that legitimate support teams will never ask you for your account password or full payment card numbers.
Best Practices for Preventing Future Login Issues
Once you regain access to your account, taking proactive steps can protect you from experiencing similar login barriers in the future:
- Keep Recovery Information Updated: Periodically review your profile settings to ensure your recovery email address and mobile phone number are current.
- Enable Two-Factor Authentication (2FA): Adding an extra layer of security not only protects your account but also provides alternative sign-in pathways.
- Use a Reliable Password Manager: Password managers securely store complex passwords and help prevent lockouts caused by forgotten credentials.
- Add Trusted Contacts: Where supported, configure secondary contact methods or trusted recovery accounts.
Frequently Asked Questions (FAQ)
How long should I wait for a password reset email before resending?
It is best to wait at least 15 to 20 minutes before attempting to request a new link. Server traffic or security filtering can cause brief delivery delays, and submitting multiple requests rapidly can invalidate the earlier links.
Why does my password reset link say it is expired or invalid?
Password reset links are typically designed to expire quickly (often within 15 minutes to 24 hours) for security reasons. A link will also become invalid if a newer reset request was triggered after the first one was sent.
Can I recover my account if I no longer have access to my registered email address?
Yes, but the process usually requires secondary verification methods such as SMS authentication, backup security codes, or submitting an identity verification form directly to the service provider’s official customer support team.
For more troubleshooting advice, security best practices, and walkthroughs, visit EasyLoginHub to explore our full library of independent guides.
by lukesmith | Aug 21, 2026 | Blog
Losing a smartphone, laptop, or tablet is a stressful experience. Beyond the physical loss of the hardware, the immediate concern is often digital security. Modern devices stay perpetually signed in to email accounts, social media platforms, password managers, cloud storage, and financial services. If an unauthorized individual gains access to an unlocked or easily bypassed device, your private data and digital identity could be at serious risk.
Fortunately, almost all major online services offer remote security options that allow you to sign out of active sessions, revoke device permissions, and protect your accounts from afar. In this comprehensive guide, we will walk you through the essential steps to remotely log out of your accounts across major platforms, secure your credentials, and restore your digital peace of mind. For additional security resources and step-by-step walkthroughs, visit Easy Login Hub.
Disclaimer: EasyLoginHub is an independent informational resource providing security tips, educational resources, and login guides. EasyLoginHub is not affiliated with, endorsed by, or operated by any third-party brands or service providers mentioned in this guide.
1. Secure Primary Ecosystem Accounts First
When securing your accounts after a device is lost or stolen, start with your primary operating system accounts (Google, Apple, or Microsoft). These primary accounts usually control device tracking, remote wiping, and central password syncing.
Google Accounts (Android & Chrome)
A compromised Google Account gives access to Gmail, Google Drive, saved passwords, and device location data. Securing it should be a top priority:
- Sign in to your Google Account on another computer or mobile browser.
- Navigate to the Security section of your account dashboard.
- Scroll to Your devices and select Manage all devices.
- Locate the lost or stolen device in the list of active sessions.
- Select the device and click Sign out to instantly terminate active sessions on that specific hardware.
- Use Google’s Find My Device tool to lock the screen remotely or trigger a full factory erase if the device cannot be recovered.
Apple ID (iPhone, iPad, Mac)
If you lose an Apple device, act quickly using another trusted Apple device or through the web:
- Go to official Apple account management or iCloud.com and sign in with your Apple ID credentials.
- Open Find Devices (Find My) to put your lost iPhone, iPad, or Mac into Lost Mode. This locks the screen with a passcode and disables Apple Pay cards.
- To remove account access completely, go to your Apple ID Account Settings, view your Devices list, click on the missing device, and choose Remove from Account.
- If recovery is impossible, choose Erase Device to perform a remote factory reset.
Microsoft Accounts (Windows & Xbox)
For Windows laptops or Microsoft services (Outlook, OneDrive, Office):
- Log in to your Microsoft Account dashboard on a secondary computer.
- Go to the Devices tab to find the connected computer or tablet.
- Select Find my device to lock it remotely.
- Go to the Security page and select Advanced security options. Scroll down and click Sign me out to terminate sessions across all browsers, apps, and platforms within 24 hours.
2. Remotely Terminate Social Media & Messaging Sessions
Social media platforms and messaging apps are prime targets for impersonation, phishing, and unauthorized access. Terminate all active sessions remotely to secure your social identity.
Meta Platforms (Facebook & Instagram)
- Access your account settings on a secure browser or mobile device.
- Navigate to the Accounts Center, then choose Password and Security.
- Select Where you’re logged in.
- Review the list of active devices, tap the lost device, and click Log Out.
X (formerly Twitter)
- Open Settings and Privacy > Security and account access > Apps and sessions.
- Click on Sessions to see every active login.
- Select the session tied to your missing device and click Log out of the device shown.
Messaging Apps (WhatsApp, Telegram, Signal)
For messaging applications, log into the application on a new primary smartphone using your original phone number. This automatically disconnects and revokes active messaging sessions on the old hardware.
3. Change Passwords to Force Universal Logouts
Many online services use persistent session tokens to keep users logged in. Changing your password is the most effective way to invalidate these tokens and force a system-wide logout across all hardware.
In your security recovery checklist, systematically update the passwords for:
- Primary email accounts (Gmail, Yahoo, Outlook, iCloud)
- Financial institutions and digital wallets (PayPal, banking apps)
- Password managers (Bitwarden, 1Password, LastPass)
- Cloud storage services (Dropbox, OneDrive, Google Drive)
- Work and corporate accounts (Slack, Teams, Zoom, VPNs)
When updating your passwords, always select the option that reads “Sign out of all other devices” or “Revoke active sessions” if prompted during the password reset workflow.
4. Revoke Banking, Payment, and Password Manager Access
Financial security requires immediate intervention to prevent monetary loss:
- Contact Your Bank: Notify your financial institution to freeze mobile banking access tied to the lost phone’s hardware ID.
- Revoke Payment Cards: Deactivate digital wallet cards connected to Apple Pay, Google Wallet, or Samsung Pay.
- Deauthorize Password Managers: Log into your password manager’s web dashboard and manually revoke the missing device’s authorization key to block access to your stored vault.
5. Additional Essential Security Measures
Once you have initiated remote logouts and updated your credentials, complete these final protective actions:
Contact Your Mobile Carrier
Call your cellular provider to report the device lost or stolen. Request them to:
- Disable your SIM card or eSIM profile to prevent unauthorized phone calls, text messages, and SMS-based two-factor authentication (2FA) verification codes.
- Blacklist the phone’s IMEI number so the hardware cannot be re-activated on another mobile network.
Audit Two-Factor Authentication (2FA) Setup
If your multi-factor authentication app (like Google Authenticator or Authy) was on the lost device, restore your authenticator profiles on a secondary device using your backup keys. Immediately revoke security keys or app connections tied exclusively to the missing hardware.
How Easy Login Hub Can Help
Navigating account recovery options during a crisis can feel overwhelming. At Easy Login Hub, we simplify online security by providing step-by-step guides, helpful resources, and account recovery assistance. Whether you need to recover a locked social media account, learn how to set up multi-factor authentication, or troubleshoot common login problems, our comprehensive library offers reliable information to protect your digital identity.
If you are looking for platform-specific security guidance, check out our latest Login Guide tutorials to keep your credentials secure across every device you own.
Frequently Asked Questions
Does changing my password automatically log me out on other devices?
On most major platforms (such as Google, Microsoft, Meta, and Netflix), changing your password immediately revokes active session tokens and forces a remote logout on all other signed-in devices. However, it is best practice to manually select “Sign out of all devices” during the password change prompt whenever available.
What happens if my lost device is offline or turned off?
If your missing device is offline, remote logout and wipe commands will enter a pending status. As soon as the device turns back on and connects to a cellular or Wi-Fi network, the remote logout and erase commands will automatically execute.
Can someone access my accounts if my lost phone is protected by a passcode?
A strong device passcode, PIN, or biometric lock significantly protects your local data. However, if an attacker removes your SIM card and puts it into another phone, they may receive your SMS verification codes unless you immediately contact your mobile carrier to suspend the SIM.
Final Thoughts
Losing an electronic device is inconvenient, but taking immediate action minimizes risk to your personal information. By remotely signing out of primary accounts, updating critical passwords, revoking payment tokens, and contacting your carrier, you effectively seal off potential entry points for unauthorized users. Bookmark EasyLoginHub for fast access to account management guides and digital security strategies whenever you need them.
by lukesmith | Aug 21, 2026 | Blog
Disclaimer: EasyLoginHub is an independent informational resource. EasyLoginHub is not affiliated with, endorsed by, or connected to any third-party web services, brands, or platforms referenced in this guide.
Few technical issues are as frustrating as entering your password into a website or app, double-checking every character, and still being greeted with a bold red message: “Incorrect Password.” You know your password. You might even have typed it correctly a dozen times this week. Yet, the login screen refuses to grant access.
Authentication failures don’t always mean you’ve forgotten your credentials. Modern web security, browser mechanics, local software settings, and keyboard configurations can all alter or block the data sent to a server. When you need to troubleshoot common login problems, understanding what happens behind the screen is the fastest way to regain control of your account.
This comprehensive guide breaks down step-by-step methods to resolve unexpected password rejection errors and regain access smoothly.
1. Eliminate Hidden Typing Errors
Even when you are certain of every keystroke, minor hardware or mechanical settings can alter the text being transmitted.
- Check Caps Lock and Num Lock: Passwords are case-sensitive. Accidental toggles of the Caps Lock key are the single most common cause of unexpected password errors. Similarly, if your password includes numbers typed on a numeric keypad, verify that Num Lock is enabled.
- Use the “Show Password” Toggle: Whenever available, click the eye icon or unmask option in the password field. Viewing the raw text reveals unexpected spaces, missed capital letters, or repeated characters caused by a sticky key.
- Watch Out for Trailing Whitespace: If you copy and paste your password from a note or document, software often automatically highlights an extra space at the beginning or end of the text string. Highlight the text manually or type it out character-by-character to avoid invisible spaces.
2. Inspect Keyboard Layout and System Localization
System settings on computers and mobile devices can change key bindings without obvious visual warnings, causing the key you press to send a completely different character to the browser.
Accidental Language Layout Switches
Operating systems like Windows and macOS support shortcuts (such as Alt + Shift or Cmd + Space) that switch active keyboard languages. If your system switches from an English QWERTY layout to a French AZERTY or German QWERTZ layout, critical letter keys like ‘Q’, ‘W’, ‘Y’, and ‘Z’ change places.
Special Character Mapping
Special characters (such as @, #, !, or $) vary significantly between regional keyboard layouts. If your password contains special characters and your system keyboard profile shifted, the server receives mismatched symbols. To test this, open a plain text editor (like Notepad or TextEdit), type your password out, verify that every character prints correctly, and then copy it into the login box.
3. Address Browser Extensions, Cache, and Autofill Conflicts
Web browsers store credentials and site scripts to speed up future logins. However, corrupted cache files or outdated browser extensions can interfere with the authentication process.
- Clear Outdated Browser Autofill Entries: Browsers often automatically fill in stored passwords. If you recently updated your account credentials on another device, your current browser might still be submitting your old, saved password behind the scenes. Delete the saved entry in your browser settings or overwrite it with the updated password.
- Test in Private / Incognito Mode: Open an Incognito or Private Browsing window and try logging in. Private mode disables most browser extensions and ignores cached cookies. If the login works in private mode, the issue is likely caused by a browser extension (such as an ad blocker or script manager) or a corrupted cache file.
- Clear Cookies and Site Cache: Corrupted browser cookies can create infinite redirect loops or send invalidated session tokens, prompting the server to throw a generic password error. Clear the browser cache and cookies specifically for the website giving you trouble, then restart the browser.
4. Resolve Password Manager and Device Sync Delays
If you rely on a dedicated password manager or cloud keychain, synchronization issues across multiple devices can lead to persistent password errors.
When you update a password on a smartphone, it may take a few minutes—or require a manual sync—to update on your desktop computer. Always inspect the vault entry in your password manager to check the “last modified” timestamp. If the password entry hasn’t updated across all devices, check your internet connection or force a sync within the password manager settings.
5. Account Lockouts, IP Rate-Limiting, and VPN Interactions
Sometimes the issue isn’t the password itself, but security barriers triggered by repeated failed attempts or unexpected network traffic.
Temporary Rate Limits and Account Suspensions
To guard against brute-force attacks, security systems automatically lock accounts or IP addresses after a specified number of failed login attempts. When an account enters a temporary lockout phase, typing the correct password will still yield an error message. Wait 15 to 30 minutes without attempting to log in to allow temporary lockouts to clear automatically.
VPN and Proxy Triggers
If you are connected to a Virtual Private Network (VPN) or proxy server, the service may flag your connection as suspicious due to unusual geographic movement or shared IP activity. Disconnect your VPN temporarily or switch to a local server location, then attempt to log in again.
6. When to Initiate Account Recovery
If you have cleared your browser settings, verified your keyboard layout, checked for hidden spaces, and waited out temporary rate limits, it may be time to reset your password officially.
Navigating account resets requires using verified recovery workflows provided directly by the platform:
- Select the official “Forgot Password” or “Reset Password” link located on the legitimate login page.
- Check your registered email account or mobile device for security verification codes.
- Check spam and junk folders if the password reset email does not arrive promptly.
- Create a robust, unique replacement password and store it immediately in a secure password manager.
How Easy Login Hub Can Support Your Digital Access
Navigating online portals, security settings, and platform updates can feel overwhelming. At Easy Login Hub, our mission is to empower users with practical technical knowledge and step-by-step guidance. Whether you are looking for general account recovery assistance, practical security tips, or a clear step-by-step Login Guide, our independent repository offers accessible educational resources designed to make online account management simple and stress-free.
By consulting structured login guides and standard troubleshooting strategies, you can minimize digital headaches and keep your essential online accounts secure and accessible.
Frequently Asked Questions (FAQ)
Why does my password say incorrect right after I changed it?
This usually happens when your browser’s auto-fill feature automatically submits your old, saved password instead of the newly created one. Clear your saved credentials in your browser or password manager, or type the new password manually to ensure it registers correctly.
Can a security extension or ad blocker block my login?
Yes. Certain privacy extensions, ad blockers, and script blockers block background authentication scripts (like CAPTCHA or security token scripts) necessary to verify your request. Disabling extensions temporarily or logging in through a private browsing window can confirm if an extension is interfering.
What should I do if I am completely locked out and not receiving reset emails?
First, inspect your spam, junk, and promotional email folders. Ensure your inbox storage isn’t full. If you still don’t receive recovery emails, verify that you are entering the exact email address or username associated with the account, or consult official platform help centers for alternative identity verification options.
by lukesmith | Aug 21, 2026 | Blog
Two-Factor Authentication (2FA) is one of the most effective security measures available for safeguarding your digital life. By requiring two separate forms of identification—typically a password combined with a time-sensitive code sent to your phone or generated by an authenticator app—2FA drastically reduces the risk of unauthorized account access. However, this robust protection can turn into a significant barrier when you lose access to your primary 2FA device. Whether your smartphone was stolen, dropped in water, or accidentally wiped during an update, being locked out of your vital accounts can be extremely stressful.
Fortunately, losing your 2FA hardware or app does not mean your online identity is permanently lost. Most online platforms provide alternative pathways to verify your identity and restore access. At Easy Login Hub, our mission is to offer clear, step-by-step login guides and reliable account recovery assistance to help you navigate these technical hurdles safely.
Disclaimer: EasyLoginHub is an independent informational resource providing general login and security advice. EasyLoginHub is not affiliated with, endorsed by, or partnered with any third-party brands or services mentioned in this guide.
Understanding the Common Reasons for 2FA Access Loss
Before diving into recovery strategies, it is helpful to understand why 2FA access failures occur so you can prevent them in the future. The most frequent causes include:
- Physical loss or damage: Losing your mobile phone, having it stolen, or suffering hardware failure that renders the screen unusable.
- Unbacked-up authenticator apps: Switching to a new phone without transferring local authenticator app data or restoring cloud backups.
- Phone number changes: Changing your mobile number without updating the SMS-based 2FA settings on your registered online profiles.
- Corrupted or misplaced hardware security keys: Misplacing physical USB security keys or experiencing NFC hardware malfunction.
Step-by-Step Recovery Guide When You Lose Your 2FA Device
When you discover that your primary authentication token is unavailable, stay calm and follow these practical steps to regain access to your account.
1. Locate and Use Your Emergency Backup Codes
When you initially configure 2FA on almost any service, the system prompts you to generate and save a list of emergency backup codes (often called recovery codes). These single-use alphanumeric keys are designed specifically for scenarios where your primary 2FA mechanism fails.
- Check your records for saved PDF files, printed sheets, or entries inside a secure password manager.
- Navigate to the account login page, enter your standard username and password, and click on options such as “Try another way,” “Use a backup code,” or “I don’t have access to my phone.”
- Enter one of your unused backup codes to instantly bypass the 2FA screen and complete your login.
Once logged in, your immediate priority should be to update your security settings, generate new backup codes, or register a new authentication device.
2. Check for Secondary Verification Methods
Many online platforms allow users to configure multiple verification options as secondary fail-safes during initial setup. If you do not have your primary authenticator device, check if the service supports any of the following alternatives:
- Secondary Email Address: Request a security link or code sent to an alternate email account registered to your profile.
- SMS or Voice Call: If your phone number has not changed but you lost access to an authenticator app, switch the verification method to an automated voice call or text message to a tablet or secondary line.
- Trusted Devices: Check if you remain logged in on another device, such as a home desktop, laptop, or tablet. If you are already authenticated on a secondary browser, you can often disable the old 2FA settings or authorize the new sign-in attempt directly from that session.
3. Restore Authenticator Apps via Cloud Backups
If you used a modern software authenticator app, your 2FA tokens might be backed up to your encrypted cloud account. When setting up your replacement smartphone:
- Download the authenticator software on your new device.
- Sign in with the cloud account associated with the app (e.g., your personal account on the application network).
- Select the restore option to download your saved 2FA tokens. If cloud sync was previously toggled on, your 2FA credentials will automatically repopulate.
4. Submit a Manual Account Recovery Request
If you lack backup codes, have no alternate verification options, and cannot restore an authenticator backup, your remaining recourse is to submit an official account recovery request directly to the service provider.
Because disabling 2FA presents a severe security risk, service support teams require rigorous verification before granting access. Depending on the service, you may be asked to provide:
- Proof of identity, such as a government-issued photo ID.
- Confirmation of historical account activity, such as recent purchase order numbers, previous passwords, or registered billing details.
- Verification using a custom automated link sent to your primary contact email address.
Manual identity verification can take anywhere from a few hours to several business days. Be patient and closely follow the instruction prompts provided by the service support portal.
How to Troubleshoot Common Login Problems During Recovery
Even when following official recovery pathways, unexpected obstacles can arise. Here is how to troubleshoot common login problems during the 2FA restoration process:
Delayed or Unreceived Verification Messages
If you rely on SMS or email codes during account recovery and they do not arrive promptly:
- Check your email’s spam, junk, and promotional folders.
- Restart your mobile phone to refresh your cellular connection to the network.
- Ensure your mobile carrier does not have active filters blocking short-code SMS notifications.
- Wait several minutes before requesting a new code to prevent invalidating previous requests due to rate limits.
Time Synchronization Issues on Hardware Tokens
Authenticator applications generate Time-based One-Time Passwords (TOTP) relying on exact system clocks. If your device time drifts out of sync by even a few seconds, generated codes will be rejected as invalid. Check your device settings and ensure the clock is configured to update time and date automatically over the network.
Proactive Strategies to Prevent Future 2FA Lockouts
Once you regain access to your locked account, taking proactive steps will ensure that a lost device never disrupts your access again:
- Store Backup Codes Securely: Print physical copies of emergency backup codes and keep them in a safe location, or store them in an encrypted digital safe/password manager.
- Register Multiple Authentication Options: Whenever a platform supports it, enable at least two methods—such as an authenticator app combined with a hardware security key or secondary phone number.
- Use Authenticator Apps with Secure Cloud Sync: Choose authenticator tools that offer encrypted multi-device synchronization so your login credentials can be seamlessly transferred when upgrading hardware.
- Audit Security Settings Periodically: Regularly review registered phone numbers, recovery email addresses, and active devices listed on your critical user accounts.
Final Thoughts
Losing access to a 2FA device can feel daunting, but following systematic recovery channels ensures you can re-establish control over your digital profiles securely. By utilizing emergency backup codes, leveraging secondary verification routes, or submitting formal manual recovery applications, you can successfully bypass authentication lockouts while maintaining robust security practices.
For more step-by-step assistance, security tips, and comprehensive advice on online portals, explore every detailed Login Guide available on EasyLoginHub.