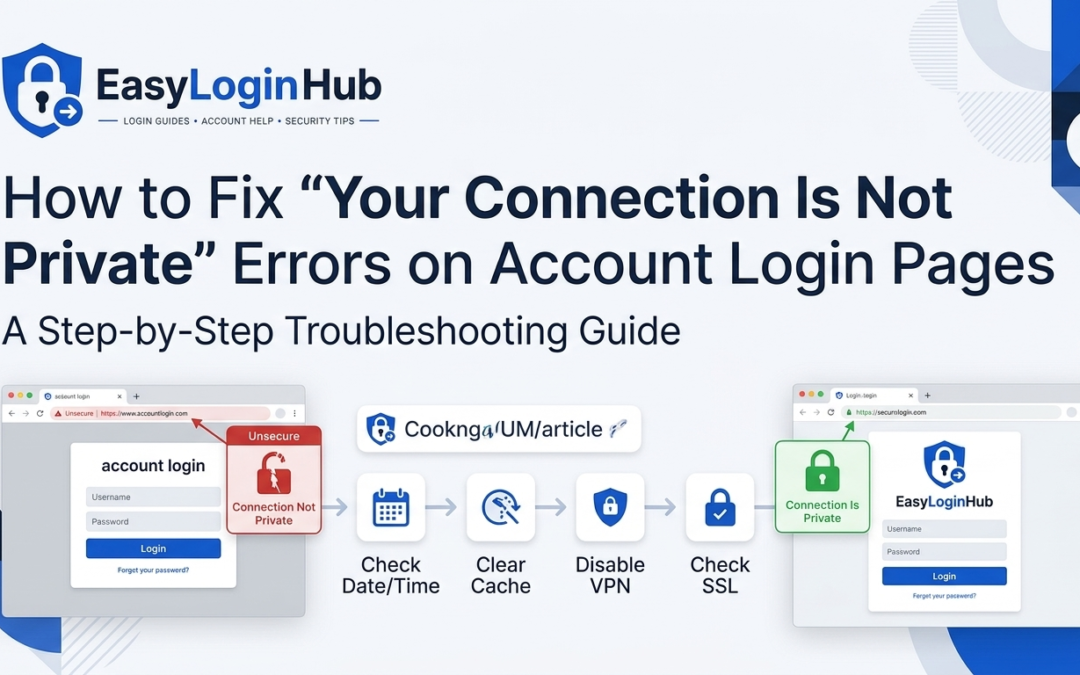
Attempting to access your email, online bank, streaming service, or work portal only to be blocked by a full-screen warning stating “Your Connection Is Not Private” can be frustrating. This security warning—often accompanied by error codes like NET::ERR_CERT_AUTHORITY_INVALID or SSL_ERROR_BAD_CERT_DOMAIN—is your web browser’s way of protecting your sensitive credentials from potential interception.
While this warning serves an essential security function, it does not always mean a malicious hacker is watching. Frequently, local browser glitches, misconfigured device settings, or temporary server updates cause these security flags. At Easy Login Hub, we provide clear login guides and technical walkthroughs to help users troubleshoot common login problems and regain safe access to their online accounts.
Disclaimer: Easy Login Hub is an independent informational platform providing general technical guidance and digital security education. Easy Login Hub is not affiliated with, sponsored by, or endorsed by any third-party services, software providers, or brands mentioned in this guide.
Understanding the “Your Connection Is Not Private” Warning
When you navigate to an account sign-in page, your browser establishes an encrypted session with the server hosting that platform using Secure Sockets Layer (SSL) or Transport Layer Security (TLS) protocols. This encryption ensures that your username, password, and private data cannot be read by third parties while in transit.
If your browser cannot verify the cryptographic certificate presented by the website, or if your device is configured in a way that interferes with the verification process, the browser halts the connection and displays the privacy warning. Entering password information on an unencrypted or improperly verified connection leaves your credentials vulnerable to “man-in-the-middle” (MitM) attacks.
Step-by-Step Troubleshooting Guide
Before bypassing any security warning, follow these sequential troubleshooting steps to identify whether the issue lies on your device, network, or the login portal itself.
Step 1: Reload the Page and Verify the Web Address
Occasionally, network glitches or temporary web server handshakes can trigger a false positive. Start with the simplest fix:
Refresh the browser: Hard refresh the page by pressing Ctrl + F5 (Windows) or Cmd + Shift + R (Mac).
Check the URL: Double-check the web address for typos. Attackers often register web addresses identical to legitimate login portals (a tactic known as typosquatting). Ensure the address begins with https:// rather than unencrypted http://.
Step 2: Check Your Device’s Date and Time Settings
SSL/TLS security certificates have strict validity periods with precise issue and expiration dates. If your computer or mobile device’s system clock is set incorrectly, your browser may evaluate a valid certificate as expired or not yet valid.
Windows: Go to Settings > Time & Language > Date & time. Enable “Set time automatically” and “Set time zone automatically.”
macOS: Go to System Settings > General > Date & Time, and toggle on “Set time and date automatically.”
Android / iOS: Open Settings > General / System > Date & Time and turn on automatic time synchronization.
After adjusting your system time, restart your browser and try loading the login page again.
Step 3: Test Access in Incognito / Private Browsing Mode
Browser extensions, corrupt cache files, or bad cookie data can corrupt your secure connection process. Opening an Incognito or Private Window loads the web page without active third-party extensions or cached session data.
Press Ctrl + Shift + N (Chrome/Edge) or Ctrl + Shift + P (Firefox) to launch a private window.
Navigate to the login portal. If the login page loads normally without any SSL warnings, an installed browser extension or corrupted cache is likely causing the error.
Step 4: Clear Cache, Cookies, and Browser SSL State
If private browsing resolves the error, clearing your standard browser data will typically fix the problem permanently.
Clear Browser Data: In your browser settings, clear your browsing history, cached images and files, and site cookies.
Clear SSL State (Windows): Search for Internet Options in the Windows search bar, go to the Content tab, and click Clear SSL State. This forces Windows to clear cached cryptographic certificates.
Step 5: Inspect Public Wi-Fi and Captive Portals
Connecting to public Wi-Fi networks in coffee shops, airports, or hotels is one of the most common triggers for the “Connection Is Not Private” error. Public networks frequently use “captive portals”—landing pages that require you to accept terms of service before granting internet access.
If you attempt to access an encrypted https:// account login page before completing the captive portal sign-in, your browser blocks the connection for safety. To resolve this:
Disconnect and reconnect to the Wi-Fi network.
Try visiting a non-sensitive, unencrypted page (such as http://example.com) to force the Wi-Fi portal log-in screen to appear.
Complete the portal acceptance process before attempting to log into your personal accounts.
Step 6: Review Antivirus and VPN Configurations
Security software and Virtual Private Networks (VPNs) protect your device by scanning internet traffic. Some third-party antivirus suites feature “HTTPS Scanning” or “SSL Interception,” which replaces web certificates with their own safety certificates. If your browser does not trust your antivirus software’s internal certificate, it will throw a private connection error.
Temporarily disable your VPN: Connect directly through your standard internet provider to see if the VPN node is causing the SSL conflict.
Check Antivirus Settings: Look for features labeled “SSL/TLS Scanning,” “Web Protection,” or “HTTPS Inspection” inside your antivirus application, and temporarily toggle them off to test access.
When Is the Error Server-Side?
If you have completed all client-side troubleshooting steps and the security warning persists across multiple devices and networks, the issue may stem from the platform provider’s infrastructure. Common server-side causes include:
Expired SSL Certificate: The site administrator forgot to renew their cryptographic certificate.
Domain Mismatch: The certificate was issued for a specific sub-domain that does not match the exact address of the login portal.
Untrusted Certificate Authority: The server uses a certificate issued by an authority no longer recognized by modern web browsers.
Crucial Security Rule: Never click “Proceed Anyway” or override security warnings on an account login page when connected to public networks or when dealing with sensitive services like banking, email, or corporate dashboards. Entering your credentials on an unverified connection exposes your password to potential theft.
Finding Additional Account Access Solutions
Navigating portal issues, locked screens, and forgotten passwords requires reliable technical information. Whether you need step-by-step assistance restoring access to your favorite social platform, recovering an old email address, or safely handling security alerts, reviewing a comprehensive Login Guide helps clarify each phase of the process.
For more troubleshooting guides, account access walk-throughs, and safe online sign-in practices, explore the resource library at EasyLoginHub. Our goal is to provide clear information that helps you manage your digital accounts securely and effectively.
Frequently Asked Questions
Is it safe to click “Proceed to Website (Unsafe)”?
It is generally unsafe to bypass this warning on any page where you enter passwords, payment details, or personal data. Bypassing the security shield means your data will be transmitted without valid encryption, making it vulnerable to interception.
Why does this SSL error only happen on one specific website?
If the error affects only a single login page while all other websites load normally, the issue is almost certainly server-side. The domain owner may have an expired certificate, an incorrect SSL configuration, or an active server migration.
Can a outdated web browser cause connection errors?
Yes. Web browsers update their built-in list of trusted Root Certificate Authorities regularly. Operating an outdated browser version may cause it to mark valid, modern security certificates as untrusted.
Where can I get expert account recovery assistance?
If security errors or lockouts prevent you from reaching your account, visit Easy Login Hub to access verified guides detailing password resets, service support contacts, and account recovery assistance strategies.
Security questions were once the gold standard for verifying identity online. From the name of your first pet to your high school mascot, these questions were designed to be easy for you to remember and difficult for strangers to guess. However, as years pass, memory fades—or slight variations in spelling, capitalization, and punctuation can make correctly answering them nearly impossible.
If you find yourself locked out because you cannot remember your security answers, you are not alone. At Easy Login Hub, we specialize in providing practical login guides and security insights to help you regain control of your digital presence safely.
Disclaimer: EasyLoginHub is an independent informational resource. We are not affiliated with, endorsed by, or connected to any third-party brands or service providers mentioned in our guides.
Why Security Questions Fail (and Why Services Are Moving Away From Them)
Security questions present several challenges for both users and service providers:
Formatting Errors: Did you write “St. Mary’s School” or “Saint Marys School” five years ago? Small formatting differences often trigger access denials.
Evolving Personal Information: Answers to questions like “What is your favorite book?” can change over time.
Security Risks: Many traditional security answers can be found through social engineering or public records.
Because of these flaws, major online platforms increasingly rely on multi-factor authentication (MFA) and alternative identity verification options rather than security questions alone.
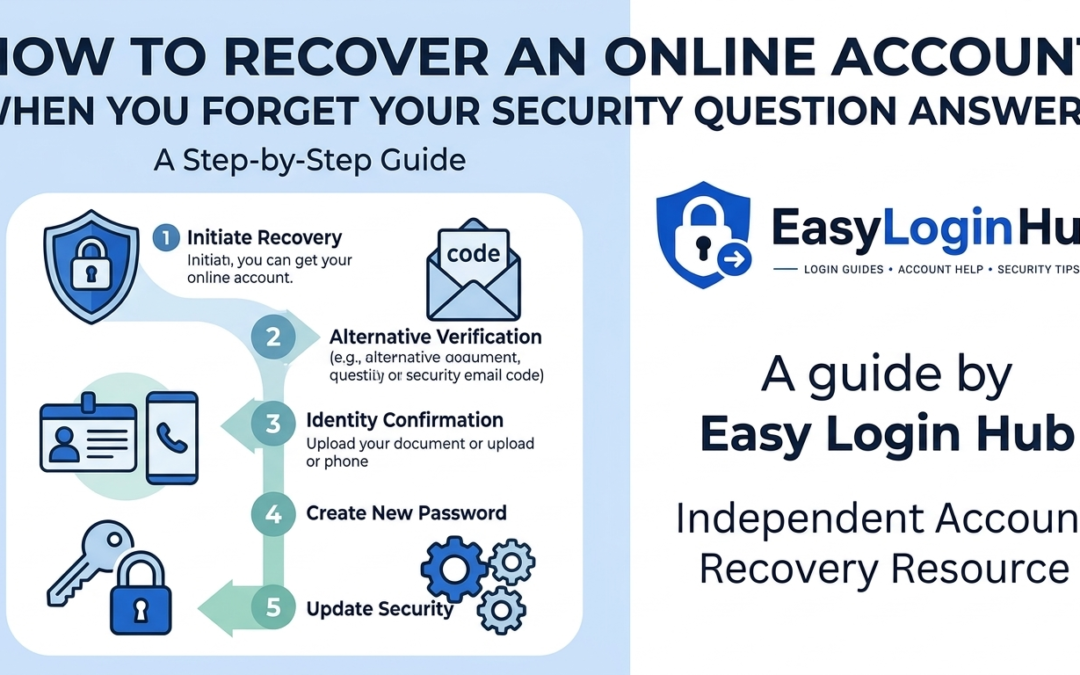
Step-by-Step Guide: How to Recover Your Account Without Security Answers
When you cannot answer your security questions, follow these structured steps to explore alternative recovery paths.
Step 1: Look for Alternative Verification Links
Most login screens provide multiple ways to verify your identity. If the system prompts you with a security question you cannot answer, look for secondary links on the screen such as:
“Try another way”
“I don’t have access to these answers”
“Verify using recovery email or phone number”
Clicking these options will often redirect you to identity verification via a temporary dynamic code sent to your primary mobile phone or secondary email address.
Step 2: Use Two-Factor Authentication (2FA) Fallbacks
If you previously enabled two-factor authentication on your account, you can often bypass security questions entirely by using your primary authentication method:
Authenticator Apps: Open your authenticator app (such as Google Authenticator, Microsoft Authenticator, or Authy) to generate a timed code.
SMS or Voice Codes: Request a dynamic text message or phone call to receive a verification pin.
Offline Backup Codes: Enter one of the single-use recovery codes generated when you first set up two-step verification.
Step 3: Log In from a Recognized Device or Location
Security systems monitor device fingerprints and IP locations. If you attempt account recovery from a brand-new device or an unfamiliar Wi-Fi network, the platform’s security software will enforce stricter verification challenges (like security questions).
To simplify the process:
Use a computer, tablet, or smartphone you have previously used to access the account.
Connect to your home or work Wi-Fi network rather than a public connection or mobile hotspot.
Use the same browser you normally rely on for logging in.
When platforms recognize your hardware and network, they may reduce the required identity challenges or permit a straightforward password reset link.
Step 4: Fill Out an Account Recovery Verification Form
If automated methods fail, many online platforms offer an manual account recovery form. These forms evaluate account ownership based on historical data rather than simple security questions. You may be asked to provide:
Previous passwords you remember using on the account.
Approximate account creation dates.
Recent activity details (such as subject lines of recent emails sent, recent transaction IDs, or contacts added).
Government-issued identification (for high-security financial or enterprise services).
Fill out these forms as accurately as possible. Even partial details can help automated verification algorithms confirm your identity.
Step 5: Contact Official Customer Support
If self-service options do not resolve the lockout, reach out to the platform’s official customer support team. Avoid searching for third-party support phone numbers through unverified search engine ads, as these can lead to tech support scams.
Always access support channels directly through the service provider’s official domain name.
How to Troubleshoot Common Login Problems During Account Recovery
Unexpected obstacles can slow down the recovery process. Here is how to handle frequent issues when seeking account recovery assistance:
1. Not Receiving Recovery Emails
Check your spam, junk, and promotional folders.
Ensure your inbox storage space is not full.
Add the platform’s official domain to your email safe-senders list.
Wait 10–15 minutes before requesting another code to prevent rate-limiting blocks.
2. Expired Verification Links
Most recovery links expire after 15 to 60 minutes for security purposes. If you open a link and receive an error, clear your browser’s cache and cookies, then initiate a fresh recovery request.
3. Lost Access to Recovery Email and Phone
If your backup email address or phone number is out of date, select the option indicating you no longer have access to these devices. This typically routes your request to an extended identity verification form or support ticket review. To troubleshoot common login problems of this nature, refer to specific service guides available on EasyLoginHub.
Preventing Future Lockouts: Account Protection Best Practices
Once you regain access to your account, take proactive steps to prevent future login issues:
Replace Security Questions with 2FA: Switch to safer authentication methods, such as an authenticator app or security key, which eliminate the reliance on memory-based answers.
Keep Recovery Information Updated: Ensure your phone number, secondary email address, and physical address listed on the account are current.
Use a Password Manager: Save your passwords, backup codes, and security question answers in a secure password manager to avoid typos and memory errors.
Store Backup Codes Safely: Whenever you enable multi-factor authentication, download the provided single-use recovery codes and store them in an encrypted digital folder or a secure offline physical location.
Frequently Asked Questions (FAQs)
What if I don’t remember any of my account recovery information?
If you lack access to your recovery phone number, recovery email, security answers, and 2FA fallback methods, you will need to submit an identity verification form directly to the platform. In some cases, platforms may require an official photo ID to restore access.
Can customer support give me the answers to my security questions?
No. Customer support representatives cannot view unencrypted security answers for privacy and security reasons. They can only assist you in resetting your security credentials after verifying your identity through alternative means.
Why is my security question answer being marked as incorrect even though I am sure it is right?
Security answers are often case-sensitive and strict regarding punctuation. For example, missing a space, adding a period, or using different capitalization can cause the system to decline your entry. Try common variations of your answer.
How long does manual account recovery take?
Automated verification (SMS codes or email links) takes only a few minutes. Manual reviews of identity forms or support tickets can take anywhere from 24 hours to several business days depending on the service provider.
Conclusion
Forgetting your security question answers can be frustrating, but modern platforms provide clear alternative paths to regain control of your account. By utilizing recovery emails, authentication apps, recognized devices, and formal verification channels, you can solve access issues securely.
For detailed step-by-step guidance tailored to specific platforms and services, consult an expert Login Guide on Easy Login Hub to help navigate your account access needs confidently.
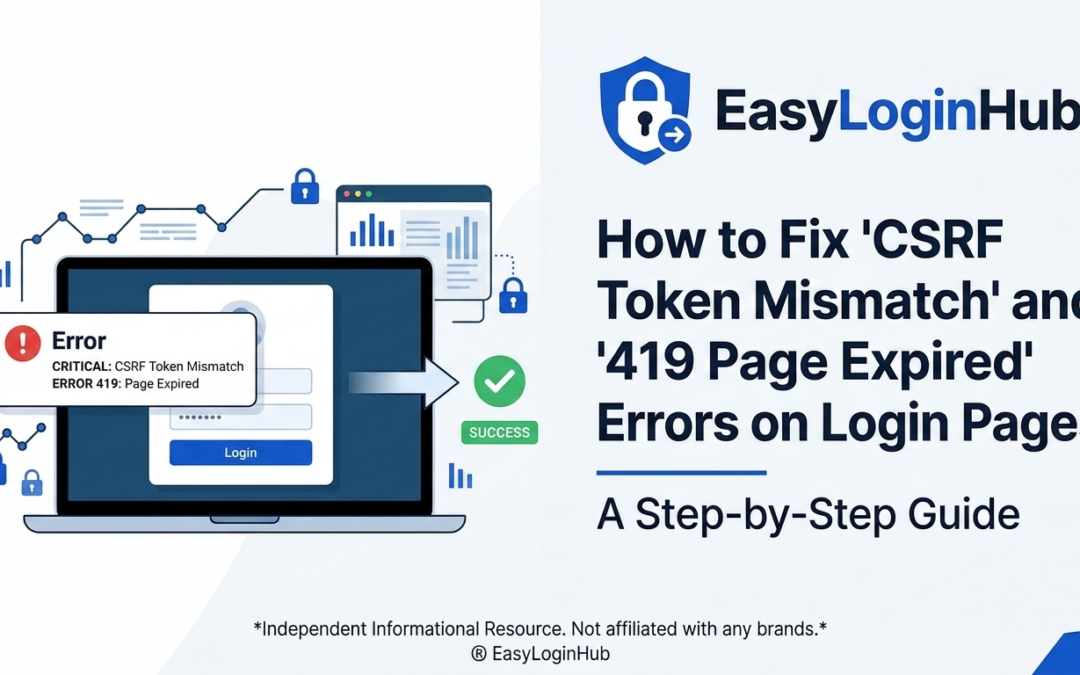
Few things are more frustrating than attempting to access an online account only to be blocked by an obscure technical error. If you have ever filled out a sign-in form, clicked “Login,” and immediately met with a message reading “CSRF Token Mismatch” or “419 Page Expired,” you are not alone. These messages are common across modern websites, web applications, and customer portals.
While these errors can seem alarming, they are actually generated by built-in web security mechanisms designed to protect your personal information. At Easy Login Hub, our goal is to help users troubleshoot common login problems and navigate account access obstacles with ease. In this comprehensive Login Guide, we will explain why CSRF and 419 errors occur, what they mean for your online security, and how you can resolve them in a few simple steps.
Disclaimer: EasyLoginHub is an independent informational resource providing step-by-step web guidance and account recovery assistance. EasyLoginHub is not affiliated with, authorized by, or operated by any third-party brands, websites, or software applications mentioned in this guide.
Understanding CSRF Tokens and the ‘419 Page Expired’ Error
To fix these login errors effectively, it helps to understand what is happening behind the scenes when a web page loads.
What Is a CSRF Token?
CSRF stands for Cross-Site Request Forgery. Cross-Site Request Forgery is a malicious technique where an unauthorized site trick a user’s web browser into executing unwanted commands on a trusted site where the user is currently authenticated.
To protect against these attacks, modern web application frameworks generate a unique, cryptographically secure string of characters known as a CSRF token whenever a page containing a form (such as a login or registration page) is rendered. This token is saved in your browser session and embedded inside the login form. When you submit your credentials, the web server compares the token sent by your form submission against the token stored in your active session. If both tokens match, the request is approved. If they do not match, the request is rejected with a “CSRF Token Mismatch” notification.
What Does ‘419 Page Expired’ Mean?
The 419 status code is a custom HTTP response code commonly utilized by popular web frameworks (such as Laravel) to denote that a CSRF token has expired or is invalid. When you see a “419 Page Expired” page, the server is simply telling your browser that the security token assigned to your browsing session is no longer active.
Why Do CSRF Mismatch and 419 Errors Happen?
There are several practical reasons why your browser and a remote web server might lose token synchronization during a login session:
Inactivity (Session Timeout): If you leave a login page open in a tab for an extended period without submitting it, the session on the server may expire. When you finally submit the form, the token is no longer valid.
Corrupted or Stale Browser Cookies: Web tokens rely heavily on browser cookies to maintain session state. Outdated, corrupted, or blocked cookies can prevent the server from recognizing your active session.
Multiple Open Tabs: Opening multiple login screens or account pages in separate browser tabs can cause newer session tokens to overwrite older ones, invalidating the form you submit in a previous tab.
Browser Extensions & Privacy Blockers: Script blockers, privacy-focused extensions, or aggressive anti-tracking tools can block necessary session cookies or scripts required to transmit the CSRF token.
System Clock Misalignment: If your computer or mobile device’s system time is set incorrectly, cookie expiration calculations can fail, leading to instant session invalidation.
Server-Side Caching Issues: On occasion, web administrators configure server caching too aggressively, causing static HTML forms with expired tokens to be served to visitors.
Step-by-Step Guide to Fix CSRF Token Mismatch and 419 Errors
If you encounter a CSRF or 419 error while logging into a website, work through the following practical troubleshooting steps to restore access.
Step 1: Perform a Hard Refresh on the Login Page
The fastest solution is often to force your web browser to reload the web page completely from the server, discarding cached files.
Windows/Linux: Press Ctrl + F5 or hold Ctrl while clicking your browser’s Reload icon.
Mac: Press Cmd + Shift + R or hold Shift while clicking the Reload icon.
This action fetches a completely fresh login form alongside a brand-new CSRF token generated by the server.
Step 2: Clear Browser Cache and Cookies
If refreshing does not solve the issue, cached files or invalid session cookies may be getting stuck in your browser memory.
Open your browser settings menu.
Navigate to the Privacy and Security section.
Select Clear Browsing Data or Clear History.
Choose a time range (select “All time” or “Everything” for best results).
Ensure Cookies and other site data and Cached images and files are checked.
Click Clear Data, restart your browser, and attempt to log in again.
Step 3: Close Duplicate Tabs
Having multiple tabs open to the same service can break session handling. Close all open tabs related to the site, open a single fresh tab, navigate directly to the login URL, and attempt to sign in.
Step 4: Test Access in Incognito / Private Mode
Private browsing disables most browser extensions and operates with an isolated cookie session. Open an Incognito or Private Window and navigate to the login page. If the page works without showing a 419 error, a browser extension or existing cookie cache is likely causing the problem in your standard browser window.
Ad blockers, privacy tools, or cookie managers can inadvertently block session tracking components. Try temporarily disabling ad-blocking or script-blocking browser add-ons to verify whether they are impeding CSRF token transmission.
Step 6: Ensure Cookies and JavaScript Are Enabled
CSRF verification requires cookies to store session keys and JavaScript to update dynamic forms. Verify your browser’s security settings permit essential first-party cookies and script execution for the domain you are trying to use.
Step 7: Check Your Device’s System Date and Time
Cookies depend on accurate timestamps. Verify that your operating system’s date, time, and time zone settings are configured to update automatically. A disparity of even a few minutes can cause security tokens to be treated as expired upon arrival.
Troubleshooting Tips for Web Developers and Site Administrators
If you manage a web platform built on frameworks like Laravel or Symfony and your visitors report persistent 419 Page Expired errors, the solution may require server-side adjustments:
Verify Session Domain Configuration: Check your environment files (such as .env) to ensure SESSION_DOMAIN matches your actual site domain precisely.
Review File Permissions: Ensure your server’s session storage folder (e.g., storage/framework/sessions in Laravel) has proper write permissions.
Check Cross-Origin (CORS) and SameSite Settings: Verify that SameSite cookie policies (Lax vs. Strict) align with how your sign-in forms interact across subdomains or external auth endpoints.
Implement Token Refresh Handling: For single-page applications (SPAs) or forms left open for long periods, consider implementing background JavaScript mechanisms to update CSRF tokens before submission.
Keeping Your Accounts Accessible and Secure
CSRF token checks and 419 page timeouts exist to protect your digital identity from unauthorized manipulation. Although encountering these errors can feel inconvenient, resolving them typically requires only a session refresh or cookie clearance.
For more detailed technical walkthroughs, account setup assistance, and solutions to common access errors across web platforms, explore our updated login guides available at Easy Login Hub.
Frequently Asked Questions (FAQ)
What does CSRF stand for?
CSRF stands for Cross-Site Request Forgery. It is a web vulnerability where malicious websites trick a user’s web browser into performing unauthorized actions on another website where the user is currently logged in.
Is a ‘419 Page Expired’ error a sign that my account has been hacked?
No. A 419 Page Expired error is simply a session management error. It means the temporary security code assigned to your current web page session expired before you submitted your form. It does not indicate a security breach or an unauthorized login attempt on your account.
Why does the 419 error keep happening every single time I try to log in?
If the error occurs repeatedly despite reloading the page, your browser is likely holding onto corrupted session cookies, blocking third-party/session cookies, or running an aggressive privacy extension. Clearing your browser cache and testing the login in an Incognito window usually solves persistent occurrences.
Will clearing my browser cookies log me out of other platforms?
Yes. Clearing all browser cookies removes saved session data across websites, which will require you to re-enter your credentials on active accounts. To avoid logging out of every service, you can choose to clear cookies specifically for the website giving you the 419 error within your browser’s advanced settings.
Few digital frustrations are as irritating as getting stuck in a persistent login loop. You navigate to a website you use daily, enter the correct username and password, press sign-in, and… nothing happens. Or worse, the page reloads back to the login screen, displays a cryptically vague session error, or insists your account is logged in when it clearly is not.
When you seek standard technical support to troubleshoot common login problems, the default advice is usually to clear your browser’s history, cache, and cookies. While this nuclear option often solves the issue, it carries a heavy penalty: it wipes out session data across the entire web. Suddenly, you are logged out of your email, streaming platforms, project management tools, and online banking, forcing you to complete multi-factor authentication requests across dozens of tabs.
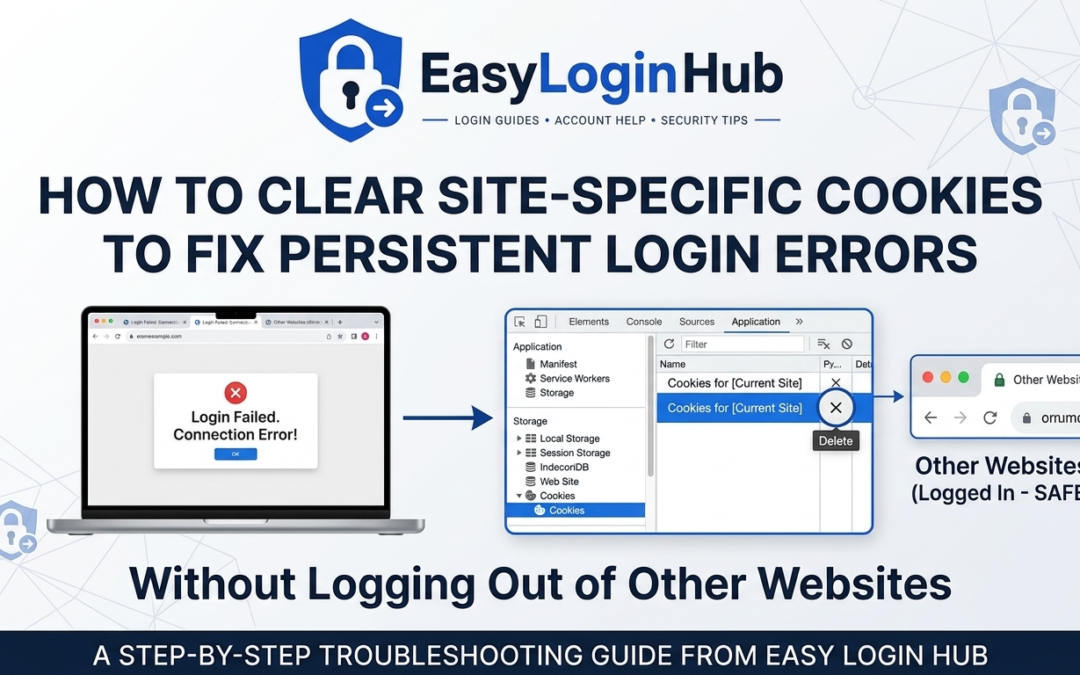
Fortunately, there is a far more precise solution. By learning how to clear site-specific cookies, you can resolve stubborn authentication bugs for a single troublesome domain while leaving the rest of your active browser sessions completely untouched. In this guide from Easy Login Hub, we break down step-by-step instructions for every major desktop and mobile browser.
Disclaimer: EasyLoginHub is an independent informational resource providing technical guides and digital troubleshooting advice. We are not affiliated with, endorsed by, or connected to any browser developer or third-party web service mentioned in our guides.
Why Do Cookies Cause Persistent Login Errors?
To understand why clearing a single site’s cookies works, it helps to understand what browser cookies actually do. When you log into a service, the server sends a tiny piece of data—a session cookie—to your browser. This token acts as a digital pass, telling the server who you are every time you load a new page without requiring you to re-enter your password.
Login glitches occur when these digital tokens become corrupted or out of sync. Common causes include:
Server-Side Updates: The website updates its authentication architecture, rendering your saved browser session cookie obsolete or invalid.
Expired Tokens: The session key has expired on the web server, but your browser continues sending the stale cookie data.
Conflicting Multi-Account Sessions: If you switch between personal and work accounts on the same site, overlapping cookie files can cause endless redirect loops.
Browser Crashes or Network Drops: Interrupted connections while a cookie is being written can leave partial, corrupted data on your local system.
When these issues arise, your browser keeps presenting a bad credential pass to the site. Removing that specific set of data forces the site to issue a completely clean session token upon your next login attempt.
Method 1: Google Chrome (Desktop)
Google Chrome provides two ways to remove cookies for a single domain: a quick method using the address bar and a detailed method through settings.
Quick Method (Address Bar Lock Icon)
Navigate to the domain that is giving you login errors.
Click the Tune icon or Padlock icon located on the far-left side of the address bar (next to the URL).
Select Cookies and site data from the dropdown menu.
Click Manage on-device site data.
Click the trash can icon next to the stored data for that domain, then click Done.
Reload the webpage and attempt to log in again.
Detailed Settings Method
Click the three vertical dots in the top-right corner of Chrome and select Settings.
In the left-hand navigation panel, click Privacy and security.
Select Third-party cookies (or Site settings depending on your Chrome build).
Click See all site data and permissions.
Type the name of the problematic website into the search box at the top right.
Click the trash can icon next to the domain name, then confirm by clicking Delete.
Method 2: Mozilla Firefox (Desktop)
Firefox makes domain-level troubleshooting straightforward directly from the active tab.
Address Bar Method
Open the website experiencing login issues.
Click the Padlock icon to the left of the URL in the address bar.
Select Clear cookies and site data…
A pop-up box will appear displaying the current domain. Ensure the site is selected and click Remove.
Refresh the page.
Privacy Settings Method
Click the menu button (three horizontal lines) in the top-right corner and choose Settings.
Select Privacy & Security from the left sidebar.
Scroll down to the Cookies and Site Data section.
Click the Manage Data… button.
In the search field, type the name of the site you want to fix.
Select the domain from the list and click Remove Selected.
Click Save Changes and confirm the action.
Method 3: Microsoft Edge (Desktop)
Because Microsoft Edge shares the Chromium engine, its domain cookie management closely mirrors Chrome’s process.
Visit the site where you are encountering session errors.
Click the Lock icon or Site Information icon immediately to the left of the URL bar.
Click Cookies.
A window will appear listing all cookies loaded by that site. Expand the main domain folder.
Select the individual cookie sub-folders or the root domain, then click Remove.
Click Done and refresh your browser.
Method 4: Apple Safari (Mac)
Safari handles cookies slightly differently, requiring access through its main preferences menu rather than the address bar.
Open Safari on your Mac.
Click Safari in the top menu bar and select Settings… (or Preferences… on older macOS versions).
Navigate to the Privacy tab.
Click the Manage Website Data… button.
Use the search box in the top-right corner to locate the specific website domain.
Highlight the domain from the search results and click Remove at the bottom of the window.
Click Done, close the settings panel, and reload the web page.
Mobile Browsers: Android and iOS
Managing cookies for a single website on mobile operating systems can be slightly more constrained due to mobile UI limitations, but options exist depending on your browser:
Chrome on Android: Open the problematic site > tap the Page Info/Lock icon near the address bar > tap Cookies and site data > tap the trash icon next to stored data.
Safari on iOS (iPhone/iPad): Open iOS Settings > scroll down and select Safari > tap Advanced at the very bottom > select Website Data > search for the domain > swipe left on the domain name and tap Delete.
What to Do After Clearing Site-Specific Cookies
Once you have isolated and deleted the cookies for the broken domain, take the following steps to complete the reset process:
Hard Refresh the Page: Force your browser to download fresh scripts by pressing Ctrl + F5 (Windows) or Cmd + Shift + R (Mac).
Re-enter Credentials Carefully: Ensure autofill isn’t submitting outdated credentials. If you are unsure of your password, refer to detailed login guides or use official password recovery procedures before locking yourself out.
Check Browser Extensions: If deleting cookies does not clear the error, temporarily disable ad-blockers, privacy extensions, or VPNs. These tools occasionally intercept authentication scripts or block essential security tokens required by modern web apps.
Verify Incognito Mode: Test logging in via a Private/Incognito window. If it works there, an extension or cached local file—rather than the site itself—is likely causing the conflict.
For users who continue to face access barrier issues, exploring specialized account recovery assistance articles can help rule out account suspensions, server outages, or security lockouts.
Frequently Asked Questions
Will clearing site cookies delete my saved passwords?
No. Your saved passwords are stored separately in your browser’s integrated credential manager (or an external password management extension). Clearing cookies only deletes active session tokens, site preferences, and locally cached browser state files.
How is clearing cookies different from clearing the browser cache?
Cookies store user identity tokens, site preferences, and tracking states. The browser cache stores media assets like images, stylesheets, and scripts to help pages load faster. While bad cache files can break page layouts, bad cookies specifically interrupt user authentication and active user sessions.
Why do I keep getting logged out even after clearing my cookies?
If login issues recur frequently after clearing cookies, check whether your browser is set to automatically clear data on exit, verify that your system clock is set to automatic time sync (out-of-sync system times invalidate security tokens), or ensure your third-party cookie blocking settings aren’t overly strict for that domain.
Final Thoughts
Clearing site-specific cookies is a surgical troubleshooting technique that every web user should master. Instead of blowing away your entire browsing history and logging out of dozens of essential services, removing data for a single domain allows you to fix login loops efficiently with minimal disruption to your daily routine.
For more step-by-step technical advice, account setup instructions, and troubleshooting resources, visit Easy Login Hub to browse our complete collection of technical tips and standard Login Guide tutorials.
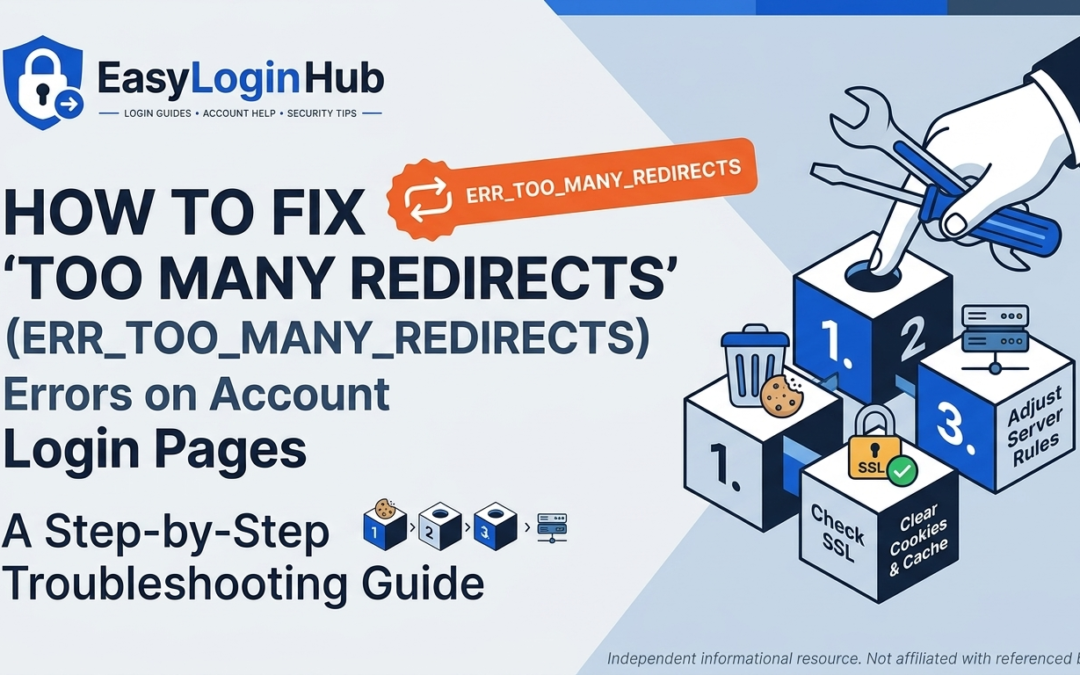
Few digital roadblocks are as frustrating as trying to access your bank, email, or work account, only to be stopped by a blank screen reading ERR_TOO_MANY_REDIRECTS or “The page isn’t redirecting properly.” Instead of loading your account dashboard, your browser gets stuck in an infinite loop, constantly passing your request back and forth without reaching a destination.
At Easy Login Hub, we understand how disruptive access errors can be to your daily routine. We create structured login guides and deliver actionable technical support to help users troubleshoot common login problems quickly and securely. In this comprehensive step-by-step Login Guide, we will explain why redirect loops occur specifically on authentication portals and provide proven solutions to restore access to your online accounts.
Disclaimer: EasyLoginHub is an independent informational resource. The login guides, troubleshooting strategies, and account recovery assistance provided on this site are for educational purposes. Easy Login Hub is not affiliated with, endorsed by, or connected to any third-party brands, platforms, or service providers mentioned in our guides.
Understanding the ‘Too Many Redirects’ Loop on Login Portals
To fix the ERR_TOO_MANY_REDIRECTS error, it helps to understand what is happening behind the scenes. A redirect occurs when a web server sends your browser from one web address (URL) to another. This is common on login pages. For example, if you try to visit an account dashboard while logged out, the server redirects you to the portal’s sign-in page.
A redirect loop happens when URL A directs your browser to URL B, but URL B immediately directs you back to URL A—or through a series of intermediate URLs that circle back to the beginning. When your web browser detects that it has been redirected multiple times without reaching a stable landing page, it stops loading and displays an error message to prevent your device from crashing or wasting bandwidth.
Why Does This Error Frequently Target Login Pages?
Authentication portals rely heavily on dynamic session verification. Several unique factors make login portals especially prone to redirect loops:
Conflicting Cookie States: Your browser may hold an outdated session cookie that says you are logged in, while the server believes your session has expired, resulting in an endless loop between the login page and the dashboard.
HTTPS Security Misconfigurations: Secure websites require encrypted connections. If a login page switches between http:// and https:// due to server configuration issues, a loop can form.
Single Sign-On (SSO) & OAuth Handshake Failures: When signing in via third-party identity providers (such as Google, Microsoft, or Apple), miscommunicated authentication tokens can cause persistent redirect loops.
Browser Extensions & Ad Blockers: Security or privacy add-ons often block authentication scripts or tracking tokens necessary for modern login flows.
Step-by-Step Troubleshooting Guide to Fix Redirect Loops
Follow these practical troubleshooting steps in order. They start with quick, local browser fixes and progress toward advanced network diagnostics.
Step 1: Open the Login Page in Incognito / Private Mode
The fastest way to determine whether the redirect issue stems from stored browser data or the host website is to open an incognito or private browsing window.
Google Chrome / Brave / Edge: Press Ctrl + Shift + N (Windows) or Cmd + Shift + N (Mac).
Mozilla Firefox: Press Ctrl + Shift + P (Windows) or Cmd + Shift + P (Mac).
Safari: Press Cmd + Shift + N.
Attempt to sign in to your account from this private window. If the login page loads normally and allows you to sign in, the error is caused by corrupted cookies, cached files, or browser extensions on your main browser profile.
Step 2: Clear Browser Cookies and Cache for the Specific Website
Corrupted or outdated session cookies are the leading cause of account-level redirect loops. While you can clear your entire browser history, clearing data specifically for the affected domain preserves your saved passwords and sessions on other sites.
How to Clear Specific Site Data in Google Chrome:
Click the padlock or view site information icon located on the left side of the address bar while visiting the problematic login page.
Select Site settings or Cookies and site data.
Click Manage on-device site data or Delete data.
Confirm the deletion, close all browser tabs for that website, and reopen the page.
Clearing All Browsing Data (Universal Solution):
If clearing specific site data does not resolve the loop, navigate to your browser’s Privacy & Security settings, select Clear Browsing Data, choose Cookies and other site data along with Cached images and files, set the time range to All time, and click Clear Data.
Step 3: Check System Date and Time Settings
Security protocols and SSL/TLS encryption certificates rely heavily on precise timestamps. If your computer or smartphone’s date and time are incorrect, your browser may evaluate authentication tokens as invalid or expired, triggering repeated redirect loops during sign-in.
Windows: Go to Settings > Time & Language > Date & time. Enable Set time automatically and click Sync now.
macOS: Open System Settings > General > Date & Time. Ensure Set date and time automatically is toggled on.
iOS / Android: Open system settings, find Date & Time, and enable automatic network time syncing.
Step 4: Disable Conflicting Browser Extensions
Certain browser extensions—particularly ad blockers, VPN extensions, script managers, and privacy guard tools—can alter network headers or block security scripts required for modern multi-factor authentication (MFA) and account sign-in processes.
Open your browser’s Extension / Add-on Management page (e.g., chrome://extensions/ in Chrome).
Temporarily toggle off all active extensions.
Restart your browser and attempt to access the account login page again.
If the sign-in works, turn your extensions back on one by one to identify which one caused the conflict.
Step 5: Flush Your Local DNS Cache
An outdated or corrupted Domain Name System (DNS) cache on your device can cause your internet connection to direct traffic to incorrect server IP addresses, resulting in a redirect loop.
Flushing DNS on Windows:
Press the Windows Key, type cmd, right-click Command Prompt, and select Run as administrator.
Type the following command and press Enter: ipconfig /flushdns
You should see a confirmation message stating that the DNS Resolver Cache was successfully flushed.
Flushing DNS on macOS:
Open Terminal (found via Finder > Applications > Utilities).
Type sudo dscacheutil -flushcache; sudo killall -HUP mDNSResponder and press Enter.
Enter your administrator password when prompted.
Step 6: Verify Network and Proxy Settings
If you are connected to a corporate VPN, proxy network, or public Wi-Fi hotspot with a captive portal, your connection routing might be altered. Try turning off your VPN client or switching to a different network (such as a mobile cellular hotspot) to verify whether local network rules are causing the login redirect error.
Server-Side Issues: What to Do When the Issue Isn’t on Your End
If you have completed all the troubleshooting steps above and the ERR_TOO_MANY_REDIRECTS error continues, the problem likely stems from a server-side misconfiguration on the service provider’s end. Common backend issues include:
Misconfigured .htaccess or NGINX rewrite rules on the host server.
Misconfigured SSL certificates or CDN (Content Delivery Network) SSL options (such as Flexible SSL misalignments).
Unannounced server maintenance or temporary outages during database migrations.
Actions You Can Take for Server-Side Errors:
Check Platform Status Pages: Check the official service status page or third-party outage tracking tools to see if other users are reporting login access outages.
Contact Customer Support: Reach out to the platform’s official support channels and report the ERR_TOO_MANY_REDIRECTS error on their sign-in page.
Utilize Mobile Apps or Alternative Portals: In many cases, official native mobile applications or web portals built for mobile devices bypass web-based authentication loops.
Summary Troubleshooting Checklist
Troubleshooting Action
Primary Cause Targeted
Success Rate
Incognito Mode Test
Browser cache / Extension conflicts
High
Clear Cookies & Cache
Expired session tokens / Bad login cookies
Very High
Disable Browser Add-ons
Blocked authentication scripts
Medium
System Time Sync
SSL/TLS certificate handshake failure
Medium
Flush DNS Cache
Outdated IP routing tables
Moderate
Frequently Asked Questions (FAQs)
Does ERR_TOO_MANY_REDIRECTS mean my account was hacked?
No. The ERR_TOO_MANY_REDIRECTS error is a technical communication fault between your browser and the website’s server. It does not indicate that your account credentials have been compromised or breached.
Why does this redirect error only happen on the login page and not the home page?
Public home pages display static content that does not require user validation. Login pages dynamically verify user credentials, cross-check active session cookies, and enforce encrypted security redirects (HTTPS). Because authentication requires multiple authentication checks, sign-in pages are significantly more vulnerable to redirect misconfigurations.
What should I do if I cannot bypass the login error and need urgent account access?
If you need immediate access, try logging in using an alternative web browser (such as switching from Chrome to Firefox), accessing the platform through its official mobile smartphone application, or connecting through a cellular data network instead of local Wi-Fi.
Final Thoughts
Encountering the ‘Too Many Redirects’ error during sign-in can feel like a major hurdle, but it is usually caused by simple client-side issues like stale cookies or outdated cached files. By systematically clearing your browser data, checking system clock synchronization, and testing in private browsing modes, you can quickly resolve the loop and regain access to your account.
For more detailed technical guides, step-by-step account access instructions, and reliable account recovery assistance across popular online services, explore the comprehensive resources available on Easy Login Hub.
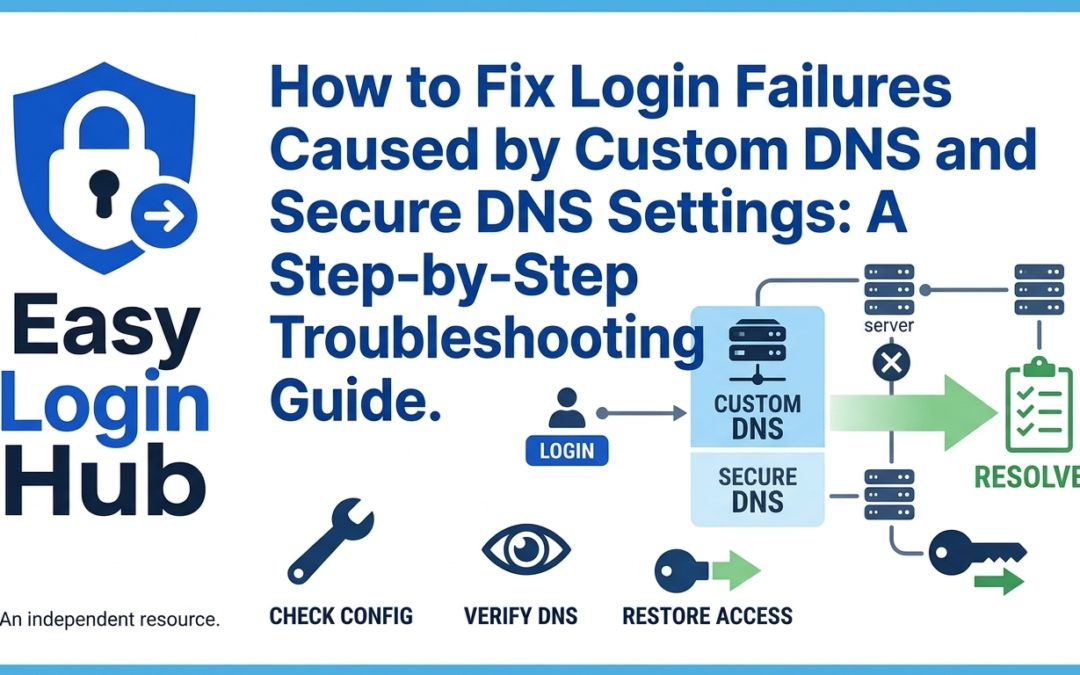
When you encounter sudden login failures, account timeouts, or infinite loading screens while attempting to sign into your favorite web services, the culprit isn’t always a forgotten password or a server outage. Frequently, modern security protocols and custom network configurations—specifically Custom DNS servers and Secure DNS (such as DNS-over-HTTPS or DNS-over-TLS)—are responsible for breaking the authentication flow.
While custom DNS solutions offer benefits like improved privacy, faster domain resolution, and content filtering, they can inadvertently block critical authorization endpoints, CAPTCHA scripts, single sign-on (SSO) redirects, or multi-factor authentication (MFA) tokens. At Easy Login Hub, our comprehensive login guides are designed to help users navigate complex access barriers and troubleshoot common login problems efficiently.
This technical troubleshooting guide explains why custom and secure DNS settings cause login failures and provides clear, step-by-step instructions to resolve these issues on desktop and mobile devices.
Why Custom and Secure DNS Settings Block Account Logins
To understand why login processes fail, it helps to realize that logging into a modern web service rarely involves just one web address. When you click “Sign In,” your browser communicates with multiple third-party servers to verify your identity, render anti-bot verification challenges, set authentication cookies, and handle secure tokens.
Custom and Secure DNS settings can disrupt this multi-step process in several ways:
Aggressive Domain Filtering and Blocklists: Custom DNS providers like NextDNS, Pi-hole, AdGuard DNS, or privacy-focused resolvers often block tracking and telemetry domains. Unfortunately, many sign-in flows rely on analytics or cross-domain authentication handlers (such as Auth0, Okta, or Google reCAPTCHA) that blocklists may mistake for trackers.
CDN and Geo-Location Mismatches: Secure DNS protocols obscure your local ISP’s geographic location. If an authentication system detects a login attempt where your IP address location conflicts with your DNS resolution point, security filters may flag the attempt as suspicious and silently block access.
DNS Cache Corruption: When web platforms update their login infrastructure or migrate to new IP addresses, local DNS resolvers may continue pointing to stale IPs, leading to “connection timed out” or “502 Bad Gateway” errors during sign-in.
Handshake Timeouts in DNS-over-HTTPS (DoH): Browser-level Secure DNS encrypts DNS requests via HTTP/2 or HTTP/3. If network latency delays these encrypted queries, authentication tokens or OAuth callbacks may expire before reaching the server.
Step-by-Step Troubleshooting Guide to Fix DNS-Related Login Failures
If you suspect that custom or encrypted DNS configurations are preventing you from signing into your accounts, follow these sequential steps to diagnose and fix the problem.
Step 1: Test Connection on an Alternate Network
Before modifying system settings, verify whether DNS is indeed the root cause of your login issue:
Disconnect your device from your current Wi-Fi network.
Connect your device to a mobile hotspot or an alternative network using default ISP settings.
Attempt to sign into the affected service again.
If the login succeeds on the alternate network, your custom or secure DNS configuration on the original network is almost certainly causing the interference.
Step 2: Flush Your Local DNS Cache
Stale or corrupted DNS records stored on your device can prevent your browser from reaching the correct authentication server. Flushing the DNS cache forces your system to retrieve fresh, up-to-date IP addresses.
On Windows:
Press the Windows Key + R, type cmd, and press Enter.
In the Command Prompt window, type: ipconfig /flushdns
Press Enter. Look for the message confirming the DNS Resolver Cache was successfully flushed.
On macOS:
Open Terminal (via Applications > Utilities or Spotlight search).
Type the following command: sudo dscacheutil -flushcache; sudo killall -HUP mDNSResponder
Press Enter and type your administrator password when prompted.
Step 3: Disable Secure DNS (DNS-over-HTTPS) in Your Web Browser
Modern browsers like Google Chrome, Mozilla Firefox, and Microsoft Edge feature built-in Secure DNS (DoH) settings that operate independently of your computer’s system-level DNS settings. Disabling or resetting this feature can immediately restore login capabilities.
In Google Chrome:
Click the three vertical dots in the top right corner and open Settings.
Navigate to Privacy and security > Security.
Scroll down to Use secure DNS.
Toggle the feature Off, or change the provider option back to “With your current service provider.”
In Mozilla Firefox:
Open Settings and select Privacy & Security from the left sidebar.
Scroll down to the DNS over HTTPS section.
Select Off (Default Protection or Off depending on your version) to return to standard system DNS resolution.
Step 4: Whitelist Authentication Domains in Custom DNS Filters
If you use network-wide ad-blocking DNS services (such as Pi-hole or NextDNS), check your query logs when an authentication attempt fails. Look for blocked domains that end in:
recaptcha.net or gstatic.com (Google CAPTCHA services)
auth0.com, okta.com, or identityserver.io (Identity provider endpoints)
account.services or brand-specific sign-in subdomains
Add these essential identity domains to your custom DNS whitelist or explicit allowlist to prevent future blocks during sign-in attempts.
Step 5: Switch System DNS to Standard Public Resolvers
If custom DNS servers managed at the router or OS level continue to cause failure, reconfigure your system to use reliable, neutral public DNS resolvers such as Google Public DNS or Cloudflare DNS.
Google Public DNS: Primary 8.8.8.8 | Secondary 8.8.4.4
Update your operating system network settings or router settings to use these addresses, save your settings, and restart your browser.
When Additional Support is Needed
If you have restored standard DNS settings, cleared your browser cache, and verified network connectivity, but you are still locked out, the issue may stem from an account-level suspension, incorrect credentials, or compromised multi-factor authentication devices. In such cases, consulting dedicated online resources can guide you through structured password resets or formal recovery requests.
When technical roadblocks persist beyond local network fixes, turning to reliable account recovery assistance can help you follow proper recovery channels for the specific service you are trying to access.
Independent Information Disclaimer
EasyLoginHub is an independent informational platform dedicated to publishing technical guides, login support articles, and account security educational content. EasyLoginHub is not affiliated with, endorsed by, or connected to any third-party service providers, software vendors, or internet service providers mentioned in this guide. All trademarks and brand names belong to their respective owners.
Frequently Asked Questions (FAQ)
Can DNS settings block multi-factor authentication (MFA) codes?
Yes. While DNS does not directly affect SMS-based MFA, it can disrupt push notifications, app-based authentication responses, and WebAuthn security keys if the domain responsible for sending or receiving the authentication challenge is blocked by a DNS rule.
What is the difference between custom DNS and Secure DNS?
Custom DNS refers to using an alternative domain name resolver (like Cloudflare or NextDNS) instead of your ISP’s default server. Secure DNS (such as DNS-over-HTTPS or DNS-over-TLS) refers to encrypting your DNS traffic so third parties cannot intercept or monitor your website lookup requests.
Will resetting my DNS settings delete my saved browser passwords?
No. Resetting or changing your DNS settings only affects how your device translates domain names into IP addresses. It will not alter, delete, or overwrite your saved passwords, web form history, or bookmarks.
Why does a login page work on my smartphone but not on my computer?
Smartphones and computers often use different DNS configurations and web browser settings. If your phone is connected to cellular data, it uses your carrier’s DNS, avoiding local network or router-level custom DNS filters that might be active on your computer’s Wi-Fi connection.
Disclaimer: EasyLoginHub is an independent educational website providing helpful technical guides and information. EasyLoginHub is not affiliated with, sponsored by, or endorsed by any third-party brand, streaming provider, smart TV manufacturer, or gaming console developer referenced in this article.
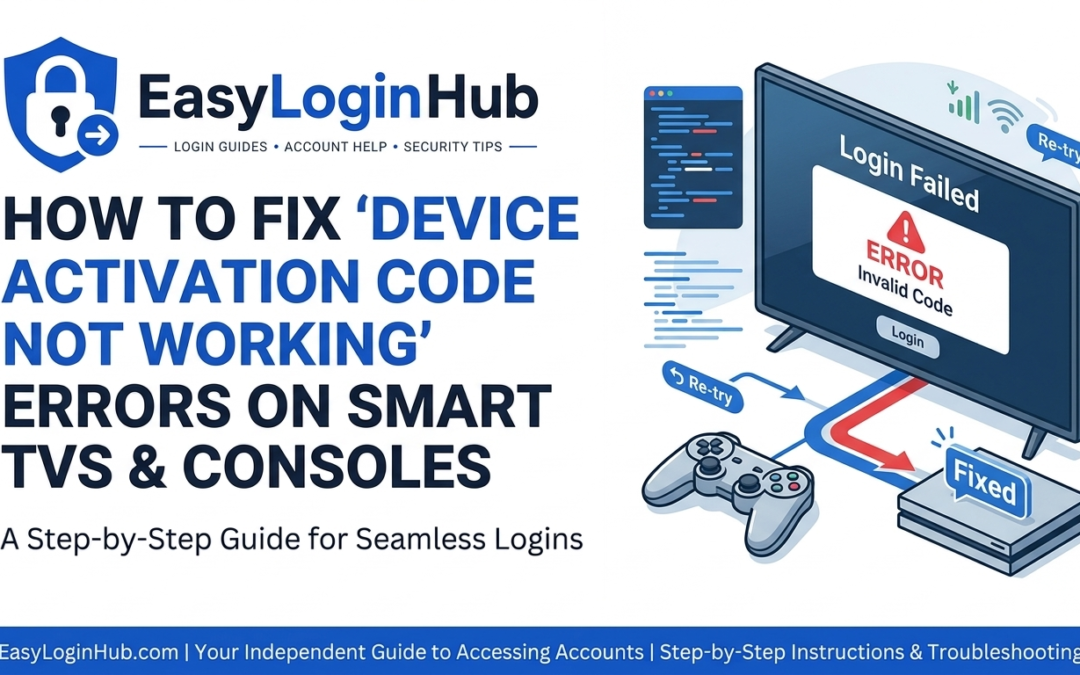
Connecting streaming services and gaming platforms to big-screen devices has become a seamless part of modern entertainment. Instead of typing lengthy email addresses and complex passwords using a clumsy TV remote, most apps now utilize a quick pair-and-activate mechanism. The TV or console displays a short alphanumeric code (usually 6 to 8 characters) alongside a website URL. You enter the code on your smartphone or computer, and your device automatically logs in.
However, when that process breaks, it can be frustrating. Seeing error messages like “Invalid Activation Code,” “Code Expired,” or simply watching the TV screen spin continuously without logging in is a frequent issue. If you are struggling with a device activation code that is not working, this step-by-step guide from Easy Login Hub will help you identify the underlying cause and resolve the problem quickly.
Why Do Device Activation Codes Fail?
Understanding why activation codes fail makes troubleshooting much easier. When a Smart TV or gaming console generates an activation prompt, it creates a temporary, secure token hosted on the service’s remote server. Your secondary device (phone, tablet, or desktop) must communicate with that exact token to confirm authorization.
The process usually fails due to one of several common technical bottlenecks:
Timeouts and Code Expiration: Most pairing codes are valid for only 5 to 15 minutes. If you pause too long to open your phone browser, the token expires on the server end.
URL Typo or Misdirection: Entering the URL slightly incorrectly on your mobile browser can lead to error pages or unofficial sites.
Account Mismatch: You might be logged into a different account on your mobile browser than the one you intended to pair with your TV or console.
Browser Caching and Cookies: Stale cookies or cached session data on your phone or computer browser can prevent the authorization request from completing.
Network or VPN Interference: If your mobile device is on cellular data or a VPN while your TV is on your local Wi-Fi, security protocols may flag or block the remote activation attempt.
Outdated System Software: Pending firmware updates on your TV, streaming stick, console, or individual app can break communication protocols.
If you regularly encounter difficulty logging into digital platforms, accessing detailed login guides can save you time and prevent unnecessary lockouts.
Step-by-Step Guide to Fixing Activation Code Errors
Follow these practical troubleshooting steps to eliminate activation code failures on your Smart TV, streaming media player, or gaming console.
Step 1: Double-Check the Activation Web Address
It is surprisingly easy to make minor typos when manually typing URLs into a mobile or desktop web browser. For instance, missing a slash, typing .com instead of .tv or .link, or skipping a hyphen will prevent the activation code page from loading correctly.
Verify every character of the URL shown on your TV screen before hitting enter.
Ensure you are navigating to the exact web page specified by the service rather than searching for it on a search engine, which might yield outdated or unofficial URLs.
Step 2: Generate a Fresh Activation Code
Because security codes are short-lived, an expired code will immediately return an “Invalid Code” notification.
On your TV or console, select the option to Back out or Cancel the current login attempt.
Re-open the app or select Get a New Code on screen.
Immediately enter the freshly generated code on your phone or computer while the timer is active.
Step 3: Verify the Logged-In Account on Your Secondary Device
When you visit an activation URL on your smartphone or computer, the platform assumes you are already logged into the primary account you wish to connect. If you are logged into a relative’s account or a secondary profile on your phone browser, the pairing will either fail or pair the wrong account.
Open a new browser tab and navigate to the main website of the service you are trying to activate.
Check which account is active. If necessary, log out and log back in with the correct username and password.
Return to the activation URL and submit the code again.
Step 4: Use Incognito / Private Browsing Mode
Browser extensions, ad blockers, and corrupted cache files on your phone or desktop often interfere with web redirection scripts during device activation.
Open a Private or Incognito window in your web browser, type the official activation URL, log into your account when prompted, and enter the display code. This ensures a clean session free of conflicting cookies or local cache data.
Step 5: Match Network Settings and Disable VPNs
Some streaming platforms verify that both the TV device and the activation device share similar network parameters during authentication.
Connect your smartphone or computer to the exact same Wi-Fi network as your Smart TV or console.
Temporarily disable any active VPN (Virtual Private Network) software on your phone or PC during the activation process.
If you are using custom DNS configurations or network-level ad blockers, disable them briefly to allow security handshake requests through.
Step 6: Clear the App Cache or Reinstall the App
If the app on your Smart TV or console has stored corrupted session data, it may fail to register success even after you enter the correct code online.
On Smart TVs/Streaming Sticks: Navigate to System Settings > Applications, find the app, select Clear Cache, and restart the app.
On Gaming Consoles: Fully close the application (do not leave it running in suspend mode), restart the console, or uninstall and reinstall the app if errors persist.
Platform-Specific Tips for Smart TVs and Gaming Consoles
Smart TVs (Samsung Tizen, LG webOS, Roku, Android/Google TV, Fire TV)
Smart TVs often keep background apps suspended in memory rather than shutting them down fully. If an activation code stalls:
Perform a full power cycle (unplug the TV from wall power for 30 seconds, then plug it back in). This clears volatile system memory and resets app states.
Ensure your TV’s system date and time are set correctly. If the TV clock does not match global network time, security certificates will reject activation attempts.
Gaming Consoles (PlayStation, Xbox, Nintendo Switch)
Gaming consoles feature strict network security policies and parental controls that can block external authorization requests.
Check if account permissions or age restrictions on the console profile block external app logins.
If available, use alternative sign-in options such as scanning a displayed QR code directly with your smartphone camera, which opens pre-authenticated app links directly.
When You Need Account Recovery Assistance
In some situations, activation code errors occur because your primary account itself is locked, unverified, or experiencing security flags. If you enter the code correctly but receive notifications regarding password resets, unverified email warnings, or suspended access, you will need dedicated account recovery assistance before device pairing can proceed.
Resolving account-level locks by updating recovery contact details, resetting forgotten passwords, or completing multi-factor authentication will generally restore your ability to pair new devices smoothly. You can follow this comprehensive Login Guide format whenever you encounter persistent account access blocks across different devices.
Frequently Asked Questions
Why does my activation code say “Invalid” immediately after generating it?
This typically occurs when your TV’s internal clock is out of sync with network time servers, causing the server to evaluate the generated code as already expired. Check your TV’s date and time settings and set them to “Automatic/Network Provided.”
Can I activate my TV app without using a secondary device?
Many modern apps offer alternative login methods directly on screen, such as entering your account email and password using the on-screen keyboard, or scanning an on-screen QR code with your smartphone camera.
Why does the TV screen stay stuck on the activation code page after I submit the code on my phone?
If your browser confirmed success but the TV does not update, the TV app lost connection to the activation server. Check your TV’s internet connection, restart the app to get a new code, and complete the process again.
Final Thoughts
Device activation code errors are usually temporary glitches caused by expired session tokens, browser cache issues, or minor network mismatches. By generating a fresh code, verifying your network settings, and using a clean browser window on your mobile device, you can get back to enjoying your favorite games and streaming content in minutes.
For more clear instructions, user safety tips, and technical assistance to troubleshoot common login problems across all your favorite digital devices, explore the resources available at EasyLoginHub.
Passwordless authentication and one-click “magic links” have made logging into mobile applications significantly faster—when they work properly. However, one of the most frustrating technical issues users encounter today is deep link sign-in failure. You click a sign-in or verification link in an email or SMS, expecting the mobile app to open automatically, but instead, you end up stuck in a web browser loop, looking at a blank page, or seeing an error message that says “Link Invalid” or “Page Not Found.”
At Easy Login Hub, we specialize in providing clear, actionable login guides to help you navigate account access hurdles smoothly. If you are struggling with magic links, Single Sign-On (SSO) redirects, or account verification URLs, this comprehensive Login Guide will walk you through why deep link failures happen and how to resolve them on both Android and iOS devices.
Understanding Mobile Deep Links and Universal Links
To understand why a sign-in link fails, it helps to understand how your mobile device handles web addresses intended for installed applications.
When an app developer designs a passwordless login system, they use underlying operating system technology known as Universal Links (on Apple iOS) or App Links (on Android). These systems register specific domain names with your phone’s operating system. When you click a URL associated with that domain, your smartphone is supposed to bypass the web browser and pass the authentication token directly to the installed application.
When this handoff breaks, you experience a deep link failure. Instead of authenticating your account, the link opens in a web browser that lacks the app’s security context, causing the sign-in attempt to fail.
Common Causes of Deep Link Sign-In Failures
There are several reasons why your mobile device might fail to direct a login link to the correct application:
In-App Browsers: Email apps like Gmail, Outlook, or Yahoo Mail often open links inside their own restricted, embedded browser rather than hand off the URL to the operating system.
Disabled OS Association Settings: Your phone’s settings may have been configured to always open links in a browser like Chrome or Safari, blocking the app from launching.
Cross-Device or Cross-Browser Requests: Requesting a login link on your mobile app and opening the resulting email link on a desktop computer (or vice versa) breaks the active session token.
Expired Security Tokens: Magic links are time-sensitive. If you take too long to open the link, the token automatically expires for security reasons.
Outdated Applications: An outdated mobile app may no longer match the secure domain records verified by Apple or Google servers.
Step-by-Step Fixes for Mobile Deep Link Login Problems
In-app web browsers embedded within email clients are the leading cause of deep link sign-in failures. When you tap a magic link inside an email app, the built-in browser attempts to handle the link internally instead of passing it to the target app.
How to fix this:
Look for an option menu (usually represented by three dots or a share icon) in the upper-right or lower-right corner of the browser window.
Select “Open in Safari” or “Open in Chrome”. In many cases, handoff to the primary system browser triggers the operating system to launch the app.
Alternatively, long-press (press and hold) the sign-in button or link inside your email, select Copy Link, and paste it directly into your main browser URL bar.
Check your email app’s settings menu and disable options like “Open web links in Gmail” or “Use internal browser.”
2. Adjust Operating System Link-Handling Settings
If your device defaults to opening all links in a web browser, you must explicitly permit the application to open supported web addresses.
For Android Devices:
Open your device Settings app.
Navigate to Apps or Applications.
Select Default Apps (or tap Special App Access > Opening Links).
Find and tap the mobile app you are trying to log into.
Ensure Open supported links is toggled On.
Verify that the app’s verified domain web addresses are listed and selected under Supported Links.
For iOS Devices (iPhone / iPad):
If a link opens in Safari instead of the app, long-press the login link in Safari or your email client.
Look for an option in the context menu that says Open in [App Name]. Tapping this restores the automatic default association.
If the app icon appears in the upper right corner of the Safari browser page (as an app banner), tap OPEN to complete sign-in.
Security protocols require that the device initiating the login request matches the device finishing it. If you open a mobile app, enter your email, and then open the confirmation email on your laptop or a secondary phone, the session token will fail because the request origin does not match.
Best practice: Always initiate the magic link request on the exact same smartphone where the app is installed, and open the confirmation link on that same device.
4. Clear Default Browser Cache and Cookies
Corrupted cookies or aggressive ad-blocking extensions inside your mobile browser can block the javascript redirects required to pass deep links back to an application.
On Android (Chrome): Open Chrome > Settings > Privacy and Security > Clear Browsing Data > Select “Cached images and files” and “Cookies and site data”.
On iOS (Safari): Open iOS Settings > Safari > Clear History and Website Data.
Temporarily disable content blockers or VPN applications that filter network redirects during sign-in.
5. Reinstall or Update the Application
If app associations become corrupted after an operating system update, your phone may fail to verify the digital asset links required for deep linking. Updating or reinstalling the app re-registers these security files with Android or iOS.
Check the Google Play Store or Apple App Store for pending updates for the application.
If updating does not resolve the issue, uninstall the application completely.
Restart your mobile device.
Reinstall the application from the official app store. Reinstalling forces the operating system to re-index the app’s supported domain links.
When Deep Links Continue to Fail: Alternative Options
If deep link navigation continues to fail despite correcting your settings, you may need to rely on fallback login mechanisms or seek dedicated account recovery assistance:
One-Time Passcodes (OTP): Many services offer an alternative sign-in method that sends a 6-digit numeric code via SMS or email instead of a magic link. Enter this code manually inside the app to bypass deep link routing entirely.
Standard Password Sign-In: If available, choose the option to log in using a traditional username and password combination.
Web Browser Fallback: Log into the service’s web version via a browser first, then check account settings to see if you can manage registered devices or generate an app-specific access key.
Conclusion
Mobile deep link sign-in failures can be frustrating, but they are usually caused by easily fixable issues like in-app email browsers, incorrect link-handling permissions, or device mismatches. By adjusting your default app settings and opening authentication links in your system browser, you can quickly restore smooth, one-tap access to your favorite mobile applications.
For more troubleshooting guides, account recovery steps, and secure access information, explore our full library of step-by-step guides at EasyLoginHub.
Disclaimer:Easy Login Hub is an independent informational platform that provides educational login guides, password recovery instructions, and tech support information. EasyLoginHub is not affiliated with, authorized by, or operated by any third-party app developers, mobile platforms, or software services mentioned in this article.
Frequently Asked Questions (FAQ)
Why does my login link keep opening in Chrome or Safari instead of opening the app?
This usually happens because your email app is using an embedded in-app browser or because your mobile operating system’s default link-handling permissions have been reset. To fix this, open the link directly in your primary system browser or tap and hold the link to select “Open in App.”
What should I do if a magic link says “Expired” or “Invalid Token” immediately?
Magic links often expire in 5 to 15 minutes. Additionally, some email security filters preview links automatically, which destroys single-use tokens. Make sure you click the link immediately after requesting it, and ensure you open it on the same device where you requested the sign-in.
Can an active VPN or Ad Blocker break mobile deep links?
Yes. Many deep links rely on domain tracking and instant URL redirects to establish identity. Aggressive ad-blocking software, tracking protection tools, or strict VPN routes can block these redirects, causing the login link to fail. Temporarily disabling these tools often resolves the issue.
Disclaimer: Easy Login Hub is an independent educational platform providing technical guidance and online safety resources. EasyLoginHub is not affiliated with, sponsored by, or endorsed by any third-party password manager services mentioned in this guide.
Password managers are designed to simplify digital life by storing hundreds of complex passwords behind a single, ultra-secure master password. However, this convenience creates a major predicament when that single key is forgotten. Because modern password managers prioritize security above all else, locked-out users often face a strict recovery process.
If you find yourself locked out of your vault, do not panic. While regaining access requires specific tools and precautions, several methods can help you recover your account or retrieve stored data. This Login Guide walks you through the step-by-step process of recovering access to your password manager when you forget your master password.
Understanding Zero-Knowledge Encryption
Before attempting recovery, it helps to understand why resetting a master password differs from resetting a standard social media or email account password. Most reputable password managers use a security model known as zero-knowledge architecture.
Under this system:
Your master password is never transmitted to or stored on the provider’s servers.
Your vault data is encrypted locally on your device using a key derived from your master password.
The service provider does not possess a master reset key to open your vault for you.
Because the company hosting your vault cannot read your data, customer support agents usually cannot manually change your password or email you a plain-text reminder. Recovery depends entirely on options set up prior to losing access or fallback access mechanisms built into your devices.
Step 1: Try Alternative Unlock Methods (Biometrics & Secondary Devices)
Before starting a formal account recovery process, check whether active sessions or alternative authentication methods are available on your secondary devices.
1. Mobile Biometrics (Face ID / Fingerprint)
If you enabled biometric authentication on a smartphone or tablet, open your password manager app. Many services allow users to unlock the local database using biometrics even if the master password isn’t recognized immediately. Once inside:
Export an unencrypted backup (such as a CSV or JSON file) immediately to a secure, temporary location.
View critical account passwords manually and store them safely while you resolve your master password issue.
2. Browser Extensions and Desktop Apps
Check all computers and web browsers where you previously installed the password manager extension or desktop application. If a session is still active or cached in memory, you might be able to view individual credentials or initiate a password change directly within the app settings.
Step 2: Locate Your Recovery Key or Emergency Kit
During the initial account setup, most password manager services prompt users to generate and save a physical or digital recovery document (often called a Secret Key, Emergency Kit, or Recovery Code).
If you need expert account recovery assistance, locating this code is usually the single most effective resolution path. Here is where to check:
Downloads Folder: Search your primary computer for PDF or text files containing phrases like “Emergency Kit,” “Recovery Code,” or the name of your password manager service.
Physical Documents: Look through home files, safes, or physical notebooks where you print critical security credentials.
Cloud Storage: Search encrypted cloud folders (such as Google Drive, OneDrive, or iCloud) for saved backup documents created when you registered.
When located, follow the on-screen prompt on your password manager’s recovery landing page to input this unique key alongside your account email address. This key acts as a cryptographic fallback to decrypt your data and allow master password creation.
Step 3: Utilize Emergency Access or Family Recovery Options
Many modern password managers offer collaborative security features designed specifically for situations where a primary user loses access.
1. Emergency Contacts
If you previously configured an “Emergency Access” contact (such as a trusted family member, colleague, or partner):
Log into the web portal of your password manager from an unrecognized browser or select the Emergency Access option on the sign-in page.
Submit an emergency access request targeting your designated contact.
Your contact will receive a notification to grant access. Depending on your pre-set waiting period (e.g., immediate, 24 hours, or 7 days), access will be granted once they approve it or once the waiting period expires.
2. Family or Business Plan Administrators
If your account operates under a Family or Enterprise subscription, contact the account administrator. Plan administrators often have access to admin-driven account recovery policies. While they cannot view your private vault items, administrative tools can securely reset access permissions and send an account restoration link directly to your inbox.
Step 4: Check for One-Time Hints or Mobile Recovery Tokens
If you do not have an active session or a physical emergency kit, check if your specific password manager supports secondary verification tokens:
Master Password Hints: Review the hint you created during initial setup. When attempting to log in on a primary browser, click “Show Hint.” Sometimes a brief memory trigger is all that is required.
Mobile Master Password Reset: Some mobile operating systems store cryptographic tokens in secure hardware (like the iOS Secure Enclave or Android Keystore). If enabled, navigating to settings within the mobile application may offer an option to reset the master password using hardware authentication.
Step 5: What to Do If Vault Access Cannot Be Restored
If you lack a recovery key, have no biometric access, have not set up emergency contacts, and cannot recall the master password, zero-knowledge encryption prevents the recovery of that specific encrypted vault. In this event, you must perform an account reset to regain access to the platform.
Initiate a factory account reset via the password manager’s website. This action permanently deletes existing encrypted vault items while keeping your subscription and account email active.
Create a brand-new master password, taking care to write down the new emergency recovery code immediately.
Manually rebuild your database by utilizing “Forgot Password” prompts on individual online accounts (email, banking, social media) to store updated login details in your fresh vault.
Best Practices to Prevent Future Master Password Lockouts
Experiencing a master password lockout highlights the importance of multi-layered backup routines. Implement these protective measures to prevent future incidents:
Print Your Emergency Kit: Keep a physical copy of your secret keys and account recovery details stored inside a secure fireproof box or safe.
Use a Memorable Passphrase: Rather than using random symbols that are easy to forget, construct a passphrase using four or five random words separated by space or symbols (e.g., correct-horse-battery-staple).
Designate an Emergency Access Contact: Assign a trusted family member or close friend as an emergency recipient within your password manager settings.
Perform Regular Backups: Periodically export an encrypted backup file of your vault and save it to an encrypted external drive.
Final Thoughts
Forgetting a master password can be stressful, but systematic troubleshooting often reveals alternative avenues of access—from cached mobile sessions to printed recovery keys and family plan administrative resets. Taking preemptive action today ensures that your credentials remain secure yet accessible whenever you need them.
For additional step-by-step account recovery assistance, troubleshooting tips, and security insights, visit Easy Login Hub to explore our complete collection of practical login guides.
Imagine looking down at your smartphone and suddenly noticing your cellular service has vanished, replaced by an unsettling “No Service” or “SOS Only” icon. Moments later, notification banners flood your screen indicating that your passwords have been changed for your primary email, online banking, or social media accounts. You may be the target of a SIM swap attack.
A SIM swap (or SIM jacking) occurs when a malicious actor tricks your mobile network provider into porting your phone number onto a SIM card under their control. Once the attacker controls your mobile number, they can intercept incoming calls and text messages—including the Security PINs and Two-Factor Authentication (2FA) verification codes used to safeguard your online presence. Because so many platforms rely on SMS for identity verification, a SIM swap can lead to a rapid cascade of unauthorized account access.
If you find yourself in this situation, rapid action is crucial. At Easy Login Hub, we provide clear information and resources to help users manage account security challenges and navigate critical recovery protocols. This emergency response guide details the exact steps you need to take to regain control of your mobile number, secure your digital identity, and restore your compromised accounts.
Disclaimer: EasyLoginHub is an independent educational platform providing technical guidance and security resources. EasyLoginHub is not affiliated with, endorsed by, or connected to any cellular carrier, bank, or third-party service provider mentioned in this guide.
Step 1: Contact Your Mobile Carrier Immediately
The absolute first priority during a SIM swap is to cut off the attacker’s control over your phone number. As long as the hacker controls your number, any SMS reset links you request will land directly on their device.
Use an alternate phone line: Borrow a family member’s phone or use a landline to call your mobile carrier’s customer protection or fraud department.
Visit a physical retail store: If you are near an official store for your carrier, go directly to a customer service representative with a valid government-issued photo ID. Physical verification is often the fastest way to prove your identity.
Report an unauthorized SIM transfer: Inform the representative that your mobile number was swapped without authorization due to fraud. Demand an immediate reversal of the SIM transfer back to a physical SIM card in your hand or an eSIM on your primary device.
Add account safeguards: Ask the customer service agent to place an immediate fraud alert or security lock on your account, requiring a strict verbal PIN or passphrase for any future account modifications.
Step 2: Secure Your Primary Email Accounts
Your primary email account is the master key to your digital identity. If an attacker gains control of your email, they can reset passwords across virtually every website you use. If you need step-by-step walkthroughs for specific email platforms, review our login guides for clear instructions on navigating reset settings.
If You Still Have Email Access:
Change your password immediately: Create a long, complex, and unique password using a combination of letters, numbers, and symbols (or a dedicated password manager).
Remove SMS 2FA: Temporarily turn off text message verification on your email settings so the attacker cannot request a new login code.
Switch to an Authenticator App: Link your account to an authenticator application (such as Google Authenticator or Microsoft Authenticator) or a hardware security key (like a YubiKey).
Check account security rules: Review your email account’s forwarders, filters, and connected backup email addresses to ensure the attacker didn’t set up automatic forwarding rules to steal incoming messages.
If You Are Locked Out of Your Email:
If the attacker has already changed your email password, use the official account recovery forms provided by your email provider. You will need to rely on non-SMS recovery channels, such as a pre-registered alternative email address, trusted contacts, or offline emergency backup codes. If you encounter hurdles during this process, seeking specialized account recovery assistance can help clarify what verification documents standard recovery workflows require.
Step 3: Alert Banks and Financial Institutions
Financial gain is usually the main driver behind SIM swap scams. Attackers quickly attempt to break into online banking apps, peer-to-peer payment platforms, and cryptocurrency wallets.
Call bank fraud departments: Reach out to your financial institutions via the official phone numbers listed on the back of your debit/credit cards or official statements.
Freeze your accounts and cards: Request a temporary freeze on online banking access, outgoing transfers, and connected payment cards until your phone line is restored.
Notify credit bureaus: Place a temporary fraud alert on your credit file with major credit reporting agencies to prevent unauthorized line-of-credit openings.
Step 4: Recover Key Social and Online Profiles
Once your mobile line and primary email are secured, begin auditing your remaining digital services. Social media platforms, shopping accounts, and cloud storage profiles require methodical attention to prevent further unauthorized access.
Navigate directly to the platform’s official login screen and select “Forgot Password?”.
Choose password reset delivery via your secured email address rather than SMS.
If the attacker updated the recovery details on your social account, use the platform’s identity verification portal (which may require submitting identity verification or video selfie confirmations).
Check out our detailed Login Guide tutorials for platform-specific insights on navigating security lockouts.
Step 5: Log Out Active Sessions and Audit Connected Devices
Even after changing your credentials, an attacker might remain signed into your accounts if active sessions are not manually terminated.
Sign out of all devices: Look for settings labeled “Security,” “Active Sessions,” or “Where You’re Logged In” across your accounts and select “Log out of all other sessions.”
Revoke third-party app authorizations: Check the list of authorized third-party applications linked to your email or social accounts. Revoke access for any unknown or non-essential applications added during the compromise.
Inspect recovery information: Re-verify that recovery phone numbers, secondary email addresses, and emergency contacts listed on your accounts belong solely to you.
Step 6: Fortify Your Digital Identity Against Future Attacks
Recovering from a SIM swap is taxing, but taking proactive security steps now will protect your accounts from similar vulnerabilities in the future.
Security Measure
Vulnerability Addressed
Recommended Action
Carrier Porting Security
Unauthorized SIM transfers at the phone company level.
Set up a mandatory Verbal PIN/Passcode with your carrier that must be provided before any SIM change or transfer.
Authenticator Apps (TOTP)
SMS interception via SIM swapping or signal spoofing.
Replace SMS-based 2FA with app-based tokens (e.g., Google Authenticator, 1Password, or Authy).
Hardware Security Keys
Phishing and remote 2FA interception.
Use physical USB/NFC hardware security keys (e.g., YubiKey) for critical high-value accounts.
Unique Passwords
Credential stuffing attacks across multiple sites.
Store strong, randomly generated passwords in a dedicated password manager.
Frequently Asked Questions (FAQ)
How do I know if I’m a victim of a SIM swap or just experiencing network outage?
A typical network outage usually affects multiple users in an area, but you will still have access to Wi-Fi features, and your carrier account will remain normal. In a SIM swap attack, your device loses service suddenly, and you may receive a confirmation text or email from your carrier stating that your SIM card or device was changed. If you test your phone on a working Wi-Fi network and discover password reset alerts in your inbox, you are likely facing a SIM swap.
Why is SMS two-factor authentication considered risky?
SMS messages are transmitted over cellular networks without end-to-end encryption and rely on phone numbers tied to mobile carriers. Because phone numbers can be redirected via SIM swapping or social engineering attacks against carrier support agents, SMS is far less secure than software-based authenticators or hardware keys.
What should I do if the hacker changes my account email and phone number?
When hackers change your contact details, most platform security systems generate an automated alert to your original email address containing a direct link such as “If you did not make this request, click here to protect your account.” Act on those emergency emails immediately. If that fails, proceed to the platform’s official identity verification process to restore access.
Final Thoughts
Experiencing a SIM swap attack can be alarming, but acting swiftly minimizes potential damage. By immediately securing your cellular line, safeguarding your primary email, contacting financial institutions, and transitioning to robust authentication mechanisms, you can safely recover your accounts and protect your online presence. For step-by-step guidance on account management and security troubleshooting, explore the comprehensive tutorials on EasyLoginHub.
Passkeys have quickly emerged as one of the most secure and convenient alternatives to traditional passwords. Built on public-key cryptography standards from the FIDO Alliance and W3C, passkeys allow you to sign in to websites and applications using biometric identification—such as fingerprint scanning or facial recognition—or a device PIN. However, because passkey deployment involves interaction between operating systems, web browsers, cloud sync services, and credential managers, users frequently encounter errors. Among the most frustrating issues are the “No Passkey Found” error message and cross-device synchronization failures.
At Easy Login Hub, our goal is to provide practical login guides and technical breakdown resources to help you troubleshoot common login problems. In this comprehensive guide, we will examine why passkey sync issues occur and provide clear, step-by-step solutions to restore your passwordless access across all your devices.
Disclaimer:EasyLoginHub is an independent informational platform. We are not affiliated with, endorsed by, or associated with any third-party brands, operating systems, hardware manufacturers, or software vendors mentioned in this article.
Understanding How Passkeys and Syncing Work
To effectively fix passkey errors, it helps to understand how passkeys are created and stored. Unlike traditional passwords, a passkey consists of a cryptographic key pair:
Public Key: Stored on the website or service server.
Private Key: Stored securely on your local device or inside an encrypted cloud key manager.
When you attempt to log in, the service issues a cryptographic challenge that can only be solved using your private key. Passkeys are generally grouped into two primary categories:
Synced Passkeys (Multi-Device Passkeys): Managed by end-to-end encrypted cloud storage services such as Apple iCloud Keychain, Google Password Manager, Microsoft account credential storage, or third-party managers like 1Password and Bitwarden. When created, these passkeys automatically synchronize across all devices signed into the same manager.
Device-Bound Passkeys (Hardware Keys): Tied strictly to a specific physical security key (such as a YubiKey) or local hardware security module (TPM/Secure Enclave) without cloud backup capabilities.
When your browser or application reports “No Passkey Found,” it usually means the device attempting authentication cannot locate the corresponding private key in its local store or designated cloud manager.
Common Causes of ‘No Passkey Found’ Errors
Before jumping into troubleshooting, identify which scenario applies to your setup:
Mismatched User Accounts: You are logged into a different Apple ID, Google Account, or password manager vault on the device you are trying to sign in from.
Disabled Cloud Sync: The primary key vault (such as iCloud Keychain or Google Password Manager) has sync turned off in your system settings.
Cross-Platform Isolation: Creating a passkey on an iPhone (stored in iCloud Keychain) and trying to access the account on a Windows PC without linking devices via QR code or using a cross-platform password manager.
Incorrect Default Passkey Handler: Your browser or operating system is searching a different credential provider (e.g., looking in Chrome’s built-in manager instead of a third-party extension like Bitwarden or 1Password).
Bluetooth and Proximity Restrictions: Cross-device passkey authentication requires active Bluetooth and local connectivity between your phone and computer to verify physical proximity.
Step-by-Step Troubleshooting Guide
1. Verify Account and Vault Parity
The single most common cause of missing passkeys is an account mismatch between your devices.
On iOS/macOS: Open System Settings, select your name at the top, and confirm that your Apple ID matches the account where the passkey was created. Ensure iCloud Keychain (or Password & Keychain) is toggled on.
On Android/Chrome: Open Chrome settings, click on your profile icon, and verify that sync is active for the specific Google Account holding your passkeys.
On Third-Party Managers: Ensure you are logged into the exact same vault/account instance on both your browser extension and mobile app.
2. Check Default Credential Provider Settings
Modern mobile and desktop operating systems allow third-party applications to manage passkeys. If your system points to the wrong manager, it will fail to discover your passkeys.
iOS Setup: Navigate to Settings > Passwords > Password Options. Make sure “AutoFill Passwords and Passkeys” is enabled and the correct manager (e.g., iCloud Keychain or your preferred manager app) is selected.
Android Setup: Navigate to Settings > Passwords & Accounts > Preferred Service (or Credentials Provider) and ensure the correct provider is designated.
Desktop Browsers: Check your browser extension settings. If you use a third-party password manager, ensure the setting for “Make default passkey handler” is activated inside the extension options.
3. Fix Cross-Device Authentication Issues (Mobile to Desktop)
If you created a passkey on your smartphone and are trying to log in on a desktop computer using a QR code, both devices must meet specific hardware requirements:
Turn On Bluetooth: Both the desktop and mobile phone must have Bluetooth turned on. They do not need to be actively paired, but Bluetooth must be enabled to confirm physical proximity.
Same Network Connection: Ensure both devices are connected to the internet, ideally on the same Wi-Fi network.
Update WebAuthn/Browser Libraries: Ensure both your desktop browser and phone operating system are updated to the latest versions. Older browser builds may fail to process the WebAuthn challenge.
4. Clear Browser Cache and WebAuthn Permissions
Corrupted site data or outdated session tokens can prevent the browser from invoking the passkey dialog properly.
Open your browser settings and navigate to privacy or history settings.
Clear cookies and cached site data for the specific domain causing issues.
Restart the browser completely and re-attempt the login prompt.
How to Resolve Persistent Passkey Sync Failures
If your passkey exists on one device (e.g., your smartphone) but refuses to synchronize to another device (e.g., your laptop) despite using the same cloud account, follow these recovery strategies:
Force Cloud Sync Synchronization
Apple Devices: Lock your screen, wait 30 seconds, and unlock. Alternatively, turn off iCloud Keychain in your iCloud settings, restart the device, and turn it back on.
Google Password Manager: Go to passwords.google.com in a web browser to confirm if the passkey entry is present in your Google Cloud account. If it appears online but not on your Android device, log out of your Google account on the device and sign back in.
Re-Registering the Passkey
If automated sync continues to fail, the cleanest solution is to re-create the passkey for that specific account:
Log in to the account using an alternative verification method (such as an SMS code, email verification link, fallback password, or security key). If you are completely locked out, you may need to seek dedicated account recovery assistance from the service’s support team.
Navigate to the account’s security settings page.
Locate your existing passkeys and delete the problematic entry.
Select Create a Passkey or Add Passkey to generate a fresh cryptographic key pair across your synchronized ecosystem.
Best Practices for Cross-Platform Users
If you regularly switch between different ecosystems—such as an iPhone paired with a Windows PC, or an Android phone paired with a Mac—native cloud keychains (iCloud or Google Password Manager) can create friction. To prevent future sync failures:
Adopt a Universal Passkey Manager: Cross-platform managers (such as 1Password, Bitwarden, or Dashlane) operate uniformly across iOS, Android, Windows, macOS, Linux, and major web browsers.
Keep Alternative Sign-In Methods Active: Always configure secondary login options—such as an authenticator app (TOTP) or backup security keys—so you never lose access if passkey synchronization fails.
Document Emergency Access Codes: Many services issue emergency account recovery codes upon enabling passkeys. Store these securely offline.
Frequently Asked Questions (FAQs)
Why does my laptop say “No Passkey Found” when my phone has one?
This usually occurs when your laptop and phone do not share the same encrypted password manager or cloud ecosystem (for instance, an iPhone using iCloud Keychain and a Windows PC using Microsoft Credentials). You can resolve this by scanning the on-screen QR code with your phone camera while keeping Bluetooth enabled on both devices.
Can I transfer a passkey manually to another device?
No. Passkey private keys are intentionally designed so they cannot be exported or copied manually as plaintext for security reasons. They can only be synchronized through end-to-end encrypted backup services or shared securely between devices supported by the same credential manager platform.
What should I do if I lose the device holding my passkey?
If your passkey was synchronized via iCloud, Google, or a third-party password manager, signing into your cloud vault on a new device will automatically restore your passkey. If you used a device-bound passkey (like a hardware key), you must use your backup authentication methods or initiate an account recovery process with the specific service provider.
For more step-by-step instructions, authentication troubleshooting, and digital access information, visit our complete index of Login Guide resources on Easy Login Hub.
Few messages are as frustrating as opening a video streaming service, music app, or cloud productivity suite only to be greeted by a blunt message: “Device Limit Reached,” “Too Many Concurrent Streams,” or “Maximum Registered Devices Exceeded.” This usually happens right when you need to access your account, leaving you locked out despite entering the correct username and password.
Device cap errors occur because modern online platforms enforce hardware limits to manage bandwidth, honor licensing agreements, and enforce tier-based subscription plans. However, old phones you no longer own, forgotten web browser sessions on public computers, or idle smart TVs can silently keep your account logged in and hog your available slots.
In this guide, we will walk you through how device limits work, how to identify hidden active sessions, and how to remotely sign out of old hardware so you can immediately clear these access blocks. At Easy Login Hub, we specialize in providing practical, clear instructions to help you troubleshoot common login problems across all your digital services.
Disclaimer:EasyLoginHub is an independent educational website that provides step-by-step technical guides and account security tips. EasyLoginHub is not affiliated, associated, authorized, endorsed by, or in any way officially connected with any third-party brands, platforms, or service providers mentioned in this article.
Understanding How Device Limits Work
To resolve device errors effectively, it helps to understand how online platforms track your presence. Service providers generally use two distinct methods to count and restrict access:
1. Registered Hardware Limits
Some platforms allow you to link a fixed number of specific devices (for example, up to 5 or 10 devices) to your profile at any given time. This is common with music download services, offline media apps, and specialized software. Once you hit that cap, adding a new tablet or computer is impossible until you explicitly delete an older device from your account settings.
2. Concurrent Stream or Active Session Limits
Other platforms care less about total registered hardware and more about simultaneous usage. A service might permit unlimited installs but only allow two or four active streams at the exact same moment. If family members are using the service in another room—or if an app crashed without properly closing its background connection—the system still counts that session as active.
Step-by-Step: How to Remotely Disconnect Active Sessions
You do not need physical access to an old phone, sold laptop, or distant smart TV to log out of your account. Almost all major online services provide a centralized security dashboard to manage connected sessions remotely. Follow these steps to clear out unwanted connections:
Step 1: Access Your Account via a Desktop Browser
While mobile apps offer convenience, mobile user interfaces frequently hide deep security settings. Open a web browser on a desktop computer or switch your mobile browser to “Desktop Site” mode. Go directly to the official platform website and log in using your standard credentials.
Step 2: Locate Security or Account Management Settings
Look for your profile icon or account name in the upper menu corner. Click on it and navigate to settings. Depending on the service, this section is usually labeled under one of the following headings:
Account Settings or Manage Account
Security & Privacy
Recent Activity or Active Sessions
Manage Devices or Registered Hardware
Step 3: Review the List of Signed-In Devices
Once inside the device management menu, inspect the listed items carefully. You will typically see details such as the device type (e.g., Windows PC, Safari browser, Android TV), approximate location based on IP address, and the date or time the account was last accessed.
Step 4: Remotely Terminate Unwanted Sessions
To reclaim your open slots, select the outdated or unrecognized entries and choose the remote logout option. Labels commonly used include:
Sign Out or Log Out
Remove Device or Deauthorize
Sign Out of All Devices / Sessions
Choosing “Sign Out of All Devices” is often the fastest remedy if you are unsure which specific connection is triggering the conflict. Keep in mind this will require you to log back in on the current device you want to use.
Workarounds when Remote Sign-Out Options Are Missing
Not every web service offers a user-friendly “Manage Devices” button. If your platform lacks a direct dashboard for session removal, use these alternative troubleshooting methods:
Method A: The Password Reset Global Logout
Requesting a password change is one of the most reliable ways to force a global session wipeout across almost all web platforms. When resetting your account password:
Go to the account login page and select “Forgot Password.”
Follow the link sent to your verified email address or phone number to set a new password.
Look for a checkbox that reads “Sign out of all other devices” or “Require all devices to sign in with the new password.” Ensure this box is checked.
This action immediately invalidates stored access tokens, forcing every active session—wherever located—to disconnect.
Method B: Revoke Third-Party App Permissions
If you use social single sign-on (such as signing into an app using your Google, Apple, or Facebook profile), the device limit might be tracked through connected permissions. Log into your primary identity provider, navigate to Third-Party Apps with Account Access, and revoke access for the app causing the error. Then, attempt to log in again.
Method C: Clear Local App Cache and Stale Cookies
Sometimes the error is not caused by external devices, but by corrupted session data on your current device. If you have already removed old sessions but the error persists:
On Web Browsers: Clear your browser’s cookies and site cache for that specific website, then restart the browser.
On Mobile Apps: Force-close the application, clear its app cache via device settings, or uninstall and reinstall the application entirely.
If you are still unable to log back in after trying these steps, you may require direct account recovery assistance from the provider’s official support team to clear persistent server-side lockouts.
Best Practices for Preventing Future Device Errors
Taking a proactive approach to session security keeps your account compliant with service limits and protects your personal data from unauthorized access:
Log Out of Guest and Shared Hardware: Always perform an explicit logout when using work computers, hotel smart TVs, or shared family tablets. Simply closing the browser or turning off the TV screen does not invalidate your session token.
Deauthorize Devices Before Selling or Trading In: Before erasing an old phone, laptop, or streaming stick, sign out of all active accounts individually and remove the hardware from your registered list.
Enable Two-Factor Authentication (2FA): Adding 2FA stops unauthorized users from signing into your account elsewhere and exhausting your limited streaming or device slots without your knowledge.
Schedule Regular Security Audits: Make it a habit to check the security tab of your core accounts every few months. Disconnect any browser or hardware entry you haven’t used recently.
Frequently Asked Questions (FAQ)
How long does it take for a device to lose access after being removed?
In most cases, remote deauthorization takes effect instantly or within a few minutes. However, some services refresh security tokens on a delayed cycle, which may cause a delay of up to 24 hours before an old device is officially disconnected.
Does changing my password log out all devices automatically?
On most major platforms, changing your password automatically revokes active session keys on all other devices. However, some platforms offer a specific option during the reset process asking if you want to sign out everywhere. Always select that option to ensure complete session termination.
Why does an unrecognized location appear on my active device list?
Discrepancies in device locations are frequently caused by Virtual Private Networks (VPNs), mobile data routing, or local Internet Service Provider (ISP) relay points. If the device type matches your own hardware but the location is a nearby city, it is likely your own session. If the hardware type and location are both entirely unfamiliar, terminate the session immediately and change your password.
What should I do if I reach the maximum device removal limit?
Certain services limit how many times you can remove or swap registered devices within a rolling calendar year (e.g., allowing only 5 hardware swaps per year). If you hit this restriction, you will need to contact the platform’s official customer support to request a manual device list reset.
Conclusion
Hitting a “Device Limit Reached” error can disrupt your workflow or entertainment, but it is easily managed once you know where to look. By logging into your central security portal, reviewing active sessions, and terminating obsolete hardware connections, you can quickly restore access to your account.
For more step-by-step walkthroughs, account recovery advice, and security tips, explore our complete library of login guides on Easy Login Hub.
Disclaimer:EasyLoginHub is an independent informational website offering educational access guides, technical tutorials, and account recovery assistance. EasyLoginHub is not affiliated with, endorsed by, or associated with Apple Inc., Google LLC, Mozilla Corporation, or any third-party software provider mentioned in this article.
Few technical issues are as frustrating as trying to log into a website only to be redirected back to the sign-in page or confronted with an error message stating that cross-site tracking has been blocked. Whether you are accessing an employee portal, an online banking portal, an educational dashboard, or a streaming service, this error can completely halt your progress.
This problem frequently occurs on Apple Safari (both on iOS and macOS), but it also appears on Google Chrome, Mozilla Firefox, and other mobile web browsers. At Easy Login Hub, our mission is to help readers troubleshoot common login problems and regain safe access to their accounts. In this step-by-step Login Guide, we will explain why the cross-site tracking blocked error happens and how you can resolve it quickly across multiple devices.
To understand why this login error occurs, it helps to look at how modern web security works. Web browsers rely on small pieces of data called cookies to remember who you are as you navigate between pages. There are two main types of cookies:
First-Party Cookies: Set directly by the domain you are visiting (e.g., example.com). These keep you logged into that specific site.
Third-Party Cookies: Set by a domain other than the one you are currently visiting. These are frequently used by advertisers to track online behavior across different websites, but they are also used for legitimate Single Sign-On (SSO) systems.
Many modern online services use third-party authentication services. For instance, when you click “Sign in with Google,” “Sign in with Microsoft,” or use an embedded login window on a third-party website, your browser must pass information between two different web domains.
Features such as Apple’s Intelligent Tracking Prevention (ITP) in Safari, or Strict Enhanced Tracking Protection in Firefox, automatically block third-party cookies to safeguard user privacy. When these features block communication between the primary site and the authentication server, the login attempt fails. Instead of granting access, the browser blocks the token transfer, resulting in an error, a blank screen, or an endless sign-in loop.
How to Fix the Error on Safari for iPhone and iPad (iOS / iPadOS)
If you encounter this login issue on an iPhone or iPad, Safari’s default privacy controls are usually responsible. Follow these steps to adjust your settings:
Method 1: Turn Off ‘Prevent Cross-Site Tracking’
Open the Settings app on your iOS device.
Scroll down and tap Safari.
Scroll to the Privacy & Security section.
Find the toggle labeled Prevent Cross-Site Tracking and switch it OFF.
Return to Safari, close the sign-in tab, open a new tab, and attempt to log in again.
Method 2: Check Cookie Blocking Settings
Go back to Settings > Safari.
Ensure that Block All Cookies is turned OFF. Blocking all cookies prevents almost all websites from maintaining an active login session.
Method 3: Clear Cache and Browsing Data for the Affected Site
Open Settings > Safari.
Scroll to the bottom and tap Advanced.
Tap Website Data.
Use the search bar to locate the domain you are trying to access.
Swipe left on the domain name and tap Delete, or tap Remove All Data at the bottom.
Restart Safari and retry the login process.
How to Fix the Error on Safari for Mac (macOS)
On Mac computers, Safari includes similar privacy mechanisms designed to protect user identity. If you see sign-in warnings or experience redirect loops on desktop Safari, follow these steps:
Method 1: Adjust Safari Privacy Preferences
Open Safari on your Mac.
Click Safari in the top menu bar and select Settings… (or Preferences… on older macOS versions).
Click the Privacy tab at the top of the settings window.
Uncheck the box next to Prevent cross-site tracking.
Uncheck Block all cookies if it is selected.
Close the preferences window, refresh the website, and attempt to sign in again.
Method 2: Remove Stored Data for the Specific Website
In Safari, go to Settings > Privacy.
Click the Manage Website Data… button.
Search for the name of the website or identity provider (e.g., Google, Okta, Microsoft).
Select the entry and click Remove.
Click Done, restart Safari, and try logging in again.
How to Fix Cross-Site Cookie Issues on Chrome and Mobile Browsers
While Safari is the most frequent browser to trigger this specific alert, Google Chrome, Brave, and Mozilla Firefox can display similar errors when third-party cookies or tracking protection are strictly enforced.
Fixing the Error in Google Chrome (Android, iOS & Desktop)
On Desktop: Open Chrome > Click the three dots (top right) > Settings > Privacy and security > Third-party cookies. Ensure your browser is set to Allow third-party cookies or temporary permissions are allowed for the site.
On Mobile (Android/iOS): Open Chrome > Tap the three-dot menu > Settings > Site settings > Cookies. Select the option that permits cross-site authentication data to save during your active session.
Fixing the Error in Mozilla Firefox
Open Firefox and click the shield icon located to the left of the address bar.
Turn off Enhanced Tracking Protection for the specific site experiencing the sign-in loop.
Alternatively, open Firefox Settings > Privacy & Security and change the protection level from Strict to Standard.
Alternative Troubleshooting Methods for Persistent Errors
If adjusting cross-site tracking toggles does not resolve the issue, additional underlying conflicts may be present. Consider these alternative solutions curated by our team at EasyLoginHub:
1. Avoid SSO Buttons and Use Direct Credentials
When third-party tracking controls fail to pass login credentials from an external provider (like Facebook or Google), check if the service allows you to log in using a direct username/email address and password instead. Direct logins bypass third-party authentication domains entirely.
2. Switch to a Dedicated Mobile Application
If you encounter cross-site tracking errors on a mobile browser when attempting to access a service (e.g., a bank, school portal, or streaming service), download the platform’s official mobile application from the App Store or Google Play Store. Native apps handle authentication tokens differently than web browsers and rarely suffer from cross-site cookie restrictions.
3. Disable Aggressive Content Blockers or VPN Extensions
Ad-blocking extensions, privacy-focused add-ons, and Virtual Private Networks (VPNs) with built-in tracking protection can override browser-level settings. Temporarily disable these extensions or pause your VPN connection to confirm whether they are blocking necessary authentication scripts.
4. Use a Private or Incognito Window
Opening an Incognito or Private Browsing window allows you to test whether existing browser cache or corrupted cookies are interfering with your sign-in process. Note that some private modes automatically enforce strict tracking protection, so you may still need to grant explicit permission for cross-site access if prompted.
Balancing Privacy and Accessibility
Privacy features like ‘Prevent Cross-Site Tracking’ serve an important purpose: they prevent advertising networks from monitoring your web navigation habits across different domains. Turning this protection off completely on a permanent basis may expose your browsing patterns to broader tracking.
Recommended Safety Tip: If you must turn off cross-site tracking prevention to log into a critical service, consider re-enabling the feature after completing your session. Alternatively, use a separate browser dedicated specifically to work or authentication tasks where cross-site features remain allowed, while keeping your main browser set to maximum privacy protection.
Frequently Asked Questions (FAQ)
Why does turning off ‘Prevent Cross-Site Tracking’ fix sign-in errors?
Many online portals use external servers to handle sign-in validation. When ‘Prevent Cross-Site Tracking’ is active, your browser prevents the portal domain from reading or writing cookies from the authentication domain. Disabling this setting allows the authentication token to pass freely between domains, completing your sign-in.
Is it safe to disable cross-site tracking controls?
Disabling this control is safe for trusted websites and necessary for many multi-domain services to function properly. However, leaving cross-site tracking disabled globally allows third-party tracking scripts across the web to gather data about your browsing behavior. Re-enabling the setting after you finish your session is good security practice.
What should I do if the sign-in error continues after fixing browser settings?
If the error persists, clear your browser cache entirely, update your browser to the latest version, verify your device’s date and time settings (incorrect times break security certificates), or attempt access from a secondary web browser.
Where can I find more technical login guides?
For more step-by-step assistance with account access, password recovery, and browser configuration, explore our complete library of login guides on Easy Login Hub.
Attempting to access your online banking, email, or social media account only to be greeted by an "Unrecognized Device" or "New Location Detected" login block can be frustrating. Security mechanisms designed to protect online accounts often flag new hardware, updated web browsers, or altered IP addresses. While these security automated protections keep unauthorized users out, they can inadvertently lock out legitimate account owners.
At Easy Login Hub, we specialize in helping users navigate digital access issues. Our comprehensive login guides simplify account navigation and security settings across major online services. In this troubleshooting guide, we break down why automated security blocks happen and provide clear steps to bypass unrecognized device warnings safely.
Why Online Platforms Flag Unrecognized Devices
Modern security systems rely on risk-based authentication models. Instead of relying solely on a password, platforms evaluate multiple contextual factors during every login attempt. When key variables change, the platform triggers an additional security check or blocks access entirely.
Common triggers for an unrecognized device login block include:
Device Fingerprint Changes: Logging in from a newly purchased smartphone, computer, or secondary tablet that has no historical login activity associated with your account.
Browser and Cookie Reset: Clearing your browser history, switching from Chrome to Firefox, or using Private/Incognito mode deletes session cookies that identify your browser to the service.
IP Address and Network Modifications: Connecting through a Virtual Private Network (VPN), proxy server, public Wi-Fi network, or logging in while traveling internationally alters your IP address and geographical location profile.
Operating System Updates: Major system updates can alter browser user agents and local storage keys, making a previously recognized computer appear brand new to security filters.
Step-by-Step Guide to Fix ‘Unrecognized Device’ Login Blocks
If you encounter a security prompt blocking your access, follow these sequential steps to troubleshoot common login problems and regain entry to your account.
Step 1: Complete Identity Verification Prompts
Most platforms offer an automated verification path when a login attempt occurs from a new device. Look for alternative verification options presented on the block screen:
One-Time Passcode (OTP): Request a security code sent via SMS or email linked to your account.
Authenticator Apps: Enter a time-sensitive code generated by Google Authenticator, Authy, or your platform’s native security app.
Security Questions: Answer pre-configured personal security questions accurately.
Prompt Verification: Confirm the login attempt by tapping "Yes, it’s me" on a previously authorized mobile device or tablet.
Step 2: Disable Active VPNs and Proxies
If you have an active VPN or proxy server running, your internet traffic is routed through a remote server address. Security scripts often view known VPN IP ranges as high-risk, triggering security blocks.
Disconnect your VPN or proxy application completely.
Clear your current web browser cache and cookies for the specific site.
Restart your web browser.
Attempt to sign in again using your standard home or mobile network connection.
Step 3: Switch to a Known Trusted Device or Network
When locked out on a new device, returning to a previously authorized environment is often the fastest solution. Try signing in from a smartphone, laptop, or home Wi-Fi network you have used successfully in the past. Once logged in on the trusted device, navigate to the security settings menu to trust or authorize your new device manually.
Step 4: Adjust Browser Settings and Extension Controls
Certain privacy-focused browser extensions, strict ad-blockers, and anti-tracking tools block JavaScript scripts responsible for verifying device identity. To resolve technical software conflicts:
Temporarily disable privacy and ad-blocking browser extensions.
Ensure third-party cookies and local web storage permissions are enabled for the login domain.
Try accessing the service using an alternative standard browser (e.g., switching to Edge, Safari, or Chrome) without custom extensions installed.
Step 5: Initiate Official Account Recovery Processes
If you no longer have access to the original verification phone number or secondary email address, standard automated verification will not work. In these cases, you must request formal account recovery assistance directly through the official platform’s recovery portal. This typically involves submitting identity verification documents or completing account verification forms manually evaluated by platform security teams.
Best Practices to Prevent Unrecognized Device Blocks in the Future
Proactive account management minimizes future service interruptions. Adopting these proactive security habits keeps your accounts accessible across all your personal devices:
Keep Emergency Recovery Contacts Updated: Always maintain updated backup email addresses and phone numbers in your profile settings.
Save Trusted Devices Carefully: When logging in from personal, non-shared devices, check the option to "Remember this device" or "Trust this browser" to store persistent security tokens.
Generate and Store Backup Recovery Codes: Most account platforms providing Two-Factor Authentication (2FA) offer printable or downloadable single-use recovery codes. Keep these codes stored securely offline.
Use a Centralized Password Manager: Password managers help manage multi-factor authentication credentials securely across multiple operating systems.
Understanding Independent Support vs. Official Brand Support
When searching for a practical Login Guide, it is critical to distinguish between independent educational resources and official account support.
Disclaimer: EasyLoginHub is an independent informational website providing login guides, security advice, and technical troubleshooting tips. EasyLoginHub is not affiliated with, authorized by, or operated by any third-party brands, platforms, or service providers mentioned in our tutorials. We do not process account recoveries, reset passwords, or access user account data directly.
If automated troubleshooting fails and you require direct intervention, always access the official help center or customer support department of the specific platform you are using. Never share sensitive account credentials, passwords, or personal identification codes on third-party forums or unofficial support websites.
Frequently Asked Questions (FAQs)
Why does my account say ‘unrecognized device’ when I am using my usual laptop?
This frequently happens if you recently cleared your browser cookies, updated your browser version, installed privacy extensions, or connected through a new network or VPN. The system treats the modified browser environment as a new, unknown device.
How long do unrecognized device security blocks last?
Temporary security blocks usually last anywhere from 15 minutes to 24 hours, depending on the service provider’s automated security policies. If you suspect an automated lock, waiting a short period before retrying can prevent permanent account lockout.
Can I disable unrecognized device warnings entirely?
Most major online platforms do not allow users to disable unrecognized device checks completely, as this is a fundamental security protection against automated credential stuffing and unauthorized access. However, adding devices to your platform’s "Trusted Devices" list reduces repeated verification requests.
Disclaimer: EasyLoginHub is an independent informational platform providing general educational guides, technical explanations, and troubleshooting tips. EasyLoginHub is not affiliated with, authorized by, maintained by, or endorsed by any third-party social media network, app developer, or service provider mentioned in this article. All product names, trademarks, and registered trademarks belong to their respective owners.
Single Sign-On (SSO) systems—commonly presented as buttons like “Sign in with Facebook,” “Continue with Google,” or “Log in with X”—have revolutionized how we interact with the web. With a single click, you can create a new account on a mobile game, an e-commerce platform, a productivity tool, or a streaming service without having to create and remember a brand-new username and password.
However, this convenience creates a single point of failure. If your primary social media account is suddenly suspended, permanently banned, or deleted, you instantly lose the technical bridge that connects you to dozens of secondary services. Facing a locked profile is frustrating, but losing access to years of purchased digital goods, saved files, or gaming progress linked to that profile can feel overwhelming.
If you find yourself locked out of external services because your main social profile was disabled, this comprehensive guide will walk you through actionable steps to reclaim your third-party accounts and prevent similar lockouts in the future.
Understanding How Social Logins Work
To recover an account linked via social login, it helps to understand what happens behind the scenes. When you log in to an app using a social network, the app does not store your social media password. Instead, it relies on an authorization standard (such as OAuth) that passes a digital authentication “token” from the social provider to the app.
When your social media account is banned or deleted, the social network stops issuing or validating those authentication tokens. As a result, clicking the social login button on a third-party app returns an error message. The third-party service itself has not banned you; rather, it simply cannot verify your identity through the disabled social provider.
Step 1: Attempt to Recover or Appeal the Primary Social Media Account
The fastest and cleanest path to restoring access to all connected services is resolving the issue at the source. If your main social media profile was suspended or disabled by mistake, filing an official appeal can restore the master connection.
Check Your Email: Review the official suspension notice sent by the social media provider to understand why the action was taken and whether an appeal process is available.
Submit an Appeal Immediately: Most major platforms have an explicit window (often 30 to 180 days) during which you can request a human review or submit identity verification documents before an account is permanently erased.
Download Your Data (If Allowed): Some platforms permit suspended users to download an archive of their account data. This archive may contain lists of connected apps or specific user IDs that will help you identify which third-party services need recovery.
If your appeal succeeds, your social login tokens will resume working, and you can immediately access all connected third-party accounts.
Step 2: Bypass Social Login Using Account Reset Workarounds
If your primary social profile cannot be restored, you must disconnect the third-party service from the dead social link and assign standard credentials (such as an email address and standalone password) to it. Many platforms offer fallback authentication mechanisms.
1. The “Forgot Password” Method
In many cases, third-party apps automatically create an account in their database using the email address associated with your social media profile. Even if you originally signed up using a social button, the system may acknowledge that email address.
Navigate to the third-party website or app login screen.
Do not click the social login button. Instead, enter the email address that was linked to your banned social media profile.
Click the “Forgot Password” or “Reset Password” link.
Check your email inbox for a password reset message. If you receive one, set a unique, strong password.
Log in using your email address and the new standalone password.
2. Alternate Social or Phone Number Login
Some modern platforms allow you to link multiple sign-in methods (e.g., both Google and Apple ID, or a mobile phone number). Try logging in via any secondary method you might have configured during account setup. If you can log in, navigate straight to the profile settings menu to add an email and password or remove the broken social connection.
Step 3: Contact Third-Party Customer Support with Proof of Ownership
If the password reset method fails—often because the app requires social token authentication exclusively—you will need to contact the customer support team of each individual third-party app or service.
When contacting third-party support, avoid focusing heavily on the details of your social media ban, as the third-party platform cannot assist with decisions made by another company. Instead, clearly state: “I no longer have access to the social media profile I used to create this account, and I need help transferring my account to a standard email and password login.”
To successfully rebind your account, support agents will require strict proof of identity and ownership. Prepare as many of the following details as possible before submitting a request:
Transaction Histories & Receipts: Copies of invoices, order confirmation emails, or app store transaction receipts showing purchases made within the app.
Account Identifiers: Your unique user ID, display name, handle, or in-game friend code.
Historical Account Details: The original account creation date, connected devices (e.g., iPhone 13, Windows PC), or recent account activity.
Linked Contact Info: The exact email address or phone number previously associated with the account.
Once customer service verifies your identity, they can manually update the email address linked to your profile and send an activation link to set up direct login access.
How to Protect Your Accounts Against Future Outages
Relying solely on a single third-party network for account access leaves your digital life vulnerable. To prevent future lockouts, adopt these security practices across your online profiles:
Set Up Direct Credentials: Whenever possible, establish an independent password for apps you use frequently, even if you initially signed up using a social network.
Link Multiple Contact Methods: Ensure every critical account has both a verified email address and a mobile phone number attached for recovery options.
Audit Connected Apps Regularly: Review the app permissions section in your social media security settings every few months. Remove access for apps you no longer use, and make note of active accounts so you have a catalog of services to update if necessary.
Use a Password Manager: Store standalone credentials securely using a reputable password manager, reducing the temptation to rely exclusively on social sign-ons.
How Easy Login Hub Can Help You Navigate Access Issues
Managing multiple digital identities and troubleshooting complex access problems can be tricky. Easy Login Hub serves as an accessible online repository designed to simplify technical account procedures. Whether you need step-by-step login guides, practical advice to troubleshoot common login problems, or structured account recovery assistance, having clear information readily available makes managing your online accounts straightforward and stress-free.
Whenever you run into sign-in hurdles across web applications or mobile services, checking an updated Login Guide on EasyLoginHub can help you understand the appropriate recovery steps and get back online quickly.
Frequently Asked Questions (FAQs)
Can a third-party app delete my account if my social media profile gets banned?
In most cases, no. Your third-party account data remains intact on the third-party service’s servers. The ban on your social network simply closes the login gateway. Unless you violated the third-party service’s own terms of service, your account data, purchases, and settings generally remain stored until you re-establish access via customer support or password resets.
What should I do if the third-party support team refuses to restore my access?
If automated or initial support requests are declined, review the platform’s terms of service regarding account recovery. Re-submit your request providing additional verifiable proof of ownership, such as bank statement line items showing direct payments to the service or device registration records.
Is Single Sign-On (SSO) unsafe to use?
SSO is not inherently unsafe; in fact, it often enhances security by reducing the need to remember multiple passwords and allowing you to utilize strong multi-factor authentication (MFA) on a primary provider. However, to mitigate risk, it is best practice to link secondary recovery options (like a backup email or phone number) inside any critical service you access via SSO.
Losing a family member or loved one is an emotionally challenging experience. In today’s digital age, managing their estate often involves more than organizing physical paperwork and closing bank accounts—it also includes handling their digital footprint. From email inboxes and social media profiles to cloud photo storage and financial management apps, online accounts contain vital documents, personal memories, and administrative records.
Navigating digital estate administration can feel overwhelming, especially when encountering strict security protocols. At Easy Login Hub, we provide clear information to help users understand online access procedures. In this guide, we break down the step-by-step process of accessing, managing, or closing the online accounts of a deceased loved one lawfully and respectfully.
Step 1: Gather Required Legal Documentation
Before contacting any online service provider, tech platform, or financial institution, you must assemble official documents to verify both the account holder’s passing and your legal authority to manage their affairs. Technology companies strictly enforce privacy laws to protect user data, even after death.
Most major platforms will ask for digital copies or certified physical copies of the following documents:
Official Death Certificate: A government-issued death certificate is the primary proof required by nearly every platform.
Proof of Estate Authority: Documents such as Letters Testamentary, Letters of Administration, or a court order identifying you as the legal executor or administrator of the estate. (Note: A Power of Attorney generally terminates automatically upon the principal’s death.)
Government-Issued ID: A valid photo ID (driver’s license, passport) of the executor or requesting family member.
Proof of Relationship: Birth certificates or marriage certificates, if requested by specific services to verify immediate family status.
Step 2: Inventory the Digital Assets
Identifying all of a deceased person’s online accounts can be a complex task. Creating a comprehensive list helps ensure no critical service or memory is missed. Key categories of digital accounts include:
1. Primary Email Accounts
An email account is usually the central hub for modern digital life. It contains password reset requests, monthly billing notices, subscription confirmations, and verification codes. Securing access to or reviewing primary email services (such as Gmail, Outlook, or Yahoo) is often the most important first step.
2. Social Media and Communication Services
Platforms like Facebook, Instagram, LinkedIn, and X (formerly Twitter) hold precious memories, interactions, and photos. Most networks offer options either to permanently delete an account or to convert it into a memorialized space where friends and family can share tributes.
3. Financial, Banking, and Utility Accounts
Online banking apps, credit card portals, investment accounts, utility bills, and e-commerce memberships need prompt attention to prevent unauthorized charges or ongoing subscription fees.
4. Cloud Storage and Digital Media
Photo repositories, video channels, and cloud drives (such as Apple iCloud, Google Photos, or Dropbox) store irreplaceable personal memories and family records.
Step 3: Understand the Official Account Access & Recovery Options
Each service provider handles deceased user accounts differently based on their Terms of Service and applicable privacy regulations (such as the Revised Uniform Fiduciary Access to Digital Assets Act in many U.S. states or GDPR in Europe). Exploring detailed login guides can clarify general policies across different account types.
Option A: Legacy Contacts and Pre-Designated Access
If your loved one set up pre-planned legacy tools before passing away, the recovery process becomes significantly easier:
Apple Legacy Contact: If configured, a designated Legacy Contact can access photos, messages, documents, and device backups by presenting an Access Key along with the death certificate.
Google Inactive Account Manager: Google allows users to specify who should be notified and granted download permissions if their account remains inactive for a set period.
Facebook Legacy Contact: Designated individuals can manage a memorialized profile, pin tribute posts, and update profile pictures.
Option B: Requesting Account Deletion or Data Export
If no legacy contact was configured, major technology companies typically provide online request forms specifically designed for deceased user accounts. Through these forms, verified executors can request:
Permanent closure/deletion of the account to prevent identity theft.
A copy of stored data (subject to privacy review and court requirements).
Memorialization of social media profiles.
Services rarely hand over direct password credentials. Instead, they provide data archives or close the account outright to respect user privacy laws.
Step 4: Avoid Common Pitfalls and Legal Risks
When attempting to resolve access issues, family members sometimes attempt unauthorized methods that can create unintended legal or technical complications.
Do Not Guess Passwords Repeatedly
Repeatedly entering incorrect credentials can trigger automated security locks or permanently disable a device. If you need to troubleshoot common login problems on hardware like smartphones or laptops, contact authorized device support rather than forcing software unlocks.
Be Aware of Terms of Service Rules
Logging into an account using stored credentials after an individual has passed away without authorization can technically violate a service’s Terms of Service. It is always safer and legally sound to use official deceased-user request channels or present probate court orders to the platform’s legal department.
Protect Against Identity Theft
Deceased individuals are sometimes targeted by identity thieves. Promptly notifying credit bureaus, closing inactive accounts, and monitoring incoming mail or email notices helps protect your loved one’s estate from fraudulent activity.
Step 5: Seeking Further Account Recovery Assistance
If standard online request forms are denied or require extra documentation, formal legal assistance may be required. An estate attorney can draft subpoena requests or formal petitions under local digital asset laws to compel platform compliance.
For routine guidance, consulting structured educational resources can help simplify complex processes. Platforms offering specialized account recovery assistance guidelines help families understand what paperwork is typically required before submitting requests.
How to Prepare Your Own Digital Estate (Preventative Steps)
Managing a deceased loved one’s accounts highlights the importance of preparing your own digital legacy. You can save your family time and distress by taking these proactive steps today:
Set Up Legacy Contacts: Assign trusted family members as legacy contacts within your smartphone OS and primary email accounts.
Use an Emergency Vault in a Password Manager: Many modern password managers feature an emergency access setting that grants designated survivors access after a specific waiting period.
Document Your Digital Inventory: Keep an offline, securely stored list of your active accounts, subscriptions, and financial portals alongside your legal will.
Frequently Asked Questions (FAQs)
1. Can I log into my deceased spouse’s email if I know their password?
While having the password allows physical entry, doing so may violate the service provider’s Terms of Service. The recommended approach is to inform the provider through official channels or contact estate counsel to ensure actions comply with local digital privacy laws.
2. How long does it take platforms to process a deceased user request?
Response times vary widely depending on the platform, verification requirements, and the completeness of submitted documentation. Simple memorialization requests may take a few days, while formal data export requests involving court orders can take several weeks or months.
3. What happens to paid subscriptions after an account holder dies?
Paid subscriptions (streaming, cloud storage, software) continue billing until the associated payment method is canceled or the platform is notified. Contacting the financial institution to close credit cards or freeze accounts stops recurring charges while account recovery requests are pending.
Conclusion
Handling the digital estate of a deceased family member requires patience, organization, and adherence to legal guidelines. By gathering official documentation, using established legacy tools, and relying on official platform recovery channels, you can secure valuable records and honor your loved one’s digital legacy safely.
For more step-by-step technical guides, platform policies, and digital access tips, explore the resources available at EasyLoginHub—your helpful Login Guide resource for navigating online accounts securely.
Few digital security roadblocks are as frustrating as entering a two-factor authentication (2FA) passcode directly from your authenticator app, only to be greeted with an “Invalid 2FA Code” or “Incorrect Passcode” error message. You double-check the six digits, type them rapidly before the timer resets, and try again—yet the login system rejects your request.
When you know you entered the exact numbers displayed on your screen, the culprit is rarely a typing mistype. Instead, the most common root cause is a time synchronization mismatch between your device’s internal clock and the authentication server’s clock. At Easy Login Hub, we frequently help users troubleshoot common login problems so they can regain seamless, secure access to their online accounts.
Disclaimer: EasyLoginHub is an independent educational platform. We are not affiliated with, endorsed by, or operated by Google, Apple, Microsoft, or any third-party authenticator software provider or online service mentioned in this guide.
Understanding Time-Based One-Time Passwords (TOTP) and Clock Drift
To understand why a time mismatch breaks two-factor authentication, it helps to understand how standard authenticator applications function behind the scenes. Most authenticator applications (such as Google Authenticator, Microsoft Authenticator, and Authy) use the Time-Based One-Time Password (TOTP) algorithm (RFC 6238).
When you set up 2FA, your provider shares a unique secret key with your authenticator app. The app and the server both use a mathematical algorithm that combines this secret key with the current UTC time to calculate a matching 6-digit passcode. This passcode automatically changes every 30 seconds.
Because the generated passcode depends directly on the current Unix timestamp:
If your smartphone or computer clock is ahead or behind by even 30 to 60 seconds, your authenticator app calculates a passcode for the wrong time window.
The server, operating on strict standard atomic time, calculates the passcode for the correct current window.
When the two codes do not match, the server flags your entry as an invalid passcode.
This phenomenon is known as clock drift. Fortunately, resynchronizing your system time or clearing internal app offsets resolves the issue almost immediately.
Step 1: Fix Time Sync directly inside Google Authenticator (Android)
If you use Google Authenticator on an Android device, the application includes a built-in feature specifically designed to correct internal clock drift independently of your phone’s main settings.
Open the Google Authenticator app on your Android device.
Tap the Menu icon (three vertical dots or lines) in the top-right corner.
Select Settings from the drop-down menu.
Tap Time correction for codes.
Select Sync now.
The app will verify its internal clock against Google’s time servers. Once the confirmation screen indicates that time has been synchronized, return to your account login page and attempt to enter a newly generated passcode.
Step 2: Correct Time Settings on Android System Settings
If you do not use Google Authenticator or if the internal sync feature does not resolve the issue, your phone’s system-wide date and time settings might be manually set or misaligned.
Open your Android device’s Settings menu.
Scroll down and select System (or General Management, depending on your device brand).
Tap Date & time.
Toggle on Set time automatically (or Use network-provided time).
Toggle on Set time zone automatically (or Use network-provided time zone).
If these toggles were already on, turn them off, wait 10 seconds, and turn them back on to force a re-sync with your cellular provider or network time protocol (NTP) servers.
Step 3: Correct Time Settings on iOS (iPhone & iPad)
Apple iOS does not feature an in-app time correction tool inside individual authenticator apps. Instead, authenticators on iOS rely entirely on the iPhone or iPad system clock. If your iOS clock drifts, TOTP calculations fail.
Open the Settings app on your iPhone or iPad.
Tap General.
Select Date & Time.
Ensure the toggle for Set Automatically is enabled (green).
If it is already enabled, toggle it off, wait a few moments, and switch it back on.
Verify that the correct Time Zone is displayed below the toggle switch.
Once updated, force-close your authenticator app by swiping up from the bottom of your screen, re-open it, and try generating a new code.
Step 4: Fix Clock Synchronization on Desktop Operating Systems
If you use desktop-based authenticator apps, browser extensions, or password managers with integrated 2FA generators on Windows or macOS, system clock mismatches can also cause invalid code errors.
On Windows 10 & 11:
Open Settings by pressing Win + I.
Select Time & language > Date & time.
Ensure Set time automatically and Set time zone automatically are turned on.
Scroll down to Additional settings and click the Sync now button under “Synchronize your clock.”
On macOS:
Click the Apple menu in the top-left corner and select System Settings (or System Preferences).
Click General in the sidebar, then select Date & Time.
Turn on Set time and date automatically.
Ensure your selected location service or time server (e.g., time.apple.com) is reachable.
Step 5: Additional Troubleshooting When Clock Syncing Doesn’t Work
If resynchronizing your system and app clocks does not eliminate the “Invalid 2FA Code” error, explore these additional possibilities outlined in our comprehensive Login Guide resources:
Multiple Accounts with Similar Names: If you maintain multiple accounts for the same service (e.g., personal vs. work emails), double-check that you are copying the token for the exact account username you are logging into.
Old Secret Keys Remaining: If you previously disabled and re-enabled 2FA on a platform, your authenticator app might still hold the old, invalidated 2FA token. Delete the old entry from your app and scan the new QR code provided by the website.
VPN Interference: In rare cases, connected Virtual Private Networks (VPNs) or strict firewall settings block the device’s ability to communicate with Network Time Protocol (NTP) servers. Temporarily disconnect your VPN and sync your clock again.
Browser Extensions and Caching: Stale cache files or auto-fill browser extensions can sometimes insert expired passcodes. Try opening an incognito/private browsing window or manually typing the code instead of copying and pasting.
What to Do If You Are Locked Out
If you remain locked out despite confirming time synchronization across your devices, you may need to utilize secondary access methods. Standard options include:
Backup Emergency Codes: Locate the list of 8-digit or 10-digit single-use recovery codes generated when you first enabled two-factor authentication on the service.
SMS or Email Fallback: Request a fallback verification code sent via text message or verified email address if the platform supports multi-channel verification.
Account Recovery Assistance: Reach out to the specific service provider’s official support channels to initiate identity verification. For detailed walkthroughs on navigating account lockouts safely, explore our specialized account recovery assistance articles.
Best Practices for Maintaining 2FA Health
To avoid unexpected lockout emergencies in the future, implement these proactive account maintenance practices:
Keep System Clocks Automatic: Always leave network time sync enabled on mobile devices and computers.
Store Recovery Codes Offline: Store your 2FA emergency recovery codes in a secure offline location, such as a printed document in a fireproof safe or an encrypted password manager.
Use Authenticator Backups: Where permitted, use authenticator apps that support secure, encrypted cloud backups (such as Authy or cloud-synced Microsoft Authenticator) so you can restore your tokens seamlessly when switching devices.
By keeping your device time accurate and maintaining accessible backup options, you can permanently eliminate clock drift issues and ensure fast, secure access across all your online accounts. For more step-by-step security walkthroughs and detailed login guides, visit EasyLoginHub.
Frequently Asked Questions (FAQs)
Why does my 2FA code fail even when I enter it immediately after it refreshes?
If a code fails immediately upon refreshing, your phone’s internal clock is out of sync with standard UTC time. Because the app generates codes based on your phone’s skewed time, the authentication server rejects the code because it belongs to a past or future time window.
Can changing my device’s time zone cause 2FA errors?
Changing time zones generally does not break TOTP 2FA as long as your system clock calculates UTC accurately. However, manually setting the local hour/minute clock instead of allowing the device to update time zones automatically via network servers can create clock drift errors.
How much time mismatch causes a 2FA code to become invalid?
Most standard 2FA setups generate codes valid for 30 seconds, though some servers allow a slight drift window (usually 30 seconds before or after). If your device clock drifts by more than 30 to 60 seconds, the generated passcodes will routinely be rejected.
Few technical glitches are as frustrating as entering your correct username and password, seeing the authentication succeed, and then instantly being redirected right back to the login screen. This endless session loop—where you are logged out immediately after logging in—can stall your work, prevent access to vital personal accounts, and leave you wondering if your account has been compromised.
At Easy Login Hub, we specialize in providing clear, step-by-step login guides to help users navigate access issues across web services and mobile applications. In this comprehensive guide, we will break down why session loops happen and provide practical steps to troubleshoot common login problems on both desktop browsers and mobile devices.
Disclaimer: EasyLoginHub is an independent informational resource. We are not affiliated with, endorsed by, or operated by any third-party websites or services mentioned in this guide.
Understanding the Session Loop: Why Does Instant Logout Happen?
When you sign into a modern website or application, the platform generates a unique digital authentication token (often stored in a browser cookie or local storage). This token tells the server, “This user has provided valid credentials; keep their session active.”
If you are immediately logged out, the server or your browser is failing to validate, store, or maintain that session token. The most common underlying causes include:
Corrupted Cookies or Cache: Outdated or corrupted session data stored in your browser conflicts with new authentication requests.
System Date and Time Misconfiguration: If your local device clock does not match the server’s time, your security tokens may expire the exact millisecond they are issued.
Strict Cookie & Privacy Settings: Overly aggressive privacy settings or third-party cookie blockers can prevent websites from writing the necessary session data.
Conflicting Browser Extensions: Ad blockers, security scripts, or VPN extensions can unintentionally intercept or strip authentication headers.
Dynamic IP Address Changes: If your connection constantly switches IP addresses (due to a cycling VPN or proxy), security protocols may drop your session automatically to protect your account.
Server-Side Issues: Database sync delays or temporary maintenance on the service provider’s end can cause valid logins to drop.
Step-by-Step Guide to Fix Endless Logout Loops
Follow these standard troubleshooting steps in order to isolate and fix the issue on your browser or device.
Step 1: Perform a Hard Refresh & Clear Specific Site Data
Before wiping your entire browser history, try clearing the cache and cookies specifically for the site giving you trouble.
Chrome / Edge / Firefox: Open the site where the error occurs. Click the padlock or tune icon next to the web address in the URL bar, select site settings, and choose to clear data/cookies for that specific domain.
Alternative: Perform a hard refresh by pressing Ctrl + F5 (Windows) or Cmd + Shift + R (Mac). This forces the browser to fetch fresh assets rather than relying on stored files.
Step 2: Check Your Device Date, Time, and Time Zone
Security protocols like JSON Web Tokens (JWT) rely heavily on exact timestamps. If your computer or phone’s internal clock is off by even a few minutes, the login server may instantly mark your session token as expired.
Open your computer or device settings menu.
Navigate to the Date & Time configurations.
Ensure “Set time automatically” and “Set time zone automatically” are toggled ON.
Sync the clock manually if your operating system provides a sync button.
Step 3: Test Access in Incognito or Private Browsing Mode
Opening an Incognito window creates a clean slate without existing cookies, cached files, or active extensions.
Open a new Private/Incognito window.
Navigate to the login page and attempt to sign in.
If it works: The issue is caused by a corrupted browser cache, stored cookie, or conflicting extension in your primary browser profile.
If it still fails: The issue is likely network-wide, device-wide, or server-side.
Step 4: Disable Problematic Extensions and Add-ons
Privacy-focused browser add-ons, script blockers, and aggressive ad blockers frequently interfere with login authentication scripts.
Open your browser’s extensions manager.
Temporarily toggle off all extensions, especially ad blockers, privacy guards, and custom script engines.
Restart your browser and attempt to log in.
If successful, re-enable extensions one by one to identify which add-on was breaking your login session.
Step 5: Verify Cookie and Storage Permissions
Many modern web applications require first-party cookies and local storage access to keep you signed in. If your browser blocks all cookies by default, sessions cannot persist.
Go to your browser’s security or privacy settings.
Ensure that cookies are allowed for the target website.
If you use strict privacy protections, add an exception allowing cookies for the specific domain you are attempting to access.
Step 6: Toggle Off Your VPN or Proxy Server
Virtual Private Networks (VPNs) protect your privacy, but some services enforce strict anti-fraud checks. If your VPN rotates server nodes mid-session or changes your IP address while the server processes your login, the website may immediately log you out as a security precaution.
Try temporarily disconnecting your VPN or switching to a static server location before attempting to sign in again.
Mobile Login Troubleshooting: App vs. Web Browser
If you encounter immediate logouts on a smartphone or tablet, the issue may involve app-specific caching or mobile operating system permissions.
Clearing App Cache on Mobile
Android: Go to Settings > Apps > [App Name] > Storage and tap Clear Cache. (Tap Clear Data if clearing cache does not solve the loop).
iOS (iPhone/iPad): iOS does not offer a direct cache-clearing button for all apps. To reset app storage, uninstall the app, restart your iPhone, and reinstall the application from the App Store.
WebView and Default Browser Mismatches
Many mobile apps open external login links inside an in-app browser (WebView). If your default browser blocks third-party cookies or cross-site tracking, the session token may fail to transfer back to the main app. Try changing your mobile default browser or attempting the login directly inside your main browser app instead.
When the Problem Is on the Server’s End
If you have cleared your browser, adjusted your time settings, disabled extensions, and tried multiple devices without success, the issue may rest entirely with the provider’s server infrastructure.
Server-side database maintenance, corrupted user session tables, or temporary outages can cause automatic session rejections. In these situations:
Check official status pages or reliable service-monitoring sites to confirm if an outage is occurring.
Wait 15 to 30 minutes before trying again to allow temporary server locks to clear.
Review targeted resources or request account recovery assistance if you suspect your account has been flagged or temporarily restricted for security reasons.
Frequently Asked Questions (FAQ)
Why does a website keep logging me out as soon as I click any link?
This typically occurs when your browser accepts the initial login cookie, but fails to store it or send it back when you click to a new page. This is usually caused by corrupted cookie data, an incorrect system clock, or browser extensions blocking session headers.
Can a full disk or low storage space cause login loops?
Yes. If your computer or mobile device has completely run out of internal storage space, your web browser cannot save new local storage files or cookie tokens required to keep you signed in.
What is the fastest way to verify if the issue is my browser or my account?
The fastest test is trying to sign in using a completely different web browser or via an Incognito window. If the account logs in normally on another browser, the root cause is isolated to your primary browser’s cache or extension settings.
Find Clear Solutions with Easy Login Hub
Dealing with sudden account lockouts and persistent session bugs can be confusing. Following structured troubleshooting routines allows you to isolate the problem quickly without risking account security.
For more step-by-step walkthroughs, technical explanations, and practical advice on keeping your online accounts accessible and secure, explore our extensive library of practical guides on Easy Login Hub.
Regaining access to a locked, lost, or compromised online account often requires proving your identity. Many major online platforms, financial apps, social media services, and email providers rely on automated identity verification systems. These security checks typically ask users to submit a photo of a government-issued ID alongside a real-time facial scan or video selfie.
While these security protocols protect accounts from unauthorized access, automated verification software can be surprisingly sensitive. A slight glare on your ID card, poor room lighting, or camera permission glitches can cause repeated verification failures. When automated systems reject your documentation, account recovery stalls completely.
If you are stuck in a verification loop, this guide breaks down why ID and selfie checks fail and provides clear, practical steps to resolve the issue. At Easy Login Hub, we provide clear explanations and resources to help users troubleshoot common login problems and navigate complex security checks.
Disclaimer: EasyLoginHub is an independent informational website providing step-by-step educational content and login guides. EasyLoginHub is not affiliated with, endorsed by, or operated by any third-party verification services or platform providers mentioned in this guide.
Understanding How ID and Video Selfie Checks Work
Automated identity verification relies on computer vision and biometrics. The process generally consists of two distinct stages:
Document Scanning: Optical Character Recognition (OCR) extracts text from your physical ID (such as your full name, date of birth, and document expiration date) while checking for security features like holograms, clear borders, and sharp text.
Biometric Matching & Liveness Detection: Facial recognition algorithms compare the photo printed on your official ID against your live video selfie. The system runs a “liveness check” (asking you to blink, turn your head, or align your face in a frame) to ensure someone isn’t holding up a static photograph.
If either stage fails to meet strict confidence thresholds set by the platform, the attempt is flagged or automatically rejected.
Top Reasons ID and Selfie Checks Fail
Understanding the exact failure point helps you fix it quickly. Most failed attempts stem from environmental factors, document issues, or camera settings rather than actual security risks.
1. Environmental and Camera Lighting Issues
Overhead lights, desk lamps, or direct sunlight can create heavy reflections on plastic ID cards. Glare hides crucial text or holographic features, preventing OCR algorithms from reading the document accurately. Similarly, submitting a video selfie in a dark room creates digital visual noise, making it difficult for facial recognition algorithms to map biometric features.
2. Document Capture Quality Problems
Automated systems frequently fail documents under the following conditions:
Cropped Edges: Cutting off any corner or border of the physical ID.
Motion Blur: Shaking hands or poor camera focus resulting in unreadable text.
Physical Damage or Expiration: Submitting an expired driver’s license, passport, or state ID, or using a document with heavy scratches across the photo area.
Unacceptable Document Types: Uploading screenshots, photos of computer screens displaying an ID, or unaccepted ID types instead of an original physical document.
3. Facial Recognition and Liveness Detection Errors
During a selfie check, the algorithm measures key facial geometry metrics, such as the distance between your eyes, nose, and chin. Discrepancies occur when:
The face is obscured by eyeglasses, sunglasses, hats, masks, or heavy shadows.
Significant physical changes exist between your current appearance and the old ID photo (e.g., changes in facial hair, dramatic weight changes, or different hairstyles).
The user fails to follow real-time prompt instructions during liveness checks (such as moving the camera too quickly or failing to center their face within the designated circle).
4. App Permissions and Technical Glitches
Technical bottlenecks often prevent the camera feed from rendering high-resolution images. Browser settings that restrict hardware acceleration, denied camera permissions, out-of-date mobile applications, or temporary cache corruption can prevent data from transmitting properly to verification servers.
Step-by-Step Solutions to Fix Verification Failures
If your verification attempt was rejected, follow these troubleshooting steps before making another attempt.
Step 1: Prepare Your Physical Document Correctly
Before initiating the capture screen, prepare your physical identification properly:
Ensure your ID is valid and unexpired.
Place the document on a flat, solid surface with a contrasting background (e.g., place a light-colored ID on a dark table). Avoid holding the card in your fingers, as fingers can block text or borders.
Clean your smartphone or webcam camera lens with a microfiber cloth to clear fingerprints and smudges.
Ensure all four corners of the ID card are completely visible inside the onscreen frame before snapping the photo.
Step 2: Optimize Lighting and Eliminate Glare
Lighting plays a vital role in automated verification success:
Use indirect, natural daylight whenever possible. Position yourself facing a window rather than sitting with a bright light source behind you.
If glare appears on your ID card due to reflection, tilt the camera slightly or shift your position relative to overhead light fixtures. Ensure text, numbers, and your photo remain clear.
Step 3: Perfect the Video Selfie Scan
When completing the liveness and facial match portion of the recovery check:
Remove any accessories that obscure your face, including hats, scarves, and reading or prescription glasses (unless required for you to view instructions).
Stand or sit against a neutral, uncluttered wall.
Hold your device at eye level rather than looking down at your phone.
Maintain a neutral facial expression unless prompted otherwise by the app.
Follow every movement prompt (such as turning your head left/right or blinking) slowly and deliberately to allow the system time to record biometric markers.
Step 4: Resolve App and Browser Technical Issues
If the verification tool freezes or fails to upload images, address local technical settings:
Grant Camera Permissions: Go to your mobile device or browser settings, locate the application or website permissions, and ensure camera access is explicitly set to “Allow.”
Clear Cache: Clear your browser’s cookies and web cache, or force-close and restart the mobile application.
Switch Connectivity: If upload speeds are slow, switch from cellular data to a stable Wi-Fi network (or vice versa) to prevent network timeout errors during image submission.
Try an Alternative Device: If a laptop webcam produces blurry or low-resolution images, complete the recovery process using a smartphone with a higher-resolution camera.
Step 5: Check Account Profile Data Mismatches
Ensure that the full name, birth date, and address associated with your account match the details on your government ID. If you recently changed your legal name or moved, automated systems may flag discrepancies. If your automated submission fails repeatedly, look for an option to submit your documents for manual review by a human customer support agent.
What to Do if Automated Verification Keeps Failing
If automated checks fail despite optimal lighting and document clarity, consider these advanced options:
Request Manual Support Review: Most major platforms offer an option to submit documentation directly to a support representative. Look for links reading “Contact Support,” “Verify Another Way,” or “I Need Human Assistance” on the failure screen.
Use Alternative Verification Methods: Some services offer fallback recovery channels, such as verifying via a trusted contact, entering backup recovery codes, or providing proof of transaction history.
Review Platform-Specific Rules: Different online platforms maintain unique policies regarding acceptable ID types (e.g., driver’s license vs. passport vs. national ID card). Check the service’s official support center for detailed documentation rules.
Final Thoughts
Identity verification during account recovery can be frustrating, but failure is usually caused by environmental or technical factors that are easy to fix. By improving your lighting, eliminating document glare, maintaining an unobstructed selfie view, and ensuring stable app permissions, you significantly increase the chances of passing automated identity checks on your next attempt.
For additional assistance with account access, password resets, and digital safety practices, explore our comprehensive account recovery assistance articles and step-by-step guides at Easy Login Hub, your trusted source for practical Login Guide resources.
Few digital issues are as frustrating as clicking a “Sign In” button only for nothing to happen. You enter your username and password, hit enter or click the button, and the page stays completely static. In other instances, navigating to an account login page results in a totally blank white screen, an infinite loading wheel, or a broken form missing critical input fields.
While server outages or incorrect credentials can cause access issues, unresponsive sign-in portals are frequently caused by client-side browser configurations. Specifically, browser extensions—such as ad blockers, privacy enhancers, script blockers, and custom security plugins—often accidentally prevent critical login scripts from executing properly. At Easy Login Hub, we specialize in providing clear login guides and technical breakdown resources to help users overcome frustrating authentication barriers and maintain seamless web access.
Disclaimer: EasyLoginHub is an independent informational resource. We are not affiliated with, endorsed by, or connected to any third-party software developers, browser vendors, or online services mentioned in this guide.
Why Extensions and Script Blockers Break Sign-In Forms
Modern online authentication systems rarely rely on simple HTML forms. Instead, modern login procedures depend on dynamic JavaScript, cross-domain API calls, third-party identity verification, and anti-bot security checks. When you load a login portal, your browser requests dozens of auxiliary scripts and cookies behind the scenes. If a privacy or blocking extension interferes with any of these network requests, the sign-in mechanism can break entirely.
Here are the primary technical reasons why browser extensions interrupt the login process:
1. Blocked Third-Party Scripts and Authentication Endpoints
Many major services delegate user authentication to dedicated security domains or single sign-on (SSO) providers. For instance, clicking a button to log in might require fetching a script from an external server (such as an OAuth service or identity manager). Aggressive privacy extensions and script blockers frequently classify these third-party requests as trackers and block them. Without these scripts, clicking the submit button triggers no action.
2. Invisible CAPTCHA and Bot Prevention Interference
To block automated brute-force attacks, platforms employ invisible CAPTCHAs and behavioral tracking scripts. Extensions like uBlock Origin, NoScript, or Privacy Badger may block these anti-bot scripts from loading. If the backend server requires a verified security token from an anti-bot check before accepting a login form submission, and that script was blocked, the submit button will remain unresponsive.
3. Cross-Site Cookie Restrictions and Storage Blocking
Authentication frameworks rely heavily on session cookies, local storage, and Cross-Site Request Forgery (CSRF) tokens. Cookie managers or privacy extensions configured to block cross-site storage can prevent your browser from saving temporary authentication tokens. When the login page attempts to write or read these essential tokens, the page may throw an unhandled error, resulting in a blank page or an unclickable interface.
How to Identify and Fix Login Blockages Step by Step
If you suspect an extension or script blocker is preventing you from accessing your account, follow these systematic steps to troubleshoot common login problems and pinpoint the exact source of the failure.
Step 1: Test the Page in Incognito or Private Browsing Mode
The fastest diagnostic test is opening an Incognito (Chrome), Private (Firefox/Safari), or InPrivate (Edge) window. By default, most browsers disable custom extensions in private mode.
Open a new Private/Incognito window.
Navigate directly to the service’s official sign-in page.
Attempt to log in using your standard credentials.
If the login page loads properly and the button works as expected, you can confirm that an active browser extension, cached file, or cookie setting in your standard browsing session is causing the block. (Note: If your extensions are explicitly configured to run in private mode, this test may not isolate the issue until you temporarily disable them.)
Step 2: Isolate the Offending Extension
Once you confirm an extension is causing the conflict, you can identify the specific add-on through a process of elimination:
Open your browser’s Extension Manager (e.g., chrome://extensions or about:addons).
Disable all active ad blockers, privacy shields, script managers, and popup blockers.
Refresh the sign-in page and test the login button.
Re-enable your extensions one at a time, refreshing the login page after each one, until the problem recurs.
Once you pinpoint which extension breaks the form, you can configure targeted exceptions rather than disabling your security tools entirely.
Step 3: Whitelist the Login Domain in Ad and Script Blockers
Completely disabling your security extensions leaves your general browsing vulnerable. A far better approach is adding the sign-in portal to your extension’s trusted allowlist (whitelist).
For standard ad blockers (e.g., uBlock Origin, AdGuard): Click the extension icon in your toolbar while viewing the sign-in page, then click the blue power button or choose “Pause on this site” / “Disable for this domain.”
For script blockers (e.g., NoScript, uMatrix): Open the extension menu and allow scripts globally for the top-level domain, as well as any subdomains explicitly tied to identity verification or CAPTCHA providers.
Step 4: Check Built-In Browser Security Features
Modern browsers feature integrated tracking protection that operates similarly to standalone extensions. These built-in features can occasionally produce blank pages or unclickable sign-in fields.
Brave Browser: Click the Lion icon (Brave Shields) in the address bar and select “Shields Down for this site” if the page loads as blank.
Mozilla Firefox: Click the Shield icon next to the URL bar and toggle off “Enhanced Tracking Protection” for the specific domain experiencing access issues.
Apple Safari: Navigate to Settings > Privacy and verify if aggressive cross-site tracking prevention is stopping necessary sign-in popups.
Step 5: Clear Domain-Specific Cache and Stale Cookies
Script blockers often leave partial page resources saved in your local browser cache. When you update blocker settings, the browser may still attempt to load corrupted or partially cached scripts. Clearing local storage for the affected site ensures a clean slate.
Open your browser settings and navigate to Privacy or Clear Browsing Data.
Select “Cookies and Site Data” and “Cached Images and Files.”
Choose to clear data specifically for the domain you are trying to access.
Restart the browser, re-visit the site, and attempt logging in again.
Advanced Tweaks for Dedicated Script Blockers
If you rely on advanced script blockers like NoScript or uMatrix for enhanced security, completely disabling them on sensitive account pages isn’t always ideal. To keep protection high while enabling sign-ins, selectively allow the following essential web elements:
Essential JavaScript: Primary site domains must be set to “Trusted” or “Allowed” so underlying form handlers can process input fields.
Cross-Domain Authentication APIs: Watch for domain names containing terms like auth, sso, login, or identity in your script blocker control panel.
Verification Services: Allow scripts from common security verification providers (such as Google reCAPTCHA or Cloudflare Turnstile) if an anti-bot challenge is required before submitting your credentials.
Why does a login page stay completely blank when I navigate to it?
A completely blank page usually indicates that a critical JavaScript file responsible for rendering the site’s front-end user interface was blocked from loading. This is common when ad blockers or tracking protections intercept essential content delivery network (CDN) scripts.
Can password manager extensions cause unresponsive login buttons?
Yes. Password manager add-ons inject custom auto-fill scripts directly into HTML input fields. If an auto-fill script conflicts with the website’s native code or fails to trigger the page’s standard input events, clicking the submit button may do nothing. Try disabling auto-fill or manually typing your password to check if the manager is causing the issue.
Is it safe to pause my ad blocker or script blocker on sign-in pages?
Pausing your ad blocker on reputable, official login pages is generally safe. Major financial institutions, corporate platforms, and subscription services require uninterrupted script execution to securely process authentication requests. Just ensure you are on the legitimate, official website URL before pausing your security extensions.
What should I do if disabling extensions still doesn’t fix the login button?
If disabling extensions fails to resolve the issue, check if an external factor is blocking web traffic. Domain Name System (DNS) filtering tools (like Pi-hole), network firewalls, corporate VPNs, or antivirus software can block login scripts at the network layer before they even reach your browser.